Leaderboard
-

NoGi
HOF Member28Points5858Posts -

jayc
Moderators19Points6248Posts -

Forevermango
Members16Points79Posts -

s1l3nt
Members14Points116Posts
Popular Content
Showing content with the highest reputation since 07/10/12 in Articles
-
10 points
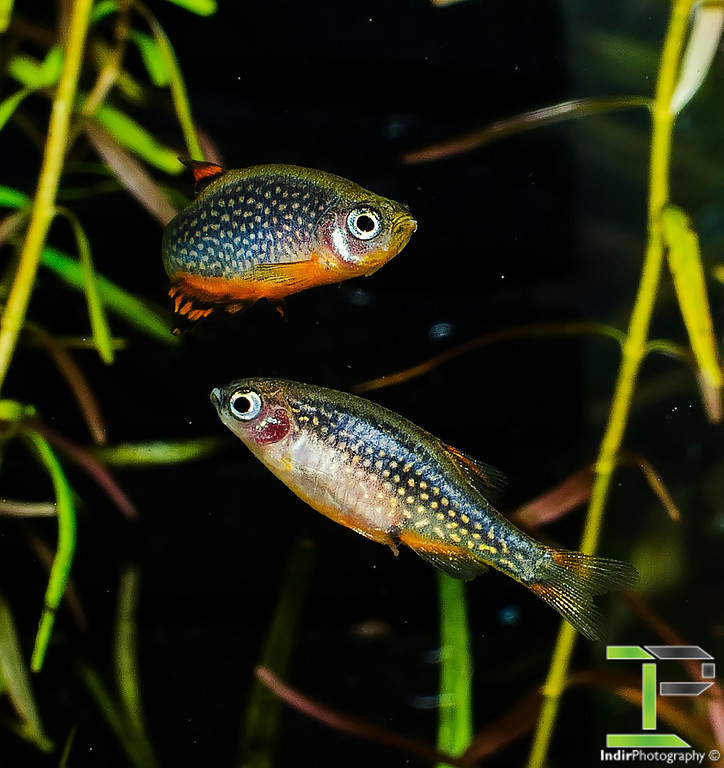 Breeding Celestial Pearl Danios (Also known as Galaxy Rasboras) Firstly I will start by saying that these are a fantastic little fish that show no aggression to any other species nor within their own species. Males will spar with each other sometimes and often display to females, no damage is ever done. They are shrimp friendly, but will take down shrimplets if they get hungry. So they can be added to a mature and established shrimp community tank to ensure maximum shrimp numbers surviving also. These fish prefer a nice planted tank with a dark substrate, this helps reduce skittishness and bring out their colour even better, it also gives refuge for fry that will pop up in the display tank! Feeding Celestial Pearl Danios will need to be fed small foods, due to their small mouth size. Though they are always excited to see live black worms (2-3 of these will make them VERY fat). Mine love grindal worms so they get this often, as well as baby brine shrimp and cyclops regularly. They will readily take dry foods of small size, I have had great success with Sera Vipagran Baby. To keep them in shape for breeding on a regular basis, I feed them twice a day with baby brine shrimp and a higher protein food like grindal worms, black worms, and so on. I find live high protein foods keep them in better shape and increase egg numbers. Sexing CPD Celestial Pearl Danios are fairly easy to sex, especially when they are of mature/breeding age. Females will have a much rounder body shape, when they are younger they will also have a taller body (older/more mature males develop this also, usually 6+ months old). Females also have a prominent black spot in front of the anal fin, the difference becomes more obvious as they mature more. Males are more slender in the body but will have much better colour in the body and fins, they develop a nice blue to purple colour to the body with nice orange fins and often the under belly too (the under belly colour can also be the case in females though, so isn’t a guarantee). In the below photos you will see the younger male has a slender body and orange under belly, as well as better colour than the female. However, as you can see in the older pair, the male has developed the deep body also and the female has a light orange hue to her under belly. The male in the second photo is a prime candidate for breeding as he is quite nicely coloured and has developed good body/fin shape and colour. Young Pair – Male on the bottom right and female on top left: Older/More Mature Pair – Male on top and female on bottom: Breeding Celestial Pearl Danios will start breeding from as young as 3 months old if fed well and have clean water throughout their short childhood. However, I find they are usually all mature by 4 months old. You will need at least one pair for breeding, however I have better experience breeding a trio as this gives females times to recover between breeding sessions as these fish are “constant” (usually daily) spawners. Spawning is induced by males, where they will hover over a specific area they like (moss, spawning mop, etc) and when a female is nearby they will begin to shake their bodies and flare their fins in hopes of attracting the female. They will do their dance and display, but the spawning comes when the male has his head pointed down and shakes, following the female behind closely. These fish will often spawn in a display tank and you will get fry popping up now and then in a well planted and mature tank. However, celestial pearl danios will readily eat their eggs and fry in my experience so this method will result in minimal fry numbers. There is another option which can work well if you have spare tanks, or enough room to rotate breeders. This method is basically using a bare tank with some java moss and keeping a trio in here for a 5 to 7 days, then moving them to another tank while the eggs hatch in the first tank. Then you keep repeating this process until you have enough fry or forever if you have the space… I have not tried this method myself, but have heard of others using this method with success. I personally don’t have the tank space for this method. The final method which has worked the best for me has been a dedicated breeding tank. In this tank all I have is a sponge filter and an acrylic yarn spawning mop (make sure it is 100% acrylic otherwise it will eventually rot in the tank). I keep a trio of my best fish in here, one male and two females. The male I use is the “older” pair from the photos above for his colour and body shape, as well as two nicely coloured and sized females. I call this the “permanent breeding factory”, because I am able to get on average 20 eggs per day with this method. To collect the eggs in the factory, I use a turkey baster purchased on eBay. I stop the sponge filter and after about 5 minutes or so when everything has settled down I slowly lift the spawning mop up and shake the mop, to make this easy I tied a long piece of yarn which comes out of the tank onto the lid for easy lifting without having to drop my arm into the tank. I then use a light on the front half of the tank, placing the light from the side helps in seeing the eggs easier as does a dark base (my tanks have black bottom panels). Using the turkey baster I suck the eggs up and collect them in a plastic cup for later use. With the eggs in the cup I then fill the cup most of the way and use an air stone on a very low bubble rate to keep circulation over the eggs to prevent fungus. Another option is to put the eggs in a fine meshed breeder box or poke some tiny holes into the cup and float it in the tank to keep fresh water circulating over the eggs. Eggs take about 3-4 days to hatch on average, and the fry will now be wrigglers which cannot really swim yet and are not ready to be fed. This wriggler stage will take about 3-5 days before they are free swimming. They will often be holding onto the side of the cup, or laying on the base. This is nothing to worry about. Once fry are free swimming they will be quite small and very thin in body thickness. You will need very small foods to have the best success, such as paramecium, spirulina powder, fry powder foods like sera micron and so on. I find that I get a MUCH better survival and growth rate when the fry are fed live foods so I only use paramecium for feeding them. The fry will need about 10-15 days before they can readily eat baby brine shrimp, I don’t bother with foods larger than paramecium until this stage mainly because micro worms and similar are a pain to keep going and requite too much maintenance. Once the fry are on baby brine shrimp, they will grow much quicker. Around the 5-6 week mark, I start introducing sera vipagran baby or similar small sized foods. I however prefer to give them live foods more than dry foods as I find the fry grow much quicker and are healthier and develop colour earlier. Fry will grow fairly quickly and at the 6 week mark will be around the 15mm mark and should be showing some slight purple/blue to the body and their golden spots should be readily visible. From this point on the fry will slow down their growth as they reach their adult size but colour will come in much quicker. By the 12 week mark the fish should be very close to looking like full grown adults, with the deep orange colour developing quickly after this point. Fish should also be reasonably easy to sex from this point on as the body shape has already developed and the colours are coming through quickly. Now I hope you enjoy the photos of the fry below, which should help you gauge age and so on of your fry! As a comparison, the first two photos are of fish the same age but the first shot is of a fry fed solely dry foods like spirulina powder and similar from hatch while the second photo is a fry fed on live foods from hatching. Young fry (most likely female) at 12 weeks old – Fed solely on dry foods from hatching. Young Female Fry at 12 weeks old – Fed on live foods, with dry food at the later stage in life Most likely a nice young female, but could be a male. Young pair of CPD, approximately 7-8 weeks old. Young female, approximately 7-8 weeks old Thank you for reading along and I hope you find the information useful, or at least enjoyed the article!10 points
 -
10 points
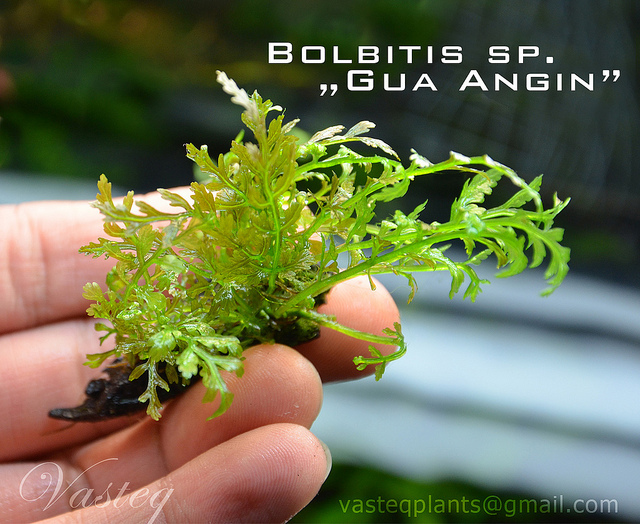 With lots of variety of mosses and ferns out there, here is a compile of Photos from the great Tomasz Wastowski of his current collection. Bolbitis sp. "Gau Angin" Microsorum "Small Leaf" Microsorum "Thunder Leaf" Microsorum "Short Narrow Leaf" Loxogramma sp. Wave Moss Mosses... Bolbitis sp. "Gua Angin", Bolbitis heteroclita "Cuspidata" & Buce. Brownie Jade Loxogramme sp. Amblystegiaceae Manaus "Queen Moss" Homalia sp "Rosa" Hymenophyllaceae sp. "Wayanad" Pteridophyta sp. "Xkiat" Microsorum sp "Trident" Plagiochcila sp. Cameroon Microsorum sp. Mini Windelov Fissidens Grandifrons var. Planiccaulis Microsorum sp. Fork Leaf Bolbitius Heteroclita Difformis Fissidens Adianthoides Fissidens Dubius & Fissidens from Poland Fissidens Dubius Fissidens from Poland Fissidens Geminiflorus "Nagasaki" Fissidens sp. "Himehouogoke" F. Nobilis, F. Zippelianus, F. Adianth, F. Dubius, F. Dubius 2, F. Poland Fissidens Nobilis10 points
 -
 10 points
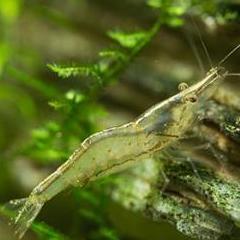
 So you went to the Local Fish Store and were seduced by a lovely Cherry Shrimp. The shop assistant said sure you can keep them with your fish - WRONG The shop assistant said just throw them in the water after a 4 or 5 minute float and adding a bit of tank water to the bag- WRONG Okay Cherries or Neocaridina Davidi are very easy to look after and can tolerate a wide range of water conditions and are infact very forgiving of our first attempts at shrimp keeping but lets try and do it simply but properly. First there are very few fish that you can keep with shrimp- some people have luck with various fish but generally if it fits in their mouth fish will eat it with very few exceptions except maybe the Otto. So step you need a shrimp specific tank planted preferably with moss. If you are going to only keep Cherries then any inert gravel will do. You need a very good water conditioner to treat the Chlorine and heavy metals so something like Prime When you get your shrimp home you will need to take your time acclimatizing them to your water conditions so it is preferable that you drip acclimatize the shrimp over an hour or 2 or if you are unable to drip them then pop 10-20ml of tank water into the bag every 5 minutes or so to get the water equal in the tank and bag. Release your shrimp and watch them explore –prepare to be mesmerized and want more. So it can be that simple and if you have a male and female they may and probably will breed but let's face it we really want to become proper shrimp keepers don't we? We want to learn all this new lingo like TDS, GH, KH etc. What foods to feed, what water parameters etc etc etc. Luckily the forum has all the answers and if you can't find the info just ask there are a lot of friendly people here willing to share their knowledge with you. This is a very simplified care sheet with much more involved information available but it can get you started. Water parameters for a Cherry Shrimp A fully cycled tank is paramount pH 6.4 - 7.6 Ammonia 0 Nitrites 0 Nitrates under 20 but preferably under 5 KH 0 - 10 GH 4 - 14 TDS 80 - 200 Temp 18 - 24 So a good water test kit is a very necessary item. A TDS pen (total dissolved solids) is important. Simple care needs Shrimp need stability in their water parameters, sudden changes are not good for them especially later if you change over to the harder to keep species. Weekly water changes of between 5 - 20% depending on the population density of your tank are necessary with the new water nicely aged and as near to the tank conditions as possible. Good quality and variety of food comes next. A mixture of commercially prepared and fresh fruit and veg (blanched spinach, broccoli, kale, fresh bananas, rock melon ) plus dried or blanched leaves like mulberry leaves, IAL (Indian Almond leaves) but all fed sparingly as shrimp graze on the bio film in your tank and don't need a lot of supplementation plus feeding large amounts can lead to planaria and ammonia spikes. It's a good idea to take out any left over food after a few hours except the IAL that can stay in the tank until just veins are left. There are several good threads about food and nutrition, Water parameters and also a glossary for those pesky abbreviations so look them up. Good luck with your new found hobby and don't be afraid to ask questions, it's the only way to learn!10 points
 -
8 points
 TDS and why is it important Preamble: Total Dissolved Solids or TDS for short is an area of water parameter we talk about very often, and is usually one of the first things we ask about when checking water parameters. This article will hopefully go into some depth for anyone who might still be new to the hobby, and likewise, might teach the veterans a thing or two that they might not have known about TDS. I have tried to keep the language appropriate to newcomers in mind, so please don’t expect a paper that reads like a scientific thesis. This article is also written from the perspective of a fish and a shrimp keeper, as I am, and draws from my experiences in these areas. You will see frequent mention of killis, Apistos, and shrimps. For the sake of simplicity, we will regard Electrical Conductivity (EC) to be of similar importance and similar definition to TDS. A definition of EC is the measure of the water's ability to "carry" an electrical current and indirectly, a measure of dissolved solids or ions in the water. Whereas a definition of “Total Dissolved Solids (TDS) is the total amount of mobile charged ions, including minerals, salts or metals dissolved in a given volume of water, expressed in units of mg per unit volume of water (mg/L), also referred to as parts per million (ppm). TDS is directly related to the purity of water and the quality of water purification systems and affects everything that consumes, lives in, or uses water, whether organic or inorganic, whether for better or for worse.” – (source: HM Digital) From the perspective of an aquarist, TDS can be defined as: a count of all the dissolved inorganic solids in the water. TDS gives an overview of mineral content in the water. It does not just necessarily provide information on hardness even though it does include the measurement of minerals like calcium and magnesium. Instead, TDS also includes measurements of all the other dissolved minerals in the body of water. So you cannot use TDS to give you an indicator of hardness, that is, how much calcium carbonate is dissolved in the water. GH is at its heart a measure of divalent cations, namely Ca (calcium) and Mg (magnesium); and we know KH is a measure of carbonate concentration. Both GH and KH can influence hardness and TDS levels – ‘an aquarium high in GH & KH can have a high TDS’. However, a fish tank could have a high TDS reading but still have low GH and KH readings. In this situation the aquarium water might be high in one or more of the other dissolved minerals apart from Calcium and Magnesium. Therefore, TDS is a better reflection of the total mineral content than hardness measurements. In conclusion, Total Dissolved Solids consists of dissolved ionic elements, both cations and anions. Whereas, GH only measures two elements, Calcium and Magnesium. Let’s see what those other minerals, that a TDS meter/pen measures, might be. In chemical terms, if a neutral atom loses one or more electrons, it has a net positive charge and is known as a cation (source: Wikipedia). Cations are elements that can be found mainly on the left side of the periodic table (metals) and when it reacts, they usually become positive ions. Cations include ions such as calcium, magnesium, potassium, sodium, barium, iron, copper and zinc. If an atom gains electrons, it has a net negative charge and is known as an anion (source: Wikipedia). Anion elements can be found on the right side of the periodic table which reacts with metals to take electrons to form negative ions called anions. Anions include elements such as chloride, nitrate, iodine, bromide, fluoride, sulphide, chlorate, permanganate, phosphate and sulphate. Because of their electric charges, cations and anions attract each other and readily form ionic compounds, such as salts. All these ions and other inorganic ions are what is included in the measurement of TDS. Occasionally you will also hear of the term Total Suspended Solids (TSS). Therefore Total Suspended Solids refers to solids both suspended and dissolved in water and is directly related to conductance and turbidity (optical determination of water clarity – how cloudy/clear the water is). Dissolved solids (invisible) are therefore the substances that can flow through the filter media, too small to be trapped. And the substances in TSS include undissolved solids (visible), like bits of plant matter, or detritus and therefore includes substances that can be trapped by the filter media. High levels of TSS also have the following impacts: increased levels of TSS obstruct light and therefore reduce photosynthetic absorption in plants. High TSS can gradually decrease the amount of oxygen produced by these plants. Decaying plant matter uses up a lot more oxygen and subsequently reduces the amount of dissolved oxygen available in the water. Unless there is a significant amount of surface agitation (oxygenation). It’s always a good idea to have your filters, be it air driven or canister, break the surface of the water. It will reduce protein scum off the surface and maximise the oxygen exchange. While TSS is not specifically measured in a TDS meter, it’s good to know the difference between TDS and TSS, as well as its influence in the aquarium environment. Measuring Total Dissolved Solids TDS is the measuring of the amount of salts in a solution. For a lot of applications the amount of salt is indicative of the levels of other stuff in a solution. TDS/PPM meters sold for gardening and aquariums figure the amount of salt in Parts Per Million by measuring the Electrical Conductivity of the solution under test. So a PPM/TDS meter is an EC meter that converts the EC value into PPM values. EC is a measure of Electrical Conductivity from two probes 1cm apart. 1 EC is = 1 microsiemens, to convert from EC to siemens multiply by 1E-6. EC can be converted to PPM by multiplying by 500. PPM can be converted to EC by dividing by 500. To convert from siemens to Ohms is s=1/ohms, you can also go the other way and do ohm=1/s for siemens to ohms. Siemens is also known as Mhos, which comes from ohm written backward. The number 500 used to convert between PPM and EC is called the Conversion Factor. Different salts will have different conversion factors because some conduct better or worse than others. NaCl's is 500, this seems to be the most common standard used, and is what was used for the calibration solutions. Though there is a close relationship between TDS and Electrical Conductivity, they are not the same thing. Total Dissolved Solids (TDS) and Electrical Conductivity (EC) are two separate parameters. TDS, in layman's terms, is the combined total of solids dissolved in water. EC is the ability of something to conduct electricity (in this case, water's ability to conduct electricity). The measurement of dissolved solids is expressed in ppm of NaCl (sodium chloride) – TDS can be compared to Electrical Conductivity (EC) and the approximate conversion formula to get TDS(ppm) = 0.64 x EC mS/cm Conductivity measures electrolytes. Aquarists can now measure TDS levels via tests performed using a TDS meter (or TDS pen) in ppm at a relatively cheap price. Alternatively, you could use an EC pen and convert to TDS using the manufacturer’s conversion factor. Picture of a TDS meter or TDS pen TDS meters are usually calibrated using a solution of Sodium chloride NaCl. While Electrical Conductivity meters (EC) are usually calibrated with a solution of Potassium Chloride KCl. How do TDS pens work? Two electrodes with an applied AC voltage are placed in the solution. This creates a current dependent upon the conductive nature of the solution. The meter reads this current and displays in either conductivity (EC) or ppm (TDS). Electronic TDS meters essentially measures the conductivity of water, ie. how well the water conducts electricity. The higher the concentration of ions, results in the higher the conductivity of the water, and thus the higher the TDS level will be. And most of our softwater shrimp and fish don’t like high TDS. Many brands have meters that use a conversion ratio to change EC (conductivity in microsiemens) into TDS (ppm) along with a temperature compensation. It really does not matter too much, which one you choose to use, since they use the standard conversion for tap water of 0.5. For example, an EC measurement of 300 mS is converted to a TDS measurement of 150 ppm (TDS = EC x 0.5). In fact, most (if not all) TDS pens are actually EC meters that convert to TDS automatically saving the user from performing the mathematical step. There are TDS meters that perform a combination of functions (TDS/EC/pH/temp) which allow conversions to be adjusted between 0.47 and 0.85. There is one weakness with TDS measurements however, it does not measure which ions are responsible for the conductivity. So if you are testing tap water you don’t know if it’s the “good” ions like Calcium, Magnesium, Potassium or the undesirable ions like Iron, Copper, Nitrates, or any other number of dissolved solids that makes up the abundance of the reading. That is why many experienced aquarist will recommend using RO water and remineralising it so you know exactly what is in the water. A few general observations on TDS When water reaches a TDS count of 50ppm it becomes electrically conducting, that is, it’s able to conduct electricity at this level. The EPA Secondary Regulations advise a maximum contamination level (MCL) of 500mg/litre (500 parts per million (ppm)) for TDS. Numerous water supplies exceed this level. When TDS levels exceed 1000mg/L it is generally considered unfit for human consumption. A high level of TDS is an indicator of potential concerns, and warrants further investigation. Most often, high levels of TDS are caused by the presence of potassium, chlorides and sodium. These ions have little or no short-term effects, but toxic ions (lead arsenic, cadmium, nitrate and others) may also be dissolved in the water. Higher levels can be a likely cause for corrosion in plumbing. The visual quality of water is also impacted at levels higher than this. A general observation of high TDS water is that it is slightly alkaline in pH, that is it is lacking in hydrogen molecules. As with everything in nature that tries to reach equilibrium, high TDS or alkaline water will want to seek out hydrogen molecules to reach a neutral state. As such, slightly alkaline water often causes dehydration at a cellular level. Low TDS water on the other hand is loaded with positively charged hydrogen molecules and is therefore slightly acidic in pH. Low TDS water is therefore very hydrating at a cellular level. TDS and Low pH fish When we discuss soft water fish or shrimp that like low pH, what that generally means is that these fish are really low TDS fish. While it is not impossible for many of these low TDS fish to adapt to harder water, and higher pH (and often relatively higher TDS levels), the problem is, especially for South American soft water fish and Caridina shrimp, that calcium and magnesium rich water makes the egg’s membrane harder, and dramatically reduces the chances of hatching. And in more recent experiences, I’ve had greater success hatching killi fish eggs in lower TDS levels than at higher TDS levels. I have also observed that high TDS levels (due to high levels of chlorides, calcium and magnesium, fluoride, sulphides as found in tap water) is generally the cause. This is where it can be a common mistake for many people, including myself, to try all sorts of methods to lower pH and hardness but give no attention to TDS values. This is where Reverse Osmosis water can help with this predicament. I now use RO water to successfully lower calcium and magnesium levels, as well as TDS. This in turn has an impact on reducing pH as well as KH and GH. The fish seemed to be much more contented using this method of preparing clean, low TDS water. And as a reward, the fish promptly rewarded its keeper with eggs which hatched into fry (apistos, rams, other South American dwarfs and Killies). If you want to also match the tank water with the shrimp’s or fish's natural habitat parameters, keep the TDS levels low. What is low? Soft water is generally considered to be in the range of TDS 70 – 150ppm. My personal observations have shown me that high levels of dissolved mineral content in the water, are the main reasons for the failed breeding of many Killis, Shrimp (Caridina) and South American dwarf cichlids. This is attributed to inappropriate levels of calcium and magnesium, and subsequently carbonates and bicarbonates. Placing the emphasis solely on pH alone does not rectify the issue since it can be said that pH is a symptom of the overall mineral content in the water, rather than the actual root cause. To make matters worse, pH down chemicals only adds to the TDS count, not decrease it. When breeding low pH fish, keep your emphasis on TDS instead of just pH. Some aquarists can often find themselves in a situation with tap water parameters that are no where near their shrimp’s or fish's preferred water conditions. My tap water in Sydney for example, is pH 7.8+, and GH & KH are also somewhat high for breeding caridina shrimp, Killi, or Apisto dwarf cichlids, which means we need to find a way of reducing it. We need to really stop thinking about just the permanent hardness of pH, KH and GH, or even temporary hardness for that matter. Concentrate on reducing calcium and magnesium hardness instead. Mixing the tap water with just plain RO at a ratio of 50:50 can be the simple solution to solving the problem of TDS, pH and Hardness. We want to keep calcium and magnesium hardness in check since this can affect the fertilisation of the egg, as the egg’s membrane can get too hard to a point of making fertilisation extremely hard (pun) and nearly impossible. Sometimes I will mix RO water with peat treated water along with tap water to make water whose parameters closely approximates the needs of the Killi or South American dwarf cichlids. Tap water can be included in order to stabilise KH levels and thus keep the pH from fluctuating. Occasionally, I will add my own remineralising DIY mix to RO water to bring TDS up to a certain specific level on the occasions that adding tap water was undesirable, especially for my shrimp tanks. TDS readings for my Caridina shrimp are around 140-150, with a lower KH value of 0-1 and GH of around 5-7 have been proving to be successful for me. Neocaridina dwarf shrimps are capable of tolerating slightly higher TDS levels of up to 200. They might survive higher, but it would be unethical of me to advise you that it’s okay beyond 200. TDS readings for Killi and South American cichlids of between 70 and 110ppm with a stable KH reading between 3 and 7. New soft water low pH fish and shrimp don’t merely survive in this treated water, but instead will thrive and multiply. You will find quite frequently that you will need to mix your water changes to a much lower TDS value that your target in order to maintain the tank’s overall TDS. This is normal, as the dissolved solids in the tank is continually increasing from various sources, like fish/shrimp waste, minerals introduced in food, water evaporation, or even decomposition of plants and organic matter. You might even get to a point where you need to change 80%+ of your tank water just to reset the TDS values. Don’t forget to re-acclimatise the shrimp back into this new water. TDS: Water Changes Many professional fish breeders practice the following method of TDS monitoring; it is one important parameter used to keep healthy fish. You could also use TDS levels as a means of deciding on the frequency of when it is time for a water change. A rise in TDS levels means it is time for some water to be changed, returning TDS levels to a lower count. Sharply increasing TDS levels can also indicate overfeeding, an over-stocked tank, or too much added minerals or fertilisers. But I would use caution in relying solely on TDS readings for water change indications. This is best reserved for those that are very familiar with their tank and understands what the TDS reading is showing. “pH Shock” - Moving fish from one tank to another For many years as a fish keeper, and now also as a shrimp keeper, I have understood changing the pH on fish or shrimp too quickly is a bad thing. It was only until I was researching the importance of TDS, a revelation has come to mind. TDS levels can represent different states of osmosis. Many aquarist have largely believed fish that succumb to what we call 'pH shock' is caused by the rapid variation in TDS levels. This places osmotic pressure stresses on the fish's osmoregulatory mechanisms which cannot become accustomed fast enough to the changing environment and hence the fish goes into a state of suffocation and in many cases can cause death. Fish have been shown to withstand fairly significant pH shifts when the TDS was low in both waters. It was not 'pH shock' as it is often alleged– that is, where the difference in pH is significant between one tank to another. But it was TDS shock! Maybe it’s because TDS meters are not as readily available, whereas, pH kits can be found in every fish shop. So the misguided recommendation was to test for pH, rather than TDS – who knows. One could declare that TDS measurements help to give an indication of the differences in osmotic levels between the water of one tank and another. In water with less total dissolved minerals compared to the amount of dissolved minerals in the tissue of the shrimp/fish, will cause the shrimp/fish to lose fluid from its cells via its gills (over hydration). In high TDS water, it has the opposite effect, they become dehydrated. Which causes the fish to have difficulty passing toxins out via its kidneys. This is a longer term impact to the fish, and you might not notice any impact immediately. IMHO, TDS meters are often the most under estimated tool that can be used to give a good indication of how successfully a shrimp or fish will adapt to the water in one tank to another. As a second reference, reading one of J. J. Scheel’s articles on dissolved solids also brought me to this realisation of ‘TDS shock’. Between 1959 and 1965 Col. Jorgen J. Scheel of Denmark sent out some letters about the science and systematics of killifish to any hobbyist that was interested. Scheel had what might be considered today some unorthodox opinions regarding water chemistry. He felt differences in salinity, or total dissolves solids mattered much more than pH (which could be safely ignored). Given this observation was made over many decades of working with killifish, it's a pervasive argument. Here are the relevant passages from Rivulins [killifish] of The Old World: Page 25 Page 26 TDS can also significantly impact the osmoregulation of the gills. Low TDS can cause the red blood cells to be depleted of water in fish that might not be acclimatised to the low TDS. While in high TDS, the red blood cells in the gills can be saturated with water causing the red blood cells to expand. Both will cause respiratory problems. As a result, always drip acclimatise new shrimp or fish to your tank prior to introducing them. Use your TDS meter/pen to match TDS values in your tank and the water of the new shrimp/fish. It usually takes doubling the amount of water from the tank to match the TDS in the bag of the new fish/shrimp. More caution needs to be placed on reducing TDS levels, compared to increasing TDS levels, as the former seems to be more lethal. Methods of lowering TDS There are several methods of lowering TDS, however, we will focus on only two methods as the other methods are unsustainable in the long term. These sources of low TDS water will need to be remineralised with Calcium & Magnesium mix in a ratio of 4:1. Remineralising raises the low TDS water back to a more suitable amount specific to the requirements of your fish or shrimp. Do not use low TDS water except to top up water loss due to evaporation. RO (Reverse Osmosis) Water Reverse osmosis works by forcing water under great pressure against a semi-permeable membrane that allows water molecules to pass through while excluding most contaminants. RO is the most thorough method of large-scale water purification available. There are a huge number and variety of RO systems around. Studies have revealed how the concept of osmotic pressure can assist in decontaminating water. With a fine particulate membrane and the act of forcing water through that membrane with sufficient pressure, will produce clean water on the other side of the membrane. The clean water is stored and the filtered waste is either thrown away or used for other non consumption uses like watering plants. RO systems can removed up to 98% of all ionic and organic impurities like pollutants, sediment, bacteria and contaminants. And as a result, TDS levels are drastically reduced. The RO filter membranes do not last forever unfortunately. As the TDS of the output water rises, it is generally an indication that the membranes need to be changed. The frequency of use and the level of TDS of your source (tap) water will determine the frequency of replacing the membrane. Deionisation (DI) In large scale DI systems water is passed between a positive electrode and a negative electrode. Ion selective membranes allow the positive ions to separate from the water toward the negative electrode and the negative ions toward the positive electrode. High purity de-ionized water results. Deionization is an on-demand process supplying purified water when needed. This is important because water at this extreme purity level degrades quickly. The nuclear grade deionization resin or polishing mixed bed resin removes almost all the inorganic contaminants in the water increasing the resistivity of the water to a maximum of 18.2 megohm-cm. However, deionization alone does not remove all types of contaminants like dissolved organic chemicals. Deionization filters are not physical filters with a pore size and cannot remove bacteria or particulates. The water is usually passed through a reverse osmosis unit first to further remove non-ionic organic contaminants. RO vs DI: RO purity is relatively continuous while DI gets progressively worse as the resin nears its regeneration point. DI chemicals are expensive and therefore operating costs are higher than RO per litre of purified water. RO membranes are a physical barrier that remove bacteria, viruses, algae and suspended solids, while DI systems cannot remove these contaminants. DI uses two hazardous chemicals, hydrochloric acid (HCl) and caustic soda (NaOH) for regeneration of the resin beds. These chemicals needs special storage and disposal requirements. As you can see, DI water is also uneconomical for aquatic hobbyists. More portable DI systems nowadays use Ion exchange resins to exchange non desirable cations & anions; and replaces them with hydrogen and hydroxyl, respectively, forming pure water (H20), which is not an ion. One type of resin will remove positive IONS, while another type of resin will remove negative IONS. Cations Anions Removed by Cation Resins Removed by Anion Resins Calcium (Ca++) Chlorides (Cl-) Magnesium (Mg++) Sulfates (SO4=) Iron (Fe+++) Nitrates (NO3=) Manganese (Mn++) Carbonates (CO3=) Sodium (Na+) Silica (SiO2-) Hydrogen (H+) Hydroxyl (OH-) (Table care of Puretecwater) You might come across the term "Mixed bed" or "Dual Bed" system - this is a DI filter with both Cation and Anion resins. RO/DI portable systems Modern portable RO/DI systems solve both the individuall RO and DI shortcomings. These systems combine an RO membrane with DI resins to produce near 0 TDS water. The RO removes the organic waste like bacteria, viruses and algae that the DI cannot. While the DI removes the minerals like Calcium, Magnesium, Chlorides, Sulfates, etc that the RO membrane misses. By combining the two, we get the best of both worlds. Most Reverse Osmosis filters you can buy today, like those sold by FSA, https://www.filtersystemsaustralia.com.au/store/index.php/reverse-osmosis-water-filter/aquarium-systems.html are in fact RO/DI systems. Rain water What can be better than water from mother nature? After all, our river systems are made up of water that falls as rain. So this has to be the best source of water, is it not? In most cases it is. However, many of us live in polluted cities, and we collect and store rain water in manmade receptacles that might add to the contamination of rain water. So some form of caution is necessary. If you are confident that the water is collected off relatively clean, rust free roofs and stored in plastic drums, then rain water is a perfect free source of low TDS water. Rain can be sporadic and unpredictable in some countries, so an RO system as a backup is always a good idea. There are other methods of lowering TDS, as mentioned in the next section, but I will not focus on them as it’s not really a preference. I mention it here only as a last resort. Peat All over the internet and on forums, many can attest to using peat in helping to lower pH, GH, KH, and TDS. This greatly depends on your own water conditions and how much the peat treated water affects TDS. If your tap water is particularly hard, you might need more peat to lower the mentioned parameters compared with someone else’s tap water. It is not uncommon to mix the peat with RO water (and/or maybe some tapwater) in an attempt for one to achieve a stable chemistry that agrees with the shrimp/fish you are keeping. The addition of tannins, phenols, humic acids along with the combination of peat treated water allows you to create water conditions close to your livestock’s natural environment. Peat water (even small additions) is positively regarded by many aquarists, as essential for low TDS fish, especially dwarfs such as Discus, Tetras, Corys, Angels, Rams and Apistos. The problem with recommending peat is finding it in Australia is difficult. Especially peat that does not also have fertilisers included. Then there is the extra effort in making peat water, and the need to make it several days ahead of use and store it in containers. The colour that results from the added tannins from peat is also not to everyone’s liking. Distillation Distillation involves boiling the water to produce water vapour. The water vapour then rises to a cooled surface where it can condense back into a liquid and be collected. Because the dissolved solids are not normally vaporized, they remain in the boiling solution. However, some impurities with the same boiling point of that of water can be transferred to the collection water, and for this reason, Reverse Osmosis can produce purer water. The absolute advantage of the distilled water is the complete absence of harmful substances like bacteria, viruses or algae. Considerable amount of cost is required to produce and maintain the thermal requirements for a distillation process. As a result this method is uneconomical for aquatic hobbyists. A quick word on Water softeners Water softeners do not necessarily produce water that is suitable for Softwater fish and shrimps. Water softeners work by removing the temporary hardness (such as carbonates) by replacing it with permanent hardness such as chlorides. This increased level of chloride is unnatural to any environment where the fish or shrimp may be found. While the water is now softer, from the fish’s or shrimp’s point of view the water is still chock full of dissolved minerals (chlorides or sodium) and TDS will still be high. The cautious approach is to avoid using water softeners altogether if you are trying to reduce the hardness of your aquarium water. Increasing TDS We have discussed reducing TDS, but how do you increase TDS the right way? Increasing TDS is one of the easiest things to do. In fact, you could do nothing to the tank and TDS will increase over time. You could add salt or sugar to the water and TDS would increase. However, that increase is due to waste from fish, food, etc. and not always a good thing. And neither is adding salt or sugar - Don't do it ! The main minerals/chemicals that you want to use to increase TDS in an Aquarium is Calcium & Magnesium at 4:1 ratio and to a smaller extent other minerals like Potassium and trace elements. There are several off the shelf products that will remineralise low TDS water, increasing it to a suitable level. If you'd like to Do It Yourself, I even have a recipe here ... Summary One of the most vital aspects of keeping soft water shrimp or fish is the significance of TDS - Total Dissolved Solids. The majority of aquarists will put their attention on the pH only for soft water fish or shrimp but completely forget about TDS. A simple $20 piece of equipment will be able to rectify that. The various years of observation has lead to a realisation that low pH actually means low TDS be it for fish or shrimp. Both water parameter readings need to go hand in hand. We cannot ignore one or the other when you are trying to replicate the aquarium’s environment. The effects of shock can be offset by slowing mixing the water. And this can be important between your own tanks too, as TDS is unique to each tank. A TDS meter is an absolutely essential tool in an aquarist’s cabinet. For the shrimp keeper, monitoring TDS is of vital importance. In an environment where the shrimp are constantly using up Calcium to grow their shells, and dissolved solids are constantly changing due to food, nitrogenous waste being produced, and even evaporation of water can cause fluctuations in the level of dissolved solids in the tank water. This constant fluctuation can cause stress in the shrimp. This stress can lead to a reduction in their immune systems, and sometimes eventuate in death. Close monitoring of TDS is required to ensure the shrimps environment is stable. TDS should never fluctuate wildly. Aim for a constant TDS reading in the tank. In doing so, you might find that you will need a lower TDS reading for water changes in order to maintain a target. For example, if your target is 150ppm TDS, then you might need to aim for 110ppm TDS in your change water. Aiming for 150ppm TDS in the change water will result in TDS rising overtime as dissolved solids gets concentrated in the tank. Over time, TDS continually and constantly rises each day. They enter the aquarium via fish food, water conditioners, plant fertilizers, medications, and any substance that treats water in some way. Water evaporation will also cause the dissolved solids already in the tank to be more concentrated. TDS readings can also be used as an indication of when it is time for a water change. If you see TDS rising to the upper limits of your target TDS, then it’s time for a 5-10% water change. If the small 5-10% water change is still not enough to reduce TDS to your ideal target, another water change might be necessary two or three days later. Don’t rush in reducing TDS. Slow is always advisable. TDS readings also come in handy when acclimatising shrimp and fish. We all know how to drip acclimatise shrimps or fish. This process reduces the impact of large fluctuations in differing water parameters. I often hear of people saying “I drip acclimatised my shrimp/fish for 3 hours” or “6 hours”. But how do you know that 3 hours or 6 hours or even 12 hours was enough for that matter? Instead, rather than acclimatising new shrimp or fish by amount of time, we should be monitoring the TDS. Once the TDS reaches the same reading between the tank and the water the new shrimps/fish came in, then you can be sure that GH, KH and pH will all be matching as well. This can take a varying amount of time depending on how fast you add the tank water and how much water is already in the bag containing the new shrimp/fish. Once TDS is matching, then place the bag or container into the tank for a few more minutes to ensure temperature is the same before catching and releasing your new pets into the tank. It can take 6 hours or it can take 16. It doesn’t matter, but I have never lost a fish or shrimp using this TDS monitoring method of acclimatising. JayC SKF Aquatics http://skfaquatics.com/8 points
 -
6 points
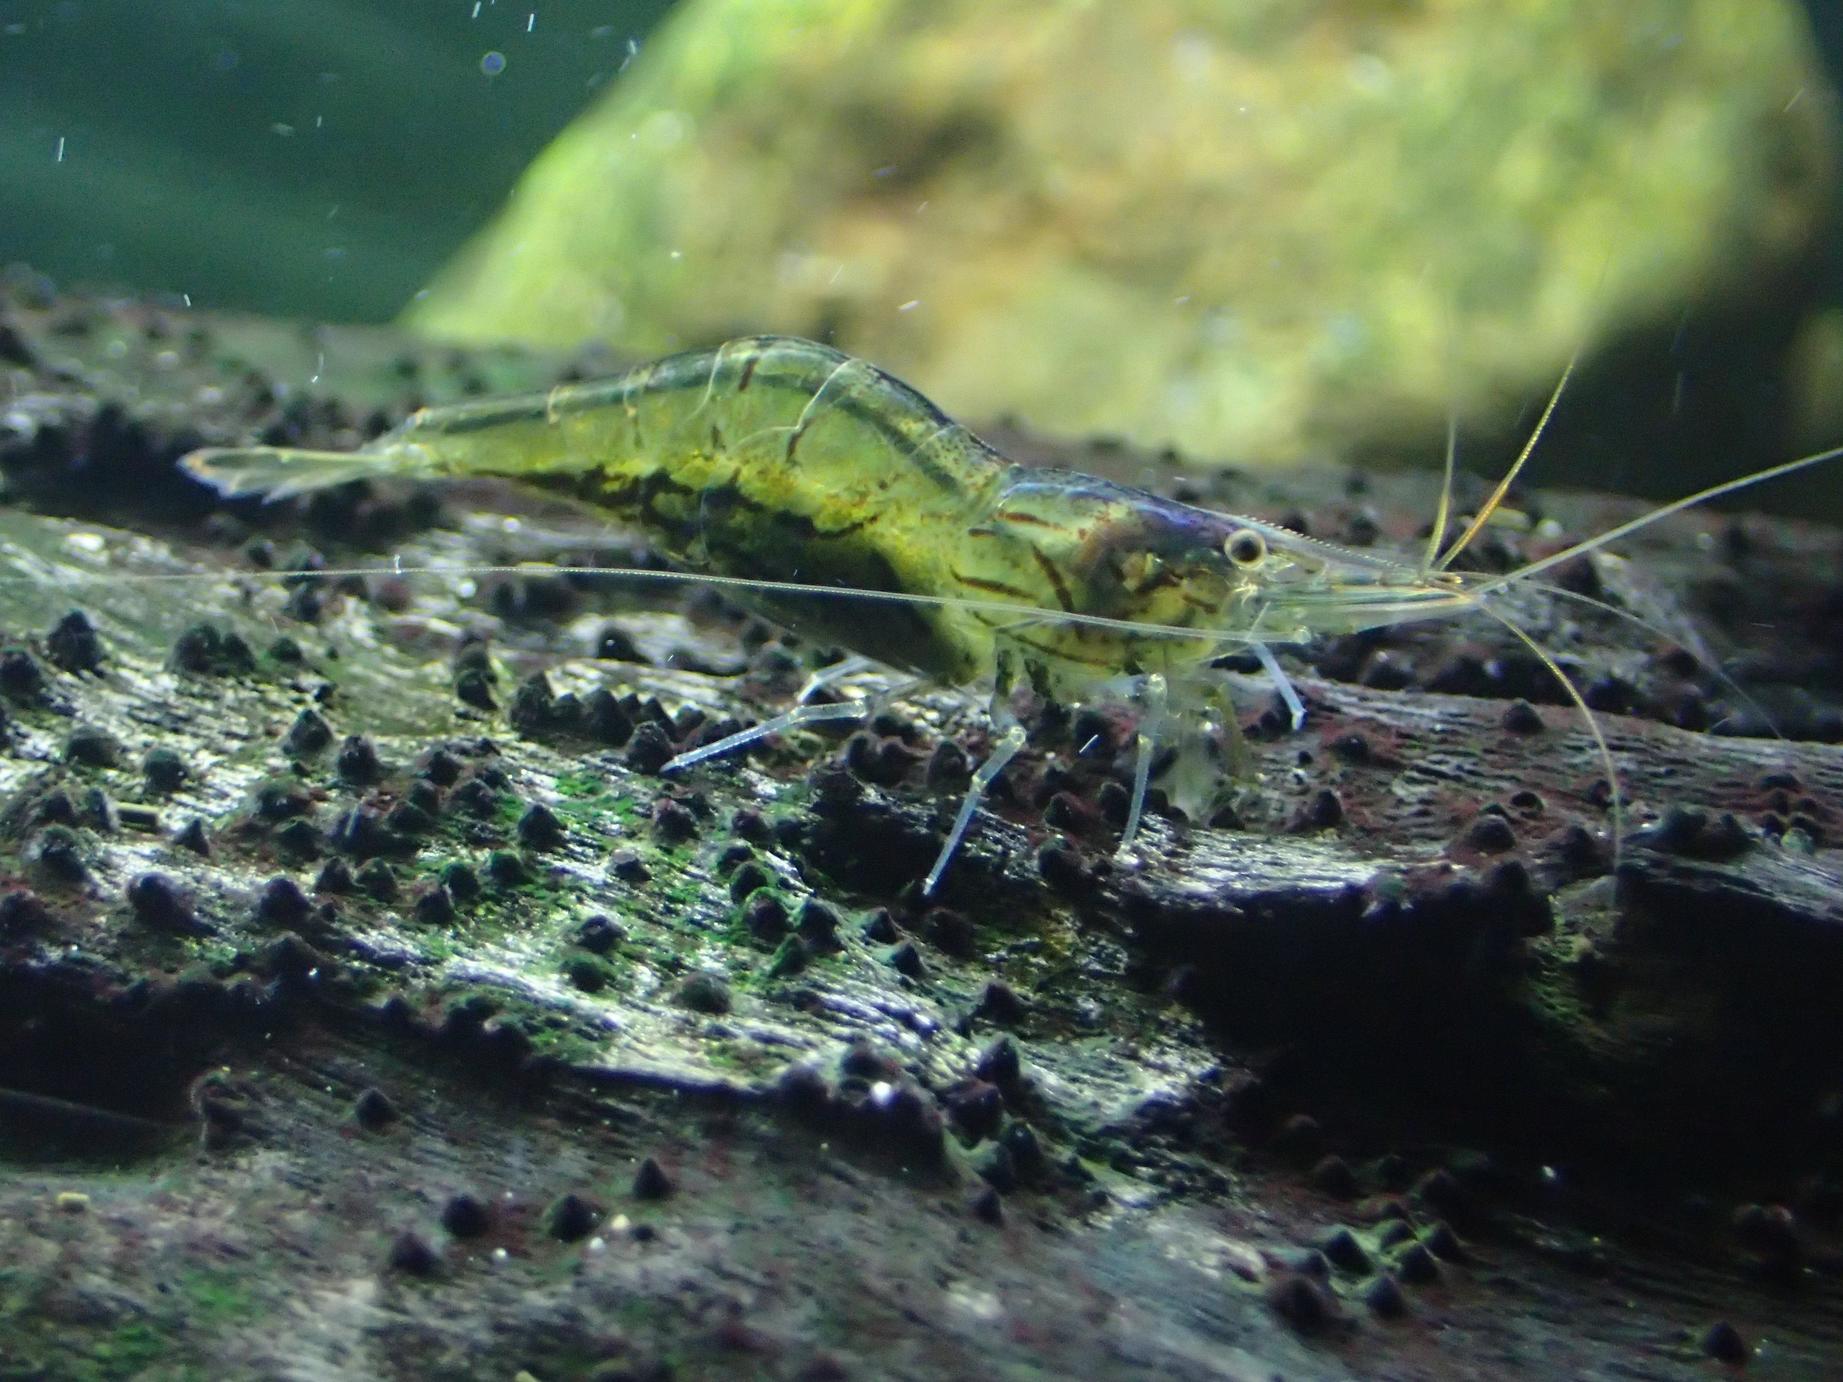 Authors: Bob Kroll, Dr. Benjamin Mos All the following information comes from personal observations, captive keeping and breeding. Longirostris are wide spread and the most abundant Caridina species in FNQ, found from at least south of Tully to Cooktown, and no doubt beyond. They are confined to coastal streams. I have found them up to 300m altitude in some creeks. To get to this height they have had to climb 50m high water falls. Habitat and Water Conditions Longirostris occur in both large rivers and small streams. In large systems, they require shelter from predators (particularly fish). Dense Vallisneria beds are their preferred habitat and they are in large numbers in these areas. In small streams at higher elevations, there is no plant cover and they tend to be in places where there is low numbers on fish predators. For this reason they are the dominant species in these areas. They can also be found in small and large leaf litter beds. From personal observations in these locations, they can occur in high densities (50 per 25cm2). The rocks and creek bed are clean of detritus and algae when they are at these densities, probably caused by the shrimp’s constant feeding actions. Longirostris are fairly forgiving so long as the water is clean and free from ammonia, nitrite and nitrate, and high amounts of phosphates (this applies to all aquatic animals to some degree). In the wild, they live in water that is always clear with a minimum visibility of 1 metre up to 5 metres. Hardness ranges from 0 KH and GH to 8 and 10 degrees of dH depending upon season and the creek where they occur. They have been kept at higher KH and GH and prospered under these conditions. pH is the least important parameter as the pH in their habitat changes from wet to dry season; lower in the dry season because of the leaf litter, higher in the wet because of increased water flow. Ranges from pH 6.6 to 7.4 are appropriate in aquariums. Temperature ranges from 16°C at altitude to 28°C lower down. Temperatures are highly variable year round. In some streams that run from the highest mountains, it is warmer in winter because of lower flow at this time. Similarly, water can be 24°C during winter because of ground water inflow into the creeks. After summer rain, temperatures can be 16-18°C. These tests have been conducted for two years in Harvey creek. Harvey creek flows from the second highest mountain in Queensland. The mountain is covered in rainforest. The following ratings denote ease of aquarium care from, 1 = easy to 10 = hard Availability 5 Keeping 1 Longevity 1 Breeding 6 Compatibility 1 Water parameters 2 Food Longirostris is a good algae eater and will eat anything it is offered. Vegetables are eaten readily, as are raw fish and prawn. All commercial fish and shrimp foods are taken with ease. Breeding Longirostris can be sexed by size differences. All big specimens are female (up to 4cm) whilst males are under 2.5cm. I don't know yet if the males remain small or change sex, that experiment is to come. A mature female can carry hundreds of eggs. The eggs are 0.4mm, the same sized egg as C. typus, but Longirostris are easier to breed than Typus. Aquarium breeding is achievable if they are kept on their own. As the shrimplets are small and free-swimming, they are open to attack from everything. The first food offered to shrimplets should be hard-boiled egg yolk, liquid fry food or spirulina in small amounts so as not to pollute the tank. The egg yolk can be offered through a piece of stocking, or in a small amount of water mashed up with a bar-mix/blender. I also use the bar-mix on the spirulina in a small amount of water. Both the egg yolk and spirulina mixes must be stored in the fridge to keep them fresh, and shaken before use. I use an eye dropper to feed because you have greater control over how much you feed. I also only keep each one for three days before making a new batch. As the shrimplets are so small, you can only raise a small number at a time. However this will lead to easier shrimp to breed as each generation may result in bigger shrimplets (essentially a selective breeding program where the shrimp cull themselves). Most hard to breed aquatic species get easier to breed through captive breeding, because the fry best suited to captivity survive and pass on these genes to the next generation. General Notes The term 'Glass shrimp' will be given to these as well as most common Australian shrimp. I feel it is too broad a term to give our native shrimp. When caught, most species will drop their colour making it difficult to get an accurate ID. However, some species can be quite spectacular when they are kept in the right conditions. For general ID, Longirostris has an easily distinguishable red vertical stripped pattern. For scientific purposes, the rostrum or nose of nearly all shrimp is how they are primarily identified, although there are many other ID protocols as well. The Longirostris has a long rostrum, not to be confused with the red nose (Gracilyrostris) which has a longer rostrum. One would think that Longirostris would have the biggest rostrum, but this is not so. Gracilyrostris has a more graceful nose but a bigger nose. Both these species are similar to two species collected near Darwin, Northern Territory, but are genetically different and breed slightly differently.6 points
 -
 5 points
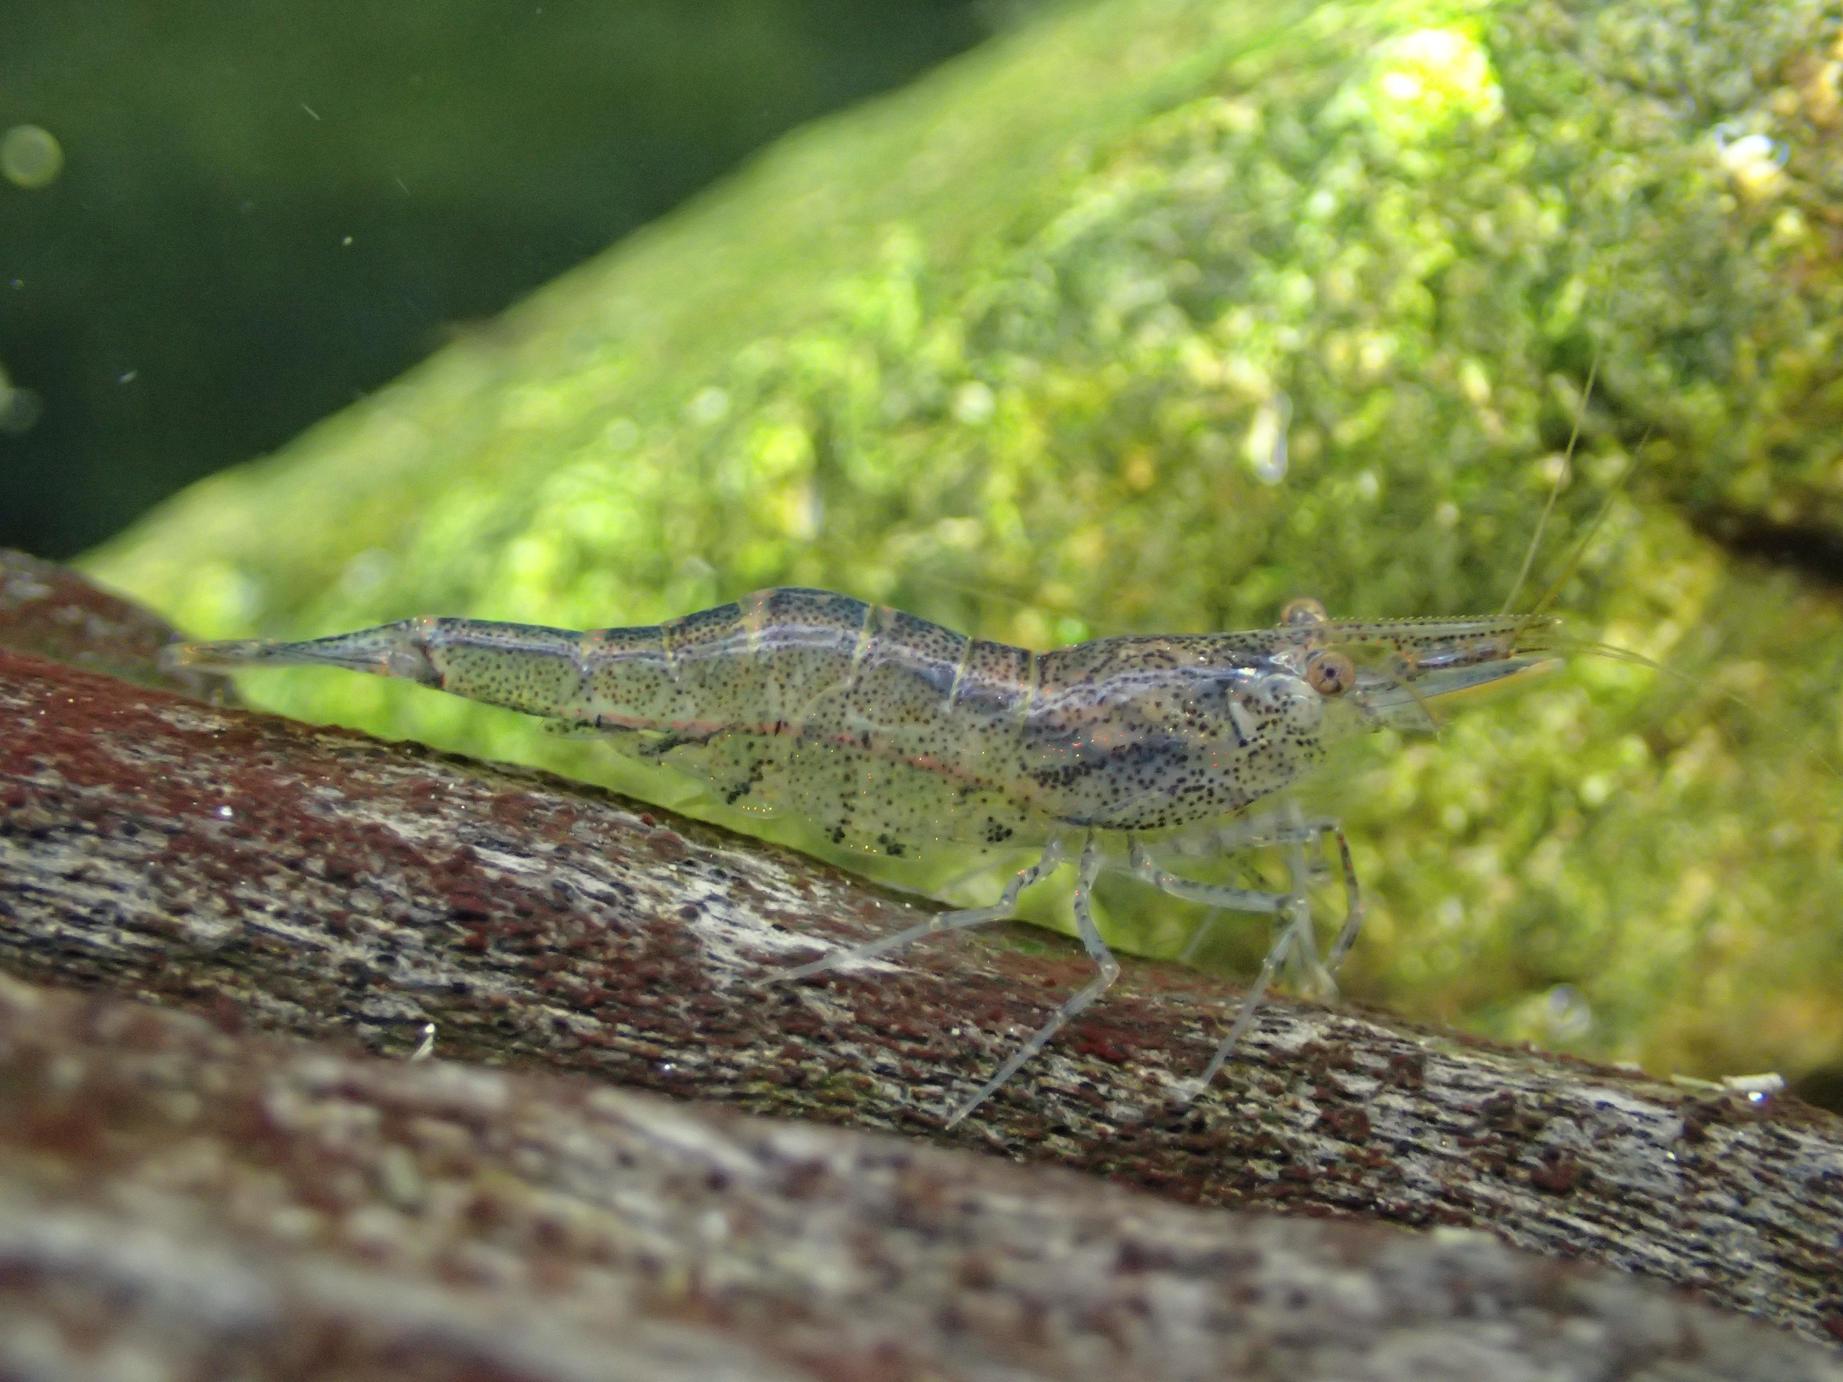 Glass Shrimp: Paratya from Australia By: Dr. Benjamin Mos Paratya are probably one of the most under-rated shrimp in Australia.The common names 'glass shrimp', 'ghost shrimp' and 'clear shrimp' don't do this group of shrimp justice. Nor does their widespread use as live food. This species complex (a group of closely related species that are currently described as a single species) is very suited to life in aquaria, tough, are good algae eaters, wide spread and easily collected, and yet breeding them will provide a challenge for the most hardcore of shrimp keepers. Why are Paratya so awesome? In a word, potential. Paratya have a huge amount of potential for breeding new variations, as algae eaters in aquascapes, as tough shrimp for beginners, as a brackish water specialist for biotopes, and much more. Paratya come in a variety of colours (blue, green, clear, black, orange and even full red individuals) and patterns (dorsal stripes, 'tiger-stripe' patterns, speckles and blotches). There is very little known about whether their colouration can be controlled by diet, stress or other environmental factors, or whether line breeding could result in fixed colour variants, so there is great potential for breeders to work on fixing colours/patterns. Current status of the taxonomy of Australian Paratya The genus Paratya in Australia has an interesting taxonomic history. Paratya australiensis was first described by Kemp in 1917. In 1953, Riek proposed several new species and sub-species of Paratya. However in 1979, Williams and Smith reviewed the genus and declared all the Paratya from the east coast of Australia were a single species, P. australiensis. Recent phylogenetic analysis (comparisons of the DNA from individuals from different locations) suggests P. australiensis is probably a group of closely related species - a species complex (Baker et al., 2004; Cook et al., 2006; 2007; Hughes et al., 2003; Hurwood et al., 2003). Currently, Australian taxonomists are working to unravel the Australian Paratya species complex. It appears the 'species' we call P. australiensis will likely be broken up into between 9 and 11 new species. This work may also shed light on the relationships among Australian Paratya and Paratya found elsewhere in the Indo-Pacific. The fact that Paratya from Australia are a species complex has important implications for hobbyists in terms of breeding, hybridization and collecting, and these issues will be examined in detail later in this article. Where are Paratya found? Species from the genus Paratya are not limited to Australia. They are found through-out the western Pacific, with "a disjunct northern range in the North Pacific (Japan, Korea, Ryukyu Islands, Siberia) and South Pacific (Australia, New Zealand, New Caledonia, Lord Howe, Norfolk Island)" (Page et al. 2005). The Paratya species from New Caledonia (see Choy & Marquet, 2002) are very attractively coloured and appear in the hobby (see link below). Whilst this article focuses on the Paratya from Australia, the information on captive husbandry and breeding should be useful for species collected and kept elsewhere. In Australia, Paratya are found all along the east coast of Australia, from the Atherton Tablelands near Cairns in the north to the east coast of Tasmania. They are also found further inland, through the Murray-Darling system. Approximate distribution of Paratya species in Australia In these areas, Paratya are found in creeks, rivers and estuaries, but also frequently in static water, such as dams. Juveniles and adults from south-eastern Australia are very tolerant of brackish water up to a salinity of around nearly full seawater (33ppt, Walsh and Mitchell, 1995). However, juveniles and adults also live quite happily (and breed) in freshwater 10's or 100's of kilometres from the nearest ocean (e.g. Hancock, 1998). This leaves almost infinite scope for using Paratya in biotope aquariums, from brackish tanks with sand, nerites and plants all the way through to freshwater tanks with leaf litter and rocks, but no plants. Some freshwater habitat pictures from the Mid North Coast of New South Wales Paratya do not appear in the western half of Australia, and 'glass shrimp' caught on the west coast near Perth are likely to be a entirely different shrimp, Palaemonetes australis, although there have been reports of an introduction of Caridina indistincta from eastern Australia into several rivers near Perth (see link below). This is a good reminder why it is important never to release any aquarium organism, including shrimp, into the wild. http://www.fish.wa.gov.au/Documents/biosecurity/freshwater_pest_fact_sheet_indistinct_river_shrimp.pdf Also see paper by Harris et al. 2017 http://projectpenguin.com/timcv/Harrisetal2017BiolInv.pdf How do I know if I have Paratya? I've realised whilst researching for this article that identification of Australian 'glass shrimp' is no where near as straight forward as what I had initially thought. Paratya can be easily confused with other native shrimp kept in aquaria, and it doesn't help that they have been mistakenly called 'cherry shrimp' in the past. Two types of shrimp that are really easy to confuse with Paratya are juvenile Macrobrachium spp. and Caridina, particularly species from a group of shrimp currently known as Caridina indistincta. Caridina and Macrobrachium species are found alongside Paratya in the same habitats. In NSW Australia, you will often catch all three types at once! How to tell Paratya apart from Macrobrachium? Many of the pictures on the internet which are labelled Paratya are actually Macrobrachium spp., including adults which are at least three times larger than any reported size for Paratya. The mistake is easy to spot if you know what to look for. To rule out if your shrimp is a juvenile macro, here is what to look for. If it has 'arms', its a Macro! Paratya have 10 legs roughly the same length Macrobrachium spp. have 8 legs roughly the same length and 2 legs much longer (in technical terms, the second pair of pereiopods are very enlarged). In juvenile Macrobrachium, the longer legs are clear rather than black, but are still obviously longer. How to tell Paratya apart from Caridina? NOTE: If you have collected your shrimp from Victoria or South Australia, they are almost certainly one of the Paratya species and not a Caridina. The number of species of Caridina shrimp generally decrease from northern to southern Australia, and have not been found south of around the Shoalhaven River in New South Wales. If do you find a Caridina south of this region, please contact me as I'd be very interested to see it! Once you've seen Paratya alongside many of the shrimp from the genus Caridina, they are fairly easy to tell apart given differences in their body shape and size, size of the rostrum, egg size, and sometimes coloration and patterning on the body. For example, one of the closest shrimp in looks to Paratya is Caridina longirostris, but their small Australian distribution in northern Queensland means they aren't likely to be collected by most people and they aren't widespread in the hobby. Note that there is also a species of Caridina (undescribed) from the Northern Territory that looks almost identical to Caridina longirostris - the Darwin Algae Eater (DAE) or Caridina sp. NT nilotica. This species is more widespread in the hobby because it is farmed in the NT and made available to the bobby via a well known supplier. Caridina longirostris - Note the large body size, very small green eggs, long rostrum and red striations. Together these characteristics can help differentiate this species from Paratya without the need to examine specimens under the microscope. If you want to be doubly sure about what shrimp you have, then use the method below for distinguishing Paratya apart from any Caridina. According to the taxonomic key by Choy and Horwitz (1995), there are two characteristics that distinguish 'P. australiensis' from all Australian Caridina shrimp; the presence of supra-orbital spines and the presence of exopods on all the pereiopods. Now you are thinking 'what the hell does that mean?' and 'where the hell can I find those things on the shrimp?' 1. Supraorbital basically means 'behind the eyes'. So supraorbital spines are spines that are found behind the eyes. Paratya are the only small freshwater Australian shrimp that have these spines (Choy and Horwitz, 1995; Williams and Smith, 1979), so if your shrimp have these, well done you have a solid ID. All species of Caridina, including indistincta, do not have supraorbital spines. Here is what the supraorbital spines look like. Top view 2. Like all shrimp, Paratya have five pairs of legs (10 in total), plus some maxillipeds (arms) around the mouth to assist when feeding. The legs are called pereiopods and are used for walking around and picking up food, ect. Exopods are basically little 'legs' that are attached to the pereiopods (or the main legs). Paratya have an exopod on every pereiopod (Williams and Smith, 1979). In C. indistincta and other Caridina, exopods are absent or, in rare cases, found only on the first pair of pereiopods. In the picture below, red is the exopods, blue is the pereiopods. Yellow is the third pair of maxillipeds (there are two pairs closer to the mouth that cant be seen here). You'll also notice that the front two pairs of pereiopods have chelae ('fingers' or 'pincers'). These are used during feeding to grab food. In fact, Paratya have been recorded using these to filter-feed like the Australian riffle shrimp, Australatya striolata (Gemmell, 1978). And just to further confirm that the pictures are of a Paratya sp.. Here is the rostrum (nose). There are 9-36 spines on the dorsal (top) side of the rostrum and 0-11 on the ventral (bottom) side of the rostrum for 'P. australiensis'. The one in the pic has 30 dorsal and 11 ventral (yes, I counted them!). The number of spines is so variable because the number of spines increases as they grow (Williams and Smith,1979). C. indinstincta has only up to 8 spines on the ventral side of the rostrum (Riek, 1953). And heres some pictures of the tail just because the colours look awesome.Notice there are both red and blue coloured spots. Note also that the presence/absence of spines on and around the tail can be used to differentiate between different shrimp, particularly shrimp in the genus Caridina. One thing you will have no doubt noticed is that both the supraorbital spines and the exopods are pretty small. The above pics were of a 35mm female, which is pretty much as big as 'P. australiensis' get (William and Smith, 1979), under a dissecting microscope (approx. 10 - 20 times zoom), and these features are still small. I could only just see the supraorbital spines with the naked eye in the right light at the right angle, and the exopods appeared only as a blur of movement above the legs. The point is that you will need some source of magnification to view these features. Unfortunately not many people have access to a laboratory spec dissecting microscope, but luckily you don't need to! A lot of the point and shoot cameras available today have built in macro modes. Simply take a picture of your shrimp using the macro mode and zoom in on the photo if you need to. I often use my point-and-shoot camera in the field for getting quick IDs of shrimp, instead of using a portable dissecting microscope. Here is one such photo - test yourself, is this a Paratya? (Answer at the end). How to keep Paratya in aquaria? So now you know you have Paratya. Now how should you go about keeping them? The answer is easily. Paratya are hardy aquarium inhabitants, and tolerate a wide variety of pH, TDS and GH/KH, and some even tolerate high salinity - perfect for those with brackish set-ups. I've successfully kept Paratya in a variety of tanks including planted aquascapes with soft, acidic water conditions to a tank with small African cichlids with hard, high pH water conditions. In my experience, Paratya are peaceful and can be housed alongside pretty much any shrimp. Likewise they are happy alongside fish that are too small to consume them. Like most freshwater shrimp, Paratya live to around two years of age (Hancock and Bunn, 1997; Williams, 1977; Williams and Smith, 1979). In general, the below water parameters should keep your Paratya happy and healthy. Temperature: optimal 20-26*C, but will tolerate extremes 8-30*C in the wild. Salinity: 0 - 33 ppt (nearly full seawater). Note Paratya is not found in brackish water in Queensland, but is found from 0- 33 ppt salinity in estuaries in Victoria (Kefford et al., 2004; Walsh and Mitchell, 1995). pH: optimal at around 7.0 but handles 6.0 - 8.2. TDS: not important as long as extremes are avoided GH/KH: not important as long as extremes are avoided Ammonia: 0 Nitrite: 0 Nitrate: Optimally as low as possible Feeding Paratya is relatively straight forward as well. They will eat anything that any other shrimp eats, and additionally are good algae eaters. In the wild they have been recorded feeding on biofilms** (Burns and Walker, 2000; Moulton et al., 2012), particularly those that form on leaves (Schulze and Walker, 1997) and on aquatic freshwater plants, like Myriophyllum salsugineum (Piola et al., 2008). In fact, they have been kept alive and bred in the laboratory by being fed on pieces of Elodea that were covered by algae dominated biofilms (Hancock, 1998). Interestingly, these are one of the few shrimp to eat cyanobacteria (Burns and Walker, 2000; Piola et al., 2008), more commonly known as the dreaded Blue Green Algae (BGA), but I'm unaware of any instances where these have been used successfully to treat BGA in aquariums. My opinion is that they would likely go for other easy-to-access foods prior to eating BGA, but they may be useful in preventing BGA out-breaks. **Note: An informative thread on biofilms (what they are and how they form) can be found here: How to breed Paratya? Now comes the tricky part of keeping these shrimp. In the wild, breeding occurs in the warmer spring and summer months, and stops over winter (Hancock and Bunn, 1997; Richardson and Cook, 2006; Richardson et al., 2004; Williams and Smith, 1979). Breeding seems to be triggered by warmer temperatures and females will not become berried at low temperatures or after a temperature drop. Some females will breed twice within a season (Hancock and Bunn, 1997). It is certainly possible that breeding could occur in aquaria year round. There is one important tip I can offer for shrimp keepers thinking of breeding these guys that could mean the difference between success and failure. In fact, this may apply to most, if not all, Australian native shrimp. If you can, obtain 'headwater' shrimp to breed from. What I mean by this is, try to collect your adults from areas that are well away from estuaries, as far inland as possible and better yet, above a natural block to upstream migration (like a waterfall). The reason for this is that shrimp collected from these areas will have a natural tendency to produce large eggs (Cook et al., 2007; Fawcett et al., 2010; Hancock, 1998; Hancock et al., 1998; Walsh, 1993). Why? Because larvae in these areas have to develop quickly before they are washed away downstream (e.g. over a waterfall). Why are large eggs important for breeding in aquariums? Because it means that: larvae from headwater adults are more likely to develop completely in freshwater larvae from headwater adults are likely to develop quickly before settling onto the substrate and feeding like adults. In contrast, low-land shrimp have longer larval stages and may need to be raised in brackish water to develop properly. This is especially true for larvae from adults found in brackish water. Headwater adults may even be a different species from lowland shrimp, and if so, will be adapted to living in pure freshwater and may even have direct-developing larvae (i.e. larvae that hatch out looking like mini adults instead of larvae that develop through a series of stages in the water column before settling onto the bottom as juveniles). Therefore larvae from 'headwater' adults will be far easier to raise than larvae from adults collected from low-land areas. More in depth analysis of the topic of egg size in lowland and headwater shrimp can be found in Cook et al. (2007), Fawcett et al., (2010), Hancock (1998), Hancock et al.(1998) and Walsh (1993) but this literature is probably too in depth for the average aquarist. Here are some examples of the difference that having headwater shrimp makes to breeding them: Hancock (1998) used the following method to culture headwater 'P. australiensis': Berried females were collected from freshwater creeks and kept at 11, 18 and 21*C. Females were fed Elodea. Eggs kept at 11*C took 60 days to hatch, whilst those at 18 -21*C took 20-25 days. Once the eggs hatched, the larvae were fed with algae scraped from the walls of an aquarium kept outside. Water changes were made every two days (no filter mentioned). All the larvae kept at 11*C died, whilst those at 18 and 21*C developed normally. Larvae took between 15 and 28 days to develop before settling onto the bottom. In contrast, Walsh 1993 used the following method to grow 'P. australiensis' collected from brackish estuaries: Adults were collected from 0.5 - 1.5 ppt salinity. Upon hatching, seawater was added to boost the salinity to 15ppt (within one hour). Larvae kept at salinity below 5ppt didn't survive. Survival was highest at 15ppt. Larvae hatched at night on approximately the 25th day from the females being berried. Larvae swam near the bottom with their tails pointing upwards Water was changed every 2-3 days Larvae were fed with newly hatched Artemia (Baby Brine Shrimp or BBS). Larval development took 28-45 days, by which time the larvae reach 4-5mm The larvae then settled onto the bottom and began feeding like adults. Other authors (e.g. Hancock and Bunn, 1997) fed larvae using FPOM (Fine Particulate Organic Matter) which is organic matter less than 1mm in diameter. This ranges from microalgae and diatoms to decomposing plants, leaves and wood. With this in mind, powdered algae, like Spirulina, or finely ground shrimp food may make the perfect larval food. There are also multiple online reports of successful breeding of P. australiensis in aquariums. However there is little variation in the methods used from those I have summarised above and often less detail, so I won't repeat them here. One final thing with regards to breeding. It is very likely that many of the Paratya 'species' can interbreed. In fact a scientific paper recently published in the journal 'Journal of Heredity' by Wilson et al. (2016) describes such an event occurring in the wild due to an introduction of one Paratya type into a stream where they did not naturally occur. This highlights the need for aquarists to be responsible with the shrimp they keep. Do not release any shrimp into the wild, even if you collected the shrimp from the same location previously. I encourage everyone to try keeping and breeding these shrimp. They really deserve to be more highly considered than only as a live food. Best of luck with your shrimp endeavors. References: Baker, A. M., Hughes, J. M., Dean, J. C., & Bunn, S. E. (2004). Mitochondrial DNA reveals phylogenetic structuring and cryptic diversity in Australian freshwater macroinvertebrate assemblages. Marine and Freshwater Research, 55(6), 629-640. Burns, A., & Walker, K. F. (2000). Biofilms as food for decapods (Atyidae, Palaemonidae) in the River Murray, South Australia. Hydrobiologia, 437(1-3), 83-90. Choy, S.C. & Marquet, G. (2002). Biodiversity and zoogeography of Atyid Shrimps (Crustacea: Decapoda: Natantia of New Caledonia. Mémoires du Muséum national d'histoire naturelle 187: 207-222. Cook, B. D., Baker, A. M., Page, T. J., Grant, S. C., Fawcett, J. H., Hurwood, D. A., & Hughes, J. M. (2006). Biogeographic history of an Australian freshwater shrimp, Paratya australiensis (Atyidae): the role life history transition in phylogeographic diversification. Molecular Ecology, 15(4), 1083-1093. Cook, B. D., Bunn, S. E., & Hughes, J. M. (2007). A comparative analysis of population structuring and genetic diversity in sympatric lineages of freshwater shrimp (Atyidae: Paratya): concerted or independent responses to hydrographic factors?. Freshwater Biology, 52(11), 2156-2171. Fawcett, J. H., Hurwood, D. A., & Hughes, J. M. (2010). Consequences of a translocation between two divergent lineages of the Paratya australiensis (Decapoda: Atyidae) complex: reproductive success and relative fitness. Journal of the North American Benthological Society, 29(3), 1170-1180. Gemmell, P., 1978. Feeding habits and structure of the gut of the Australian freshwater prawn Paratya australiensis Kemp (Crustacea: Caridea, Atyidae). Proc. linn. Soc. N.S.W. 103: 209–216. Hancock, M. A. (1998). The relationship between egg size and embryonic and larval development in the freshwater shrimp Paratya australiensis Kemp (Decapoda: Atyidae). Freshwater Biology, 39(4), 715-723. Hancock, M. A., & Bunn, S. E. (1997). Population dynamics and life history of Paratya australiensis Kemp, 1917 (Decapoda: Atyidae) in upland rainforest streams, south-eastern Queensland, Australia. Marine and Freshwater Research, 48(4), 361-369. Hancock, M. A., Hughes, J. M., & Bunn, S. E. (1998). Influence of genetic and environmental factors on egg and clutch sizes among populations of Paratya australiensis Kemp (Decapoda: Atyidae) in upland rainforest streams, south-east Queensland. Oecologia, 115(4), 483-491. Harris, A., Page, T. J., Fotedar, S., Duffy, R., & Snow, M. Molecular identification of the precise geographic origins of an invasive shrimp species in a globally significant Australian biodiversity hotspot. Biological Invasions, 1-6. Hughes, J., Goudkamp, K., Hurwood, D., Hancock, M., & Bunn, S. (2003). Translocation causes extinction of a local population of the freshwater shrimp Paratya australiensis. Conservation Biology, 17(4), 1007-1012. Hurwood, D. A., Hughes, J. M., Bunn, S. E., & Cleary, C. (2003). Population structure in the freshwater shrimp (Paratya australiensis) inferred from allozymes and mitochondrial DNA. Heredity, 90(1), 64-70. Kefford, B. J., Dalton, A., Palmer, C. G., & Nugegoda, D. (2004). The salinity tolerance of eggs and hatchlings of selected aquatic macroinvertebrates in south-east Australia and South Africa. Hydrobiologia, 517(1-3), 179-192. Moulton, T. P., Souza, M. L., Brito, E. F., Braga, M. R. A., & Bunn, S. E. (2012). Strong interactions of Paratya australiensis (Decapoda: Atyidae) on periphyton in an Australian subtropical stream. Marine and Freshwater Research, 63(9), 834-844. Page, T., Baker, A., Cook, B., & Hughes, J. (2005). Historical Transoceanic Dispersal of a Freshwater Shrimp: The Colonization of the South Pacific by the Genus Paratya (Atyidae). Journal of Biogeography, 32(4), 581-593. Retrieved from http://www.jstor.org/stable/3566210 Piola, R. F., Suthers, I. M., & Rissik, D. (2008). Carbon and nitrogen stable isotope analysis indicates freshwater shrimp Paratya australiensis Kemp, 1917 (Atyidae) assimilate cyanobacterial accumulations. Hydrobiologia, 608(1), 121-132. Richardson, A. J., & Cook, R. A. (2006). Habitat use by caridean shrimps in lowland rivers. Marine and freshwater research, 57(7), 695-701. Richardson, A. J., Growns, J. E., & Cook, R. A. (2004). Distribution and life history of caridean shrimps in regulated lowland rivers in southern Australia. Marine and Freshwater Research, 55(3), 295-308. Riek, E. F. (1953). The Australian freshwater prawns of the family Atyidae. Records of the Australian museum, 23(3), 111-121. Schulze, D. J., & Walker, K. F. (1997). Riparian eucalypts and willows and their significance for aquatic invertebrates in the River Murray, South Australia. Regulated Rivers: Research & Management, 13(6), 557-577. Walsh, C. J. (1993). Larval development of Paratya australiensis Kemp, 1917 (Decapoda: Caridea: Atyidae), reared in the laboratory, with comparisons of fecundity and egg and larval size between estuarine and riverine environments. Journal of Crustacean Biology, 456-480. Walsh, C. J., & Mitchell, B. D. (1995). The Freshwater shrimp Paratya australiensis (Kemp, 1917)(Decapoda: Atyidae) in estuaries of south-western Victoria, Australia. Marine and Freshwater Research, 46(6), 959-965. Williams, W. D. (1977). Some aspects of the ecology of Paratya australiensis (Crustacea: Decapoda: Atyidae). Marine and Freshwater Research, 28(4), 403-415. Williams, W. D., & Smith, M. J. (1979). A taxonomic revision of Australian species of Paratya (Crustacea: Atyidae). Marine and Freshwater Research, 30(6), 815-832. Wilson, J. D., Schmidt, D. J., & Hughes, J. M. (2016). Movement of a Hybrid Zone Between Lineages of the Australian Glass Shrimp (Paratya australiensis). Journal of Heredity, 107(5), 413-422. Further Reading: Bool, J. D., Witcomb, K., Kydd, E., & Brown, C. (2011). Learned recognition and avoidance of invasive mosquitofish by the shrimp, Paratya australiensis. Marine and Freshwater Research, 62(10), 1230-1236. Page, T. J., von Rintelen, K., & Hughes, J. M. (2007). Phylogenetic and biogeographic relationships of subterranean and surface genera of Australian Atyidae (Crustacea: Decapoda: Caridea) inferred with mitochondrial DNA. Invertebrate Systematics, 21(2), 137-145. Smith, M. J., & Williams, W. D. (1980). Infraspecific variations within the Atyidae: a study of morphological variation within a population of Paratya australiensis (Crustacea: Decapoda). Marine and Freshwater Research, 31(3), 397-407. Answer to 'Is this a Paratya'? - No. This specimen does not have supra-orbital spines, and is in fact a species of Caridina, most likely in the nilotica complex.5 points
 -

 A Generally accepted method of spot dosing with H2O2 (Hydrogen Peroxide) We will work with a 30cm cube to make all calculations easier (30L of water) and be using 3% solution of H2O2 Remember you are playing with a chemical that oxidizes when it comes in contact with organic matter, so always use as little as possible as overdoses can damage your invertebrates (shrimp) or nitrifying bacteria causing your tank to cycle again. MAXIMUM dosage in a 30L body of water is 15ml in a 48 hour period, this will increase total peroxide levels by 15 mg/l, generally this is deemed safe, but always best to work well and truly under this level. Things you will need: Half hour of time Hydrogen Peroxide (3% solution) - easily purchased from your local super market or pharmacy 1x 10ml syringe, these are available relatively cheaply from your pharmacy Prepare your tools: Draw up 5ml of your H2O2 If this is the first time you're doing this, before you start the actual dosing process add 2.5ml of tank water as this will give you slightly more ammo to play with without increasing your overall dose. Prepare your tank: Turn off all filters and pumps. This is so you don't have a current in the body of water (should only take 30seconds to settle). also if your dosing near your intake best to avoid getting H2O2 in the filters as it will go bananas on all the good bacteria you have in there. Plan your attack: Take a step back look at what your treating and figure out if you have more than one place to dose or if its just localized less time your filters are off the better. Not an Ideal situation to be fiddling around for an hour with your filtration off Attack: Dose sparingly directly above the site you wish to treat, within a second or two you will see it bubbling away. try to avoid sensitive mosses and such if in doubt patch test first. An example of what the effect is: Finish up: Wait a couple of minutes and turn everything back on. It is generally suggested to do a water change (one third) if you wish to re-dose within 48hrs, but as we are only playing with a third of the maximum dosage you can repeat this the next day if you feel it necessary, or if you have more algae than this dosage allows you to treat..... Good Luck and if in doubt ask questions on the forum, there is plenty of experienced shrimp keepers that are willing to help out!!!!4 points
 -

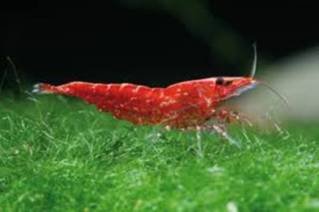 Scientific name: Neocaridina davidi Origin: Taiwan Max size: 2.5 cm Lifespan: 1-2 years PH: 6.5 - 8.0 Temperature: 18 - 28°C, Recommended 23°C Description Cherry Shrimps are peaceful shrimp which are easy to care for if they have clean and stable water conditions. They are good tank cleaners and will eat algae off your tanks which make them very useful! Cherry Shrimps should be kept alone or with small fishes that are non-predatorial as big fishes would eat them, For Example Neons. They also should not be kept with other variants of cherry shrimp or else they will interbreed, and their offsprings will not be of good quality. However, they can live with other species of shrimp, like the Crystal Red Shrimp, as they are of different species, and there will not breed together. Food and Diet Cherry Shrimps will need a balanced diet containing of protein and minerals. They should be fed vegetables, either raw or blanched in boiling water for a few seconds, high-protein and calcium foods, and special shrimp foods which are designed for shrimps. They will also eat algae as a source of food. Cherry shrimps, like all other shrimps should not be fed foods which contain high in copper, as copper can kill shrimps. Hikari Shrimp Cuisine: Shrimps eating banana: Sexing Sexing of the cherry shrimp may not be determined until they are nearly old enough to breed. Females are bigger, will have a darker colour, a wider abdomen and will grow a saddle behind her head when she is ready to breed. Males are mainly smaller and less colourful and of course will not grow a saddle. Female: Male: Breeding Breeding cherry shrimp is very easy. As long as the water parameters are stable, and there are both males and females which are ready to breed in the tank. Once the female grows a saddle, the female will release hormones into the tank which will attract males. A male will eventually mate with her and she will have eggs to carry, (also known as being berried). After 3+ weeks, baby shrimp, also known as shrimplets, will appear in the tank as tiny replicas of their parents. A sponge will be needed to cover the intake of the filter so that baby shrimp will not get sucked in, this also provides a good source of bacteria for shrimps to eat. Berried Shrimp: Sponge over filter: Dangers and Extra Notes Can be killed by copper, like any other shrimp. Juveniles may/will be killed by Pest and Parasites if not treated (A thread can be found in the SKF Library by Dean) Can be killed by overdose, such as an overdose of “no-planaria†Which is used to kill Planaria. Juveniles can be killed by the filter suction. It is important to acclimatise shrimps properly, when shrimps are moving from one tank to another You should always have some moss for your shrimps, as it provides food You should change/top up about 10-20% of the water fortnightly. Filter maintenance should be done around twice a year Shrimp love live plants, also they will look nice in your tank If keeping two species in the same tank, make sure BOTH species satisfy the conditions. Have a few places for the shrimps to hide Variants There are many colourations of the cherry shrimp which are kept in Australia. (For Pictures please refer to the SKF library Cherry Shrimp ID by Nogi) Var. Red Var. Sunkist Var. Pumpkin Var. Chocolate(Delight) Var. Black Var. Yellow Var. Blue4 points
 -
 4 points
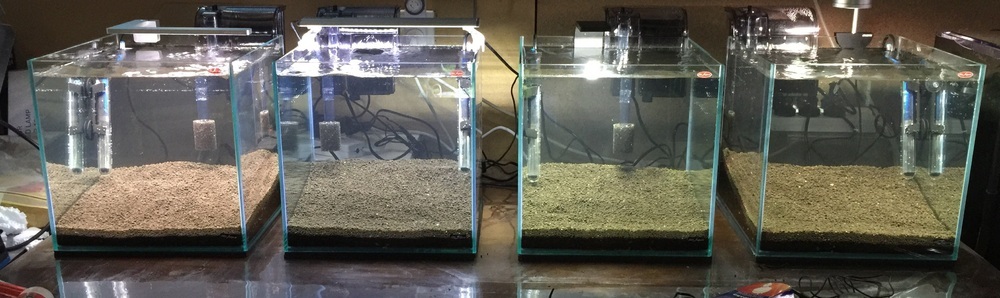 So I had the opportunity Friday to setup some new 30cm cubes, which will be used for guppies (maybe shrimp later on!) I then decided it would be great to run a side by side comparison of the lights we sell online. All tanks have same heaters, filters and substrate (shirakura red bee sand). Left to Right: Aqualighter Nano Aqualighter Pico Up Aqua Y series 18cm ATLEDTiS E6 Left to Right: Flexi Mini Aqualighter Nano Up Aqua Y series 18cm ATLEDTiS E6 Left to Right: Flexi Mini Up Aqua ProZ 30cm Up Aqua Y series 18cm Up Aqua Y seties 25cm Left to Right: Flexi Mini Up Aqua ProZ 30cm Aqualighter Nano ATLEDTiS E6 Very surprised by the blue content in the Y series lights, though these still work well wih mosses and low light plants. Really Pleased with the ATLEDTiS E6 as it probably hd the most natural colour. I knew the Flexi minis were bright, and this is the original version, but when directly compared it outshines all. The ProZ has a nice even white colour to it as expected. Not a very scientific study, but amazing to see the side by side comparison. Hope it helps with any future plans for smaller tank setups. Will definitely give me a better base for recommendations in the future. Also have planted some tissue culture plants in each tank, again same plants across all tanks, so will be fun to watch the growth rates of each. As all other factors are the same, light will be the ultimate factor to growth.4 points
 -
4 points
 Ever wondered what that sweet bread dough smell is coming from your neighbours fish room? Read on to find out the secret to that beautiful (to each their own right?) smell! Microworms are an easy to culture and maintain live food for your small/micro fish and especially for small fry. Size wise they fall somewhere between vinegar eels and baby brine shrimp (BBS) so is a good transition food prior to BBS. Nutrition wise they are a solid food source, but the fatty content may be a little on the higher side I believe so should not be a staple food permanently. Feeding a range of foods is best for the health of your fish and other aquatic friends. NOTE: Microworms sink fairly fast so be aware of this. They will also live a fairly long time in a fish tank, personally I have seen mine alive as long as 48 hours. But I would err on the side of caution and estimate a 24 hour “alive” time in a tank. Microworms can be cultured in a various mediums such as oats, bread, potato peelings, etc. Personally I use and prefer using white bread with the crusts cut off. The reason I prefer this method is because there is a much less foul smell as the culture matures, and even less of a foul smell when the culture crashes. It gives of a sour smell when it goes bad but otherwise smells yeasty similar to bread dough. Cultures can crash fairly easily in my experience and no one likes a horrible smell in their house/room/shed/etc… I haven’t used bread crusts because they are usually coated in oil or similar to give the golden colour which causes a bit of a messy culture. Now onto the fun part, finding out how it is done! What you will need: - Some form of container. I use take away containers. - Bakers yeast. I use the Tandaco branded dry yeast which comes in small satchels will last quite a while… Real reason is that my wife uses it…. :) - Bread with crusts cut off. I use any brand that is on hand, doesn’t matter. - A starter culture of micro worms. I have these available for anyone interested :) - Water. Tap water is fine, and is what I use. Though it is possible to use tank water or milk (but milk smells worse in my experience). NOTE: You should always work with at least 2 cultures in the event one decides to crash that day when your fry are ready to feed! Steps to starting your culture: - Grab your bread with the crusts off and wet it with tap water. (You don’t want it soaking wet but rather similar to battering fish. Wet on both sides but not dripping or drenched throughout.) - Line your container with at least 1 layer of bread. (I find I have the most success with one layer personally but have used multiple in the past.) - Grab your starter culture and spread it over the bread. - Sprinkle some bakers yeast over the bread and the starter culture worms. - Put your lid on with some holes in it to allow oxygen exchange. (You can use filter wool loosely in the holes to prevent bugs/flies/etc from getting into your culture. - Wait a couple of days (if you have a good sized starter culture, they are ready within 24 hours) for the worms to do their magic. - Worms will climb the walls of the container, all you need to do then is use something like a pipette or your finger or similar to collect as many worms as needed. (I use the side of a pipette and put the worms into a small feeding container and then use the pipette to feed the fry/fish with a controlled amount of worms). - Reap rewards, benefits, remind everyone of this awesome information and spread those culture because you will lose them at some point! We all do… :) Maintaining your culture: - You can prepare a slice of bread the same way as when you started a culture and drop this with a little bit of yeast ontop of your culture that is doing well. This will feed your worms further as they will eventually eat all the food you gave them in the beginning. (I find I can do this 1-2 times per culture before I have to start a fresh culture and use these worms as a large starter culture (don’t use the entire culture…)). NOTE: You can let your culture go dry and eventually wet it with tank water and drop some bread with yeast ontop and they will start a culture all over again. I believe this is because the worms lay eggs. Approximate Nutritional Values: Protein: 48% Fat: 21% Glycogen: 7% Orgainic Acids: 1% Nucleic Acids: 1% Please note - If you would like to share this article or use it outside of SKF please contact me for permission first. Thank you! NOTE: I am currently working on an aquatic hobby based website which will contain lots of information on things such as breeding fish, shrimp, live foods, nutritional values of foods, fish profiles, etc. Keep an eye out for this post but the website will be live as soon as I can possibly do so. The website is www.aquapixel.com.au4 points
 -
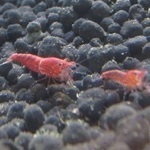 4 pointsSome of you have probably noticed. But for confirmation, I am a big fan of not paying if I don’t need to. This means I’m a big fan of DIY. I made PVC overflow and return pipes tailored to my 3ft, I made a $10 sump for it as well, I built an air powered substrate vacuum. I made my life cheap and easy for this hobby. This article came at the expense of a disaster. I bought a 6x2x2 tank. It cracked. Not to throw the towel, I took it apart, had panels cut in half, new panels made, and here is my tutorial on how to build your own fish/shrimp/planted tank. First, build a stand for the tank. Get your glass panels ready. To figure out what sizes you need, remember that the bottom supports the sides. Your bottom panel has to be the exact width and length as you planned tank. A 100x50x40 tank with 10mm thick glass needs a 100x50cm bottom panel. The front and back are the same width as the bottom, but the glass’ thickness shorter than the projected height. For the example, front and rear panels would be 100x39cm. The sides sit on the bottom, and between the front and rear panels. Subtract the thickness from the height once, and for the width twice, here the sides would be 48x39cm. If you are reusing old aquarium panels, scrape them clean with a razor blade, then wipe off any silicone residue with acetone. Let dry. Tools needed: A good razor blade or sharp utility knife, tape, either electrical, masking or both, a caulking gun, twice the silicone tubes you think you’ll need, optional are suction cup handles to move the glass around, I did this build alone, it helped for the big panels. Get your work area ready, cover the floor, table, bench you’re working on. Have moist rags and/or gloves at your disposal. Make sure your work surface is flat, clean of debris and level. Put your panels within easy reach. You have limited time to work with silicone, it starts to skin, to dry its surface fairly quickly, so you have to be organised. The longer the seam, the faster you need to work. Apply the first bead of silicone on the bottom panel where the rear panel will sit. How thick depends on how experienced you are, and how thick your panels are. In my case, I did a bead of around 10mm, because my glass is 10mm thick. Do not worry about putting too much. Too much is better than not enough. Put the rear panel in place, making sure it sits right on the edge of the bottom panel, flush on both sides. Have someone or something hold the panel up for a moment. Apply a bead of silicone on one side of both the bottom and the rear panel, and while keeping the rear panel slightly tilted back, put one of the side panels in place on the bottom panel. Then bring up the rear panel and push it against the side panel, making sure they’re square and flush with each other. They will now hold each other with the silicone. Put a piece of tape or two across the corner as extra support. Repeat the operation on the other side, this time lay the side panel a few mm off to the front and slide it in place against the rear panel. Make sure they’re square and flush, and tape them. Apply silicone on the front top edge of the bottom panel and the edges of both side panels. Bring your front panel at an angle, sit the bottom first, make it flush to bottom panel, then press it against the sides. Square, flush, tape. Let the tank cure for about 24 hours. Watch your berried shrimp in the meantime. Once the silicone is dry, remove the excess with a sharp blade. Trim the inside carefully, just to remove the excess and not to dig and cut between the panels. There is no real need to use acetone there, it is mainly used because new silicone doesn’t stick well to old silicone. So unless you went crazy on the amount of silicone you put on the first part and it went everywhere, you can leave the little bits around the corners. Tape the edges of the tank leaving the corners exposed. About 5-10mm is good, some prefer to leave a wider gap around the bottom. Apply silicone to the corners, starting around the bottom, then go up in the corners. You don’t need much there, a good bead size would be around 80% of the gap you left with the tape. Smooth out the silicone with your finger to give it a nice concave shape. Remove the tape while the silicone is still wet. Take care of not putting silicone everywhere and not to destroy your awesome corners as you remove it. Let the tank cure once more, for three to seven days this time. Why not watch your fish play in the bubbles? After the curing is done, do a test fill. If possible do it outside. If not, I suggest doing it slowly, adding a few cm at a time and constantly monitoring the seams for any signs of leakage. The test fill is also a good moment to see if you need to brace your tank. As you fill your tank, measure the distance between the front and back on both sides and compare the results with the measure in the center. If your panels are bowing by the same or more than their thickness, I’d recommend a brace. In this case, the bowing is only 1-1.5mm while the tank is ¾ filled. I do not need bracing. If everything is in order, scape, plant, fill, cycle, stock and enjoy your new DIY tank. Side note: if you are building a small tank, the cure period between the assembly and the reseal may be skipped by working fast enough to smooth the silicone as you go. On bigger tanks, like my 6ft, by the time I fit the panel, the silicone is already drying where I started to lay the bead, making it impossible to create a clean seam. My tank's specs: 6X2X1 (1830x610x310mm) 10mm thick glass. Filtration: Sponge + double overflow to sump (to be built). Stand: DIY 70x35 timber, 1830x610x800.4 points
 -
 4 pointsI am often amazed at the panic that people exhibit when they discover that they have a colony of seed shrimp in their aquariums. Is it because of lack of knowledge about this little animal ?or is it just a case of I have some sort of BUG in my tank so I must get rid of it before it kills my shrimp? I know people with planted tanks may not like the sight of them but to my eye they are very interesting. In this short article I will attempt to dispel these fears by a little knowledge about these wonderful creatures. Ostracoda Podocopida (Seed Shrimp) belong to the major group Crustacea minor group Ostracoda order Podocopida this order comprises terrestrial, marine and freshwater seed shrimp. they can be described as small crustaceans typically round or egg shaped, varying in size from 0.2 to 1mm . The body of a seed shrimp is encased in a calcified shell consisting of two parts, superficially resembling the shell of a clam The body consists of a head and thorax. unlike many other crustaceans the body is not clearly divided into segments. The head is the largest part of the body and bears most of the animal's appendages, two pairs of well developed antennae, used for swimming and feeding, a pair of mandibles and two pairs of maxillae (mouthparts) Seed Shrimp have no gills instead they take in oxygen through plates on the surface of their shells. Seed Shrimp can be found worldwide but mainly in Africa and Australia. Australian Seed Shrimp occur in fresh to hyper saline waters from permanent to temporary waterways. They are mostly free living and are often found in or just below the substrate. Seed Shrimp are "Filter Feeders" using their antennae to filter and search for their food. They live on organic detritus and algae. Seed Shrimp form part of the food chain for other invertebrates and juvenile fish. In actual fact Seed Shrimp are a benefit to your aquarium , because of their small size and eating habits they are one of nature's best clean up crews for shrimp keepers aquariums. Many people encourage them to thrive in their tanks in the true belief that they are an indicator that their tank and water parameters are healthy. My personal experience with these fascinating little creatures is that they seem to be self regulating and will disappear from my tank by themselves only to reappear at a later date. I always look forward to their return. I hope that this short article will help those who fear them to relax a little and enjoy their company Wayne REF Wikipedia - Ostracod www.mdfre.org.au identification and ecology of Australian Freshwater Invertebrates.4 points
 -
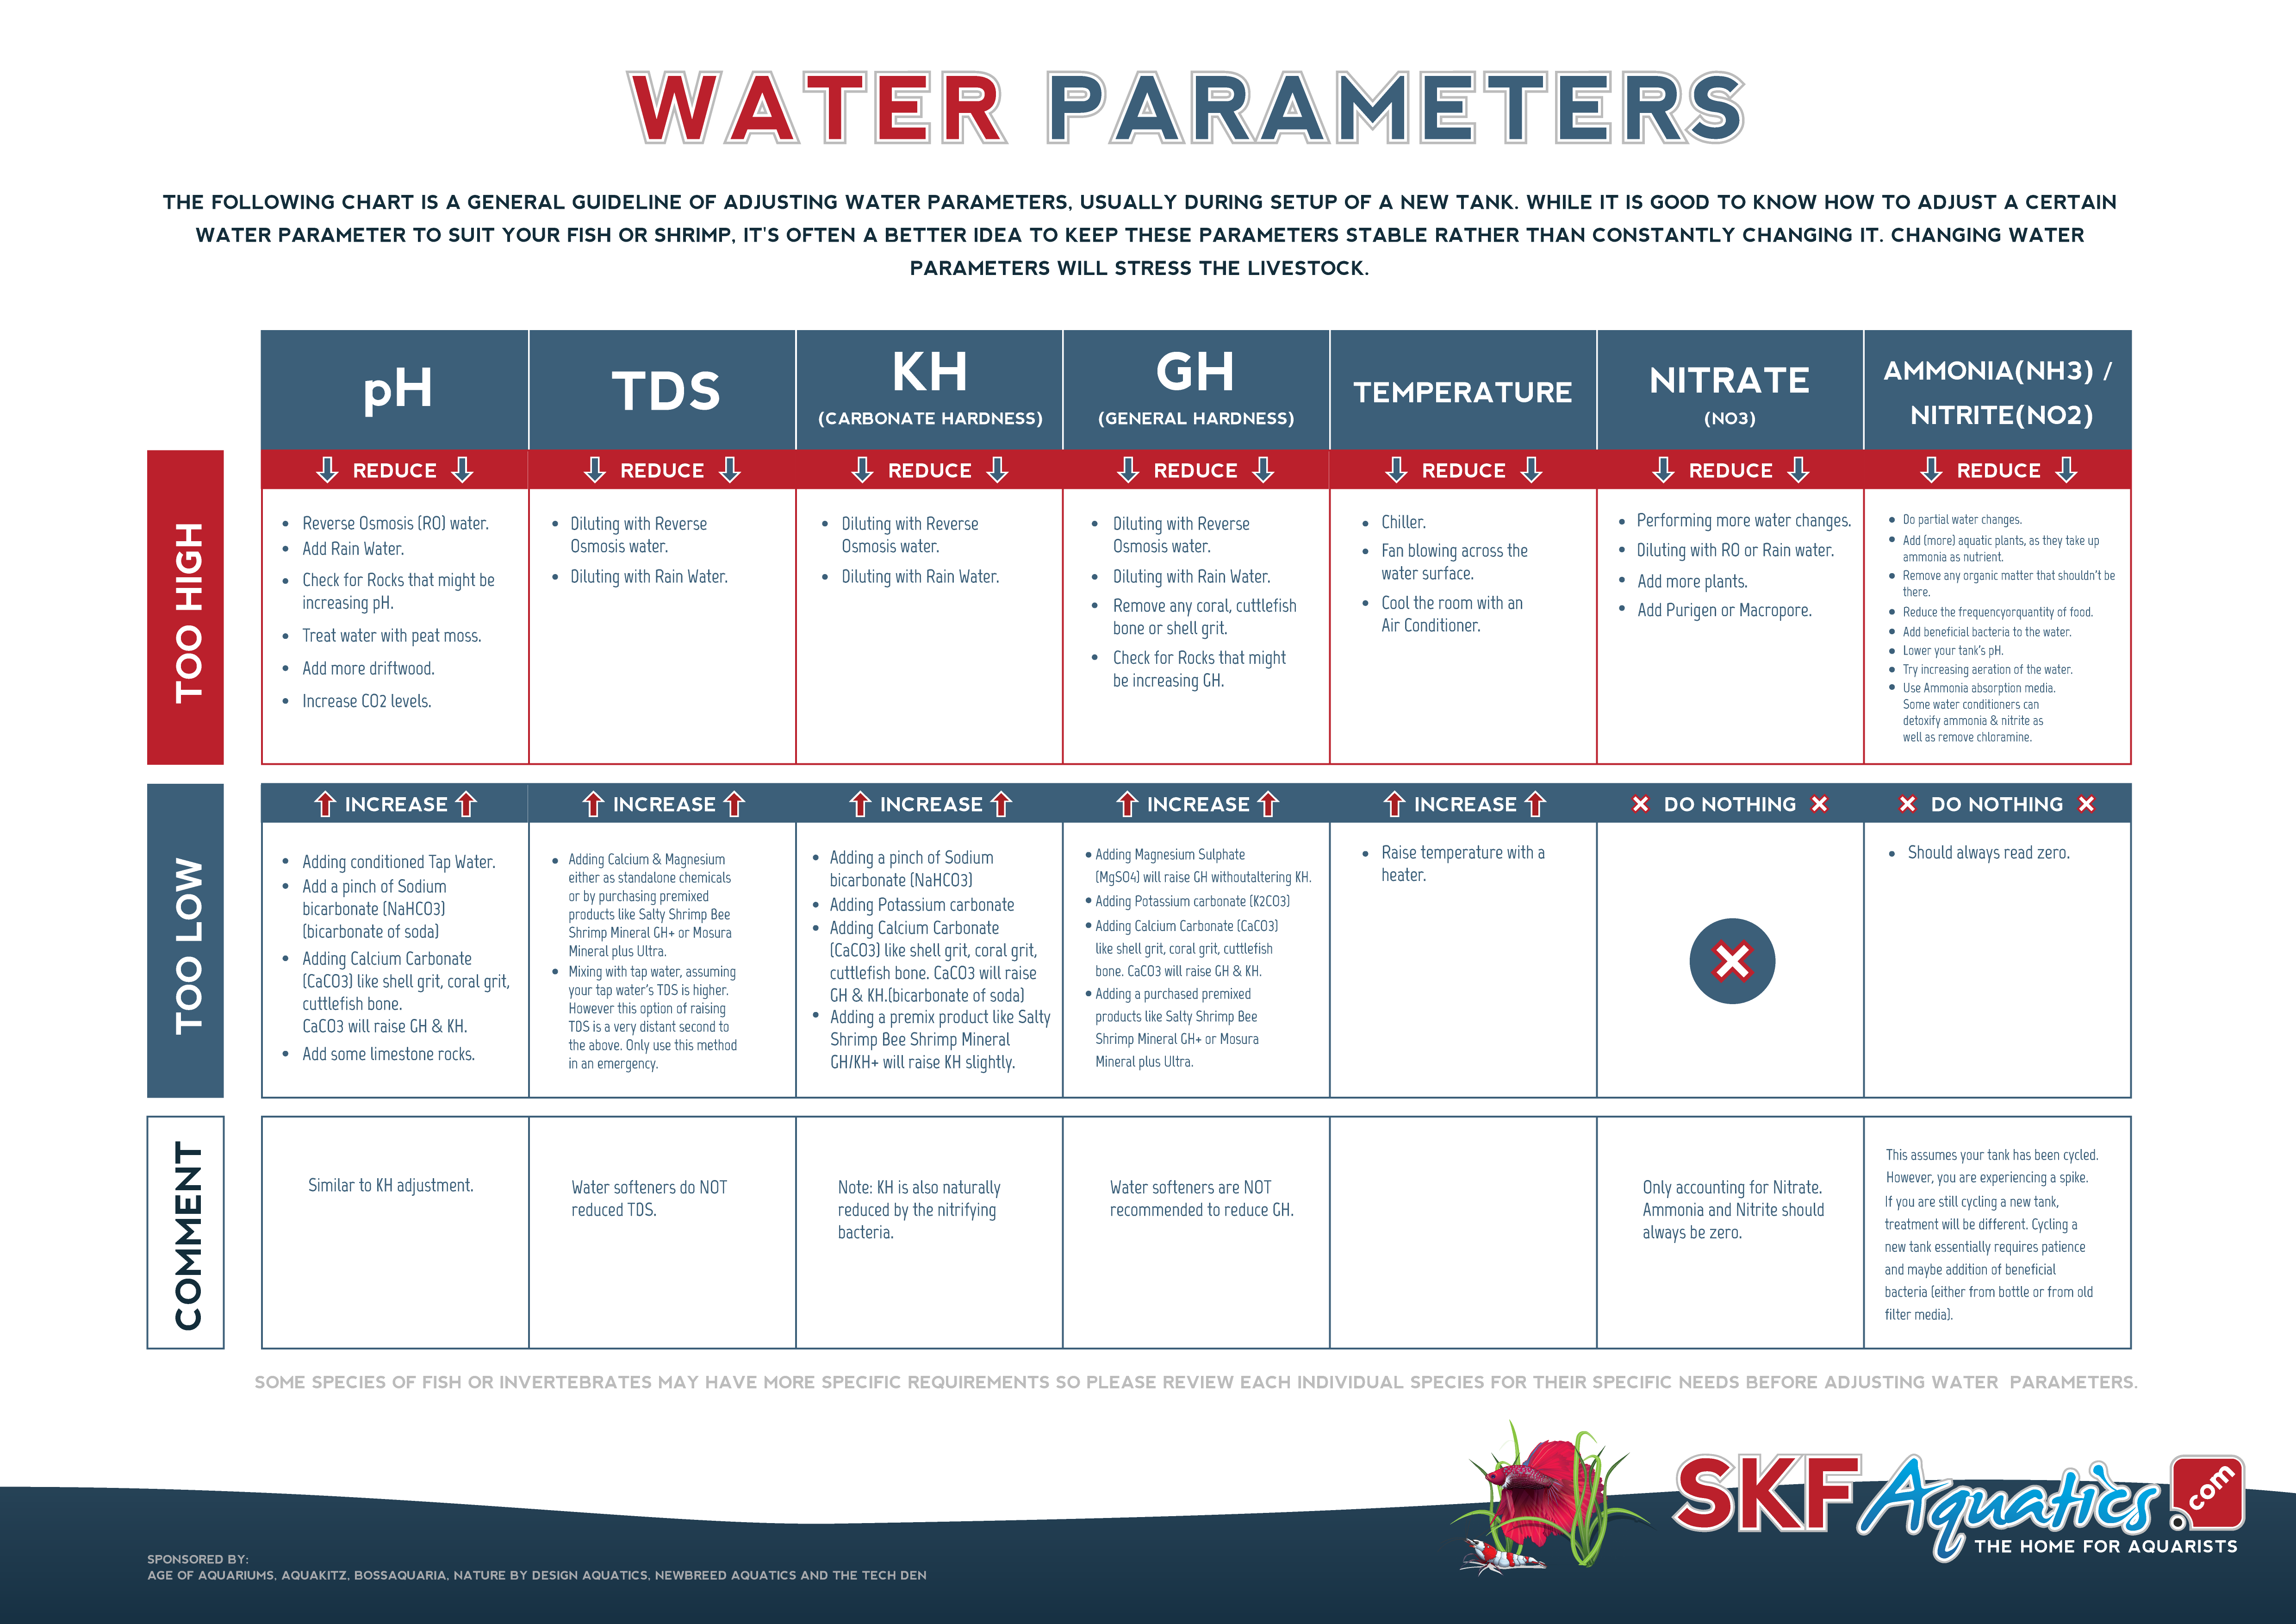 Someone asked for a guide on adjusting water parameters. As I don't recall one being made on SKF, I thought I'd start a little Cheat Sheet for adjusting water parameters. The following chart is a general guideline of adjusting water parameters, usually during setup of a new tank. While it is good to know how to adjust a certain water parameter to suit your fish or shrimp, it's often a better idea to keep these parameters stable rather than constantly changing it. Changing water parameters will stress the livestock. Some species of fish or invertebrates may have more specific requirements so please review each individual species for their specific needs before adjusting water parameters. Too High Too Low Comment pH Reduce pH with: Reverse Osmosis (RO) water. Add Rain Water. Check for Rocks that might be increasing pH. Treat water with peat moss. Add more driftwood. Increase CO2 levels. Increase pH by: Adding conditioned Tap Water. Add a pinch of Sodium bicarbonate (NaHCO3) (bicarbonate of soda) Adding Calcium Carbonate (CaCO3) like shell grit, coral grit, cuttlefish bone. CaCO3 will raise GH & KH. Add some limestone rocks. Similar to KH adjustment. TDS Reduce TDS by: Diluting with Reverse Osmosis water. Diluting with Rain Water. Increase TDS By: Adding Calcium & Magnesium either as standalone chemicals or by purchasing premixed products like Salty Shrimp Bee Shrimp Mineral GH+ or Mosura Mineral plus Ultra. Mixing with tap water, assuming your tap water's TDS is higher. However this option of raising TDS is a very distant second to the above. Only use this method in an emergency. Water softeners do NOT reduced TDS. KH (Carbonate Hardness) Reduce KH by: Diluting with Reverse Osmosis water or Diluting with Rain Water. Raise KH by: Adding a pinch of Sodium bicarbonate (NaHCO3) (bicarbonate of soda) Adding Potassium carbonate (K2CO3) Adding Calcium Carbonate (CaCO3) like shell grit, coral grit, cuttlefish bone. CaCO3 will raise GH & KH. Adding a premix product like Salty Shrimp Bee Shrimp Mineral GH/KH+ will raise KH slightly. Note: KH is also naturally reduced by the nitrifying bacteria. GH (General Hardness) Reduce GH by: Diluting with Reverse Osmosis water. Diluting with Rain Water. Remove any coral, cuttlefish bone or shell grit. Check for Rocks that might be increasing GH. Raise GH by: Adding Magnesium Sulphate (MgSO4) will raise GH without altering KH. Adding Potassium carbonate (K2CO3) Adding Calcium Carbonate (CaCO3) like shell grit, coral grit, cuttlefish bone. CaCO3 will raise GH & KH. Adding a purchased premixed products like Salty Shrimp Bee Shrimp Mineral GH+ or Mosura Mineral plus Ultra. Water softeners are NOT recommended to reduce GH. Temperature Reduce Temps with a: Chiller. Fan blowing across the water surface. Cool the room with an Air Conditioner. Raise Temps with a Heater. Nitrate (NO3) Reduce Nitrate by: Performing more water changes. Diluting with RO or Rain water. Add more plants. Reduce feeding amounts. Add Purigen or Macropore. Do nothing Only accounting for Nitrate. Ammonia and Nitrite should always be zero. Ammonia(NH3) / Nitrite(NO2) To reduce NH3 and NO2: Do partial water changes. Add (more) aquatic plants, as they take up ammonia as nutrient. Remove any organic matter that shouldn't be there. Reduce the frequency or quantity of food. Add beneficial bacteria to the water. Lower your tank's pH. Try increasing aeration of the water. Use Ammonia absorption media. Some water conditioners can detoxify ammonia & nitrite as well as remove chloramine. Should always read zero. This assumes your tank has been cycled. However, you are experiencing a spike. If you are still cycling a new tank, treatment will be different. Cycling a new tank essentially requires patience and maybe addition of beneficial bacteria (either from bottle or from old filter media).3 points
 -
3 points
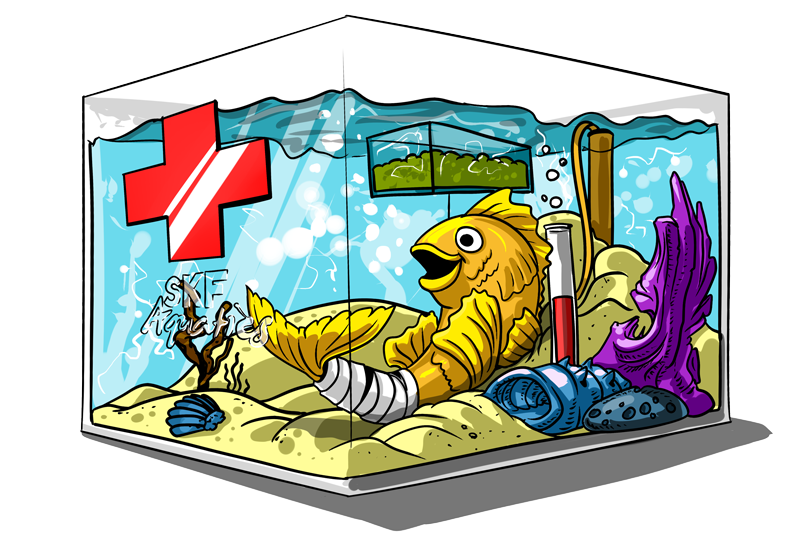 The Importance of Owning a Quarantine Tank A quarantine or hospital tank is an important part of owning an aquarium. Quarantine tanks should be used by anyone introducing new inhabitants (fish, shrimp, etc…) to a tank, but unfortunately, not all owners are able to use these specialized tanks. When a new inhabitant is introduced into an aquarium, there is the potential for it to bring diseases or parasites and vice versa. For example, new fish tend to be stressed from the transportation process. Because of this, new fish are more vulnerable to any disease or parasites already present in the existing aquarium environment. In other words, disease and parasites can work both ways, harming both the new fish and harming fish already present in the environment. A quarantine tank helps to protect your aquarium and allows new fish to regain their strength following their journey. It’s important to make an investment in one of these tanks if you’re serious about fish or any aquatic animal ownership. In most cases, people don’t purchase a quarantine tank because they either don’t understand its importance or they don’t have the additional money/space for another tank. A quarantine tank also requires additional maintenance. However, you don’t have to invest in a particularly large or expensive tank. You may end up saving money in the long run by preventing your fish and shrimp from getting sick or ill. Most people who invest in a quarantine tank end up realizing there are significant benefits. These tanks not only prevent the spread of disease and parasites, but also help your new inhabitants to adjust to the new water and food they’ll be exposed to. When you’re not quarantining before introduction into the larger tank, you can also use it as a treatment tank. For example, if you have sick or infected shrimp, you can separate them from the larger population and place them inside the quarantine tank. This allows you to carefully attend to your sick shrimp without worry than your healthy shrimp will also become ill. Under some circumstances, you can also use the quarantine tank as a breeding tank, a tank to raise newly hatched fry and shrimplets, and as a place to seclude any of your inhabitants who are being harassed. There are additional benefits to using a quarantine tank. First, it’s easier and cheaper to medicate sick inhabitants when you use a quarantine tank. By preventing a larger outbreak, you can minimize the medical costs by limiting your treatment to one or two sick inhabitants. It’s also far easier to maintain the water quality for newly introduced fish or shrimp. In heavily populated tanks, it’s difficult to keep the water quality at optimal levels. In a more limited quarantine tank, you can more effectively maintain the optimum water conditions. If your inhabitants are exhibiting any signs of trouble adjusting to its environment, you can perform even more frequent water changes to guarantee the water quality is optimum. However, in general, a quarantine tank is a good investment because it allows you to keep any eye on specific tank inhabitants more easily. When a fish or shrimp is isolated from larger groups, it’s easier find and inspect. They will also be less likely to hide in a smaller tank. For all these reasons, quarantine tanks are the perfect solution for aquatic owners needing to keep inhabitants isolated. Typically speaking, you’ll want to buy a 30-40L (approx. 9 gallon) tank for use as a quarantine tank. This size is perfect for both freshwater and saltwater environments. Afterward, you’ll want to set up the tank to operate properly. Use a fluorescent light to illuminate the area, keep a heater to warm the water, and use rocks that can be easily scrubbed of any waste. PVC and plastic tubes can be used to provide additional cover. To keep the tank appropriately filtered, use a sponge filter. These filters require you to remove, disinfect, and rinse them in-between uses. Also, since quarantine tanks are temporary holding areas, they typically don’t have a substrate. This will let you clean and disinfect them more easily. The disinfection process itself is not too complicated. You can remove the equipment inside when the tank is not in use. Using a mild unscented bleach solution, you can scrub both the equipment and the internal walls of the tank. However, make sure to remove all traces of bleach before refilling the tank and placing any fish in there. Drying out the tank is another way to kill many of the waterborne pathogens that commonly infest a tank. Use a separate siphon for your quarantine tank than you use for your normal tank, and disinfect it when you disinfect the rest of the tank’s equipment. With fish, the actual length of time you keep them quarantined can vary, but typically it takes between two to four weeks to either introduce a new fish or rehab a sick one. Within that time frame, a copper sulfate treatment can be used to treat parasites. This process can last anywhere from two to three weeks. Keep an eye on your fish. If they have red spots or ragged fins, there’s a chance there’s a bacterial infection going on, which will require additional treatments. Also replace between 10 and 15% of the water every other day to guarantee the quality of your water is at its best. That said, if you also keep shrimp, either setup a second hospital tank for them or ensure you do a proper clean after use. To shrimp, the majority of copper based solutions can be fatal.3 points
 -
 3 points
.thumb.PNG.b2ca8f0ec35b2ea0acea155b2273948f.PNG.9f2fd1287a6c18b5b11fe713965b914e.PNG) Amarinus lacustris are a fully freshwater crab native to almost all parts of Australia, New Zealand, Tasmania and several other islands, As a breeding guide, I must introduce, that they DO NOT have a larval stage at any point of their life cycle, once females are berried they take between 3-5 weeks until the baby crabs hatch and are released, they are fully formed miniature adult crabs (about 1mm) For water parameters they are reasonable hardy and accept a wide ranges of conditions ( they have to be expendable as they are an estuarine species, where the pH and salinity changes extremely quickly), mine are kept at a pH of 7-7.5, with water changes done weekly of 25%, the tank has sponge filters (I use sponge filters as they are completely shrimp and crab safe, compared to internal motorised sponge filters and hang on the back filters which are known to suck up baby shrimplets and crablets), they easily breed in the same environment that they are kept in (no need for a specific breeder tank), from what I have witness like shrimp they can only breed when a female sheds her shell, there should be an extremely high ratio of females to males as males will continually harass female crabs (that have just shedded) other wise the males can kill females, however males and females get on perfectly fine when females have not shed recently, mine are kept in a cold water aquarium which has a large amount of native fissidens, driftwood, sand substrate and porous rocks, baby crabs should be fine if kept in the colony environment however as they need to compete with food with adult crabs you may only get 50% survival rate to adulthood, I overcome this issue by housing females (that are berried) in my 5 segmented tank this mean when the female releases the babies I simply take the female out and put back into the main crab tank, the babies are then grown on until the are about .5cm and added to the main colony tank, I keep mine in a species only aquarium, I have some with cherries and the crabs are quite timid of the shrimp even the HUGE 2cm males XD, I feed all the same food I do my shrimp, this includes shrimp sinking pellets, algae wafers, carrot and other safe vegetables, I did have Amarinus Laevis however I did find the quite regularly predated on my shrimp (this is subjective, as I know people have had no trouble with them and shrimp), also I stopped keeping them because of their complicated life cycle, all in all, easy to care for, easy to feed, just keep with non aggressive fish (they can be acclimatised to tropical), fully formed babies, extremely shrimp safe. *images may appear different depending on your computer settings, also if you want to use my images please contact me before copying them/using them (The crabs range from a light sandy colour, blonde, brown, and dark brown - depending on environment/day and night3 points
Amarinus lacustris are a fully freshwater crab native to almost all parts of Australia, New Zealand, Tasmania and several other islands, As a breeding guide, I must introduce, that they DO NOT have a larval stage at any point of their life cycle, once females are berried they take between 3-5 weeks until the baby crabs hatch and are released, they are fully formed miniature adult crabs (about 1mm) For water parameters they are reasonable hardy and accept a wide ranges of conditions ( they have to be expendable as they are an estuarine species, where the pH and salinity changes extremely quickly), mine are kept at a pH of 7-7.5, with water changes done weekly of 25%, the tank has sponge filters (I use sponge filters as they are completely shrimp and crab safe, compared to internal motorised sponge filters and hang on the back filters which are known to suck up baby shrimplets and crablets), they easily breed in the same environment that they are kept in (no need for a specific breeder tank), from what I have witness like shrimp they can only breed when a female sheds her shell, there should be an extremely high ratio of females to males as males will continually harass female crabs (that have just shedded) other wise the males can kill females, however males and females get on perfectly fine when females have not shed recently, mine are kept in a cold water aquarium which has a large amount of native fissidens, driftwood, sand substrate and porous rocks, baby crabs should be fine if kept in the colony environment however as they need to compete with food with adult crabs you may only get 50% survival rate to adulthood, I overcome this issue by housing females (that are berried) in my 5 segmented tank this mean when the female releases the babies I simply take the female out and put back into the main crab tank, the babies are then grown on until the are about .5cm and added to the main colony tank, I keep mine in a species only aquarium, I have some with cherries and the crabs are quite timid of the shrimp even the HUGE 2cm males XD, I feed all the same food I do my shrimp, this includes shrimp sinking pellets, algae wafers, carrot and other safe vegetables, I did have Amarinus Laevis however I did find the quite regularly predated on my shrimp (this is subjective, as I know people have had no trouble with them and shrimp), also I stopped keeping them because of their complicated life cycle, all in all, easy to care for, easy to feed, just keep with non aggressive fish (they can be acclimatised to tropical), fully formed babies, extremely shrimp safe. *images may appear different depending on your computer settings, also if you want to use my images please contact me before copying them/using them (The crabs range from a light sandy colour, blonde, brown, and dark brown - depending on environment/day and night3 points -
3 points
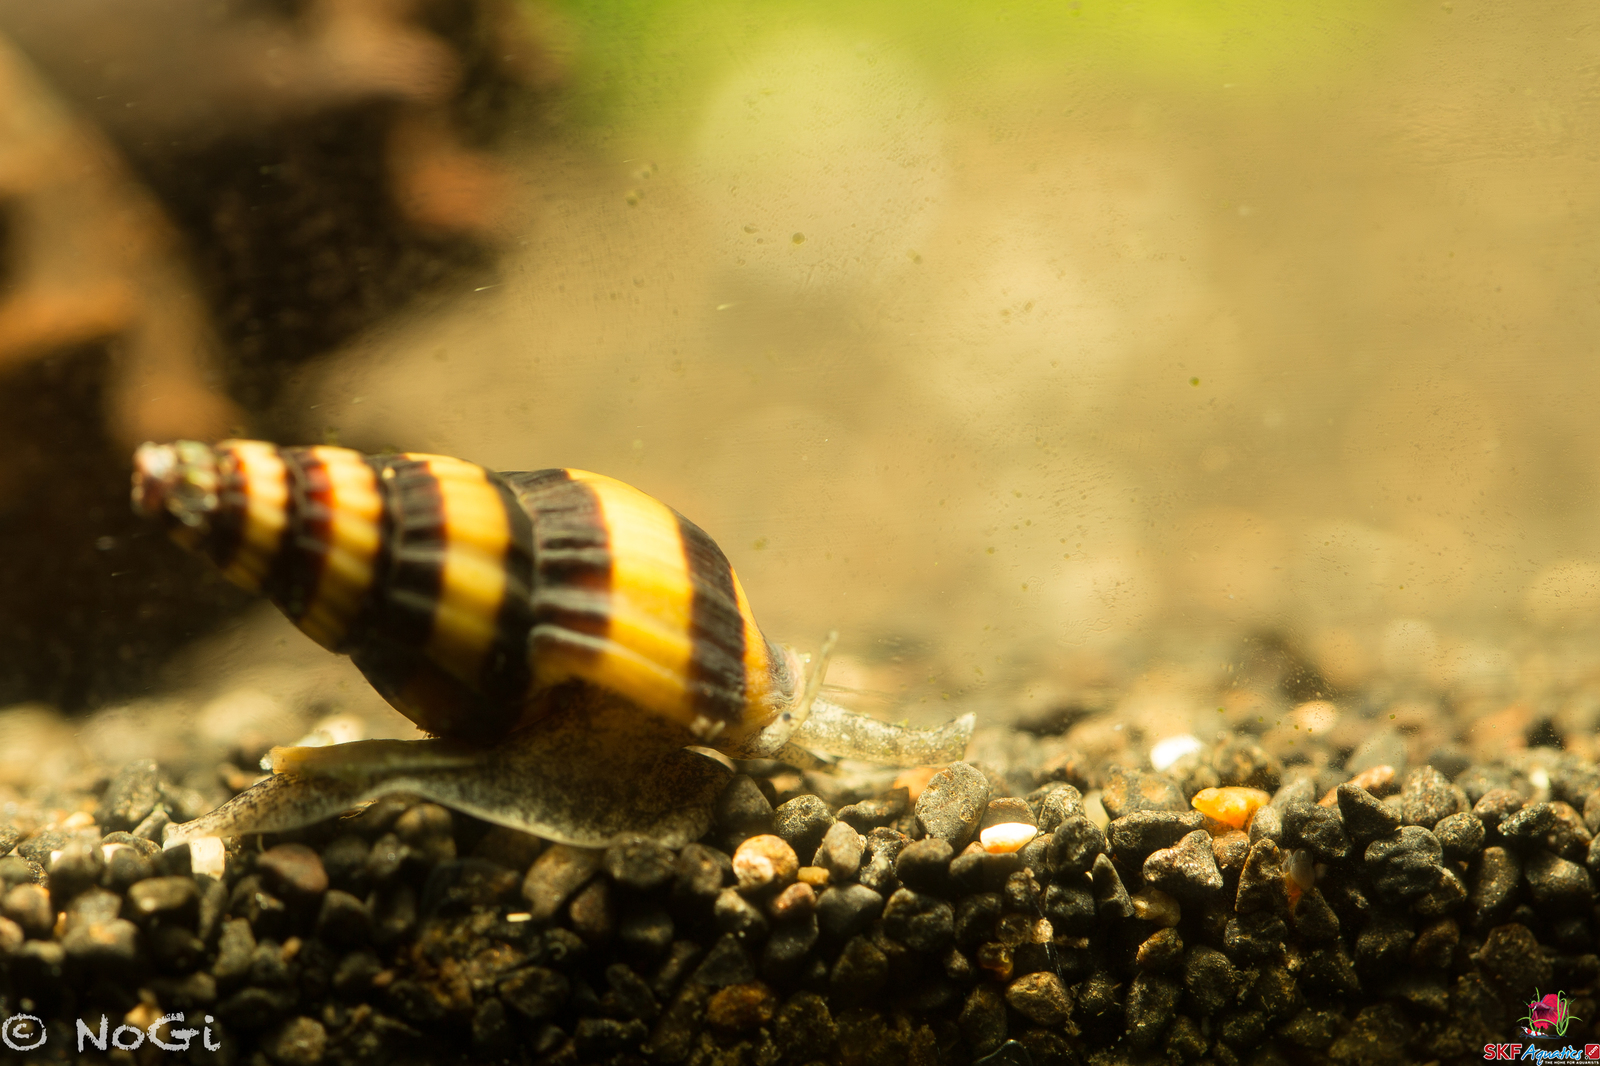 Clea helena is one of the most sought-after species in the aquarium business as it has the capability to hunt down pest snails; thus, helping solve the snail infestation concerns in fish tanks. Except for this, they are a peaceful community tank resident. Keep reading to know more about the assassin snail. Appearance Their shells are conical and are prominent because of their yellow and dark brown stripes – adding a splash of color inside the fish tank. Unlike other species, it is not possible to tell which a female assassin snail is and which a male is. They breathe by sticking out their siphon – like other snails. Clea helena grows as large as 0.5 inch or 1.3 cm. However, there were reports of finding bigger snails. As the large snails age, they begin to lose the tip of their shell. Natural Habitat Assassin snails are found in Southeast Asia and are native to Indonesia, Malaysia and Thailand. As freshwater aquatics, they occupy small bodies of water like streams and ponds. They prefer to live in areas where there are sandy or muddy substrates. Thus, if you are thinking about placing them in an aquarium, you should be able to reproduce a habitat like these conditions. Care It is so easy to look after an assassin snail. Water parameters are not essential, but to best care for them, keep them in water with medium hardness (pH 6.5-7.5). Their appearance may seem to point out that they move slowly but the truth is that they move quickly on any surface. Anyone can notice this particularly when they are hungry – and after they are fed as they disappear immediately. Feeding They eat other species of snails and worms, but they also devour anything they can find – including decaying fish and other small or soft-bodied invertebrates. Because of this, they do not give aquarists like you a hard time feeding them. If in case the tank has a significant population of snail, then you have nothing to worry about feeding them. Other aquarists feed them with brine shrimp, frozen blood worms and others. Breeding Some snails contain both the female and male reproductive organs. When they mate, they can produce eggs or young. However, these assassin snails are born a female or a male. Because you can’t tell their sex, buy 5 or 6 of them so you can at least be sure that you will have a male and a female. They mate for about 3 to 5 hours before they separate. Shortly thereafter, the female assassin snail will lay eggs (up to 4). These eggs, in a gelatinous square with a yellow centre appearance, emerge in a straight line. Feed them meaty food as it helps in good reproduction. Lifespan Clea helena can live around two years, but make sure that the aquarium is well-maintained and they can easily exceed this lifespan. Sources Clea helena (assassin snail) Clea helena Wikipedia Image Sources PKMousie Flickr cc3 points
 -
3 points
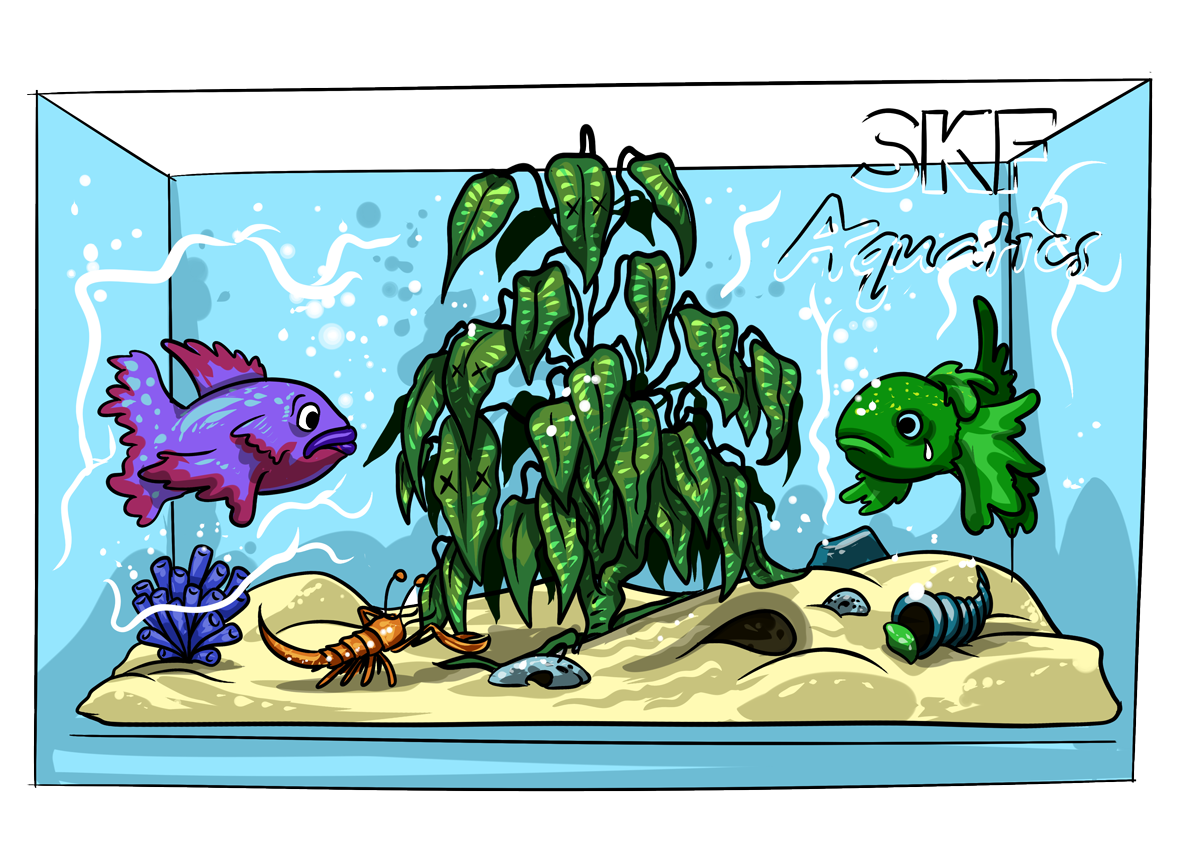 Non-aquatic plants to avoid! When you purchase aquarium plants, it's important that you understand that not all plants available for sale are truly aquatic. Vendors have no qualms offering this plants for sale, because they are very easy to obtain, and it is rare that you will see the designation "non-aquatic." While these plants can often survive as long as a year submerged, more often than not, they begin to decompose in as little as a couple of weeks or months, causing an ammonia spike, which can lead to algae, or worse, prove toxic to fish. These plants are not meant to be grown in an aquarium long-term and it is best that you avoid purchasing them for your benefit and the benefit of the non-aquatic plant. They are terrestrial plants and are meant for either indoor or outdoor gardening. They are at their best when they planted and cared for the right way. Japanese Rush (Acorus gramineus) Often sold in pots with rockwool, this plant will survive in the aquarium upto a year, but prefer cooler temperatures. In warm tropical tanks, this plant will turn to mush very quick. Aquatic alternatives such as Lilaeopsis species, Echinodorus tenellus, Sagittaria subulata, Vallisneria species can be used. Caladium (Caladium bicolor) This plant will only survive in the aquarium for upto 6 weeks (best kept with its leaves out of the water). These are usually sold in pots with rock wool. Aquatic alternatives such as Tiger lotuses and Barclaya longifolia can be used. English Parlor Palm (Chamaedorea elegans) This plant can survive long periods in the aquarium, these are usually sold as seedlings about 20cm tall either in pots or in bunches. In terrestrial environments, these can grow upto 2m tall. Aquatic alternative such as Hygrophilia difformis can be used. Aluminum Plant (Pilea cadierei) This plant may last in the aquarium for a few weeks, but will eventually melt away. Aquatic alternatives is the Blue Stricta. Spider Plant (Chlorophytum comosum) Another plant found in the trade as a potted plant. While it may grow very well in terrestrial form, once submerged it will root very quickly. Alternatively you can use larger Sagittaria species. Lucky Bamboo (Dracaena sanderiana) The lucky bamboo is very common these days among aquarists. If the leaves are kept out of the water, it can survive for a very long time. Once completely submerged, the lifespan is roughly 8 weeks. It is usually sold as rooted stalkes. Fittonia verschaffeltii This compact little plant is usually sold in pots, but unfortunately it will only last a couple of weeks in the aquarium before it begins to decay. Alternatively you can used Staurogyne sp. Purple Waffle Plant (Hemigraphis colorata) One of the most commonly seen non-aquatic plant in the trade. It is often sold in cuttings secured with rubberbands or lead weights. It may survive upto a year in the aquarium but would require high lighting and high iron levels. This plant will slowly deteriorate. Alternatively you can use Lobelia cardinalis. Iresine lindenii A beautiful plant, but completely unsuitable for the aquarium. It is often sold as a potted plant in the aquarium trade. Alternatively you can use Alternantera reineckii. Selaginella moss (Selaginella martensii) Unfortunately, this plant only has a 2-week lifespan in the aquarium and is often sold in pots. However, it makes an excellent paludarium plant. Very similar to Selaginella martensii is Selaginella willdenowii (umbrella fern, peacock fern). Aquatic Alternatives - Aquatic mosses, including Frontinalis antipyretica, Taxiphyllum barbieri and other Taxiphyllum species, and Vesicularia dubyana and it's related species. Peace Lily (Spathiphyllum wallisii) There is a lot of debate regarding the Peace Lily, and it is often seen in the trade as a potted aquarium plant. In Peter Hiscock's book, it is listed as a suitable plant for the aquarium, since it is extremely hardy and can remain healthy in the home aquarium for many months or even years. It is slow growing and can grow with minimal effort and in lower light levels. It is not, however, a true aquatic plant. Arrowhead Plant (Syngonium podophyllum) Though suitable for paludariums, the "arrowhead plant" quickly dies if left submerged. It can, however, be kept in situations where its roots are submerged. It is often sold as a potted aquarium plant. Aquatic alternatives - Hygrophila corymbosa, Echinodorus "Ozelot green", Anubia species Mondo grass (Ophiopogon japonica) Mondo Grass is not a true aquatic plant. It will survive for awhile underwater but will not prosper. Best if taken out after a couple of months. Alternatively you can use Hairgrass or Blyxa japonica If you know any other plants I have missed, please post them below :)3 points
 -
3 points
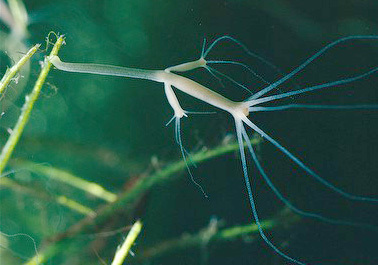 Aquariums make a wonderful hobby. They are soothing, interesting and can provide a lot of fun and entertainment. However, in order to make the most of your aquarium, taking proper care of it is exceptionally important. It must be maintained, and part of proper maintenance is understanding issues that can develop. One of the side effects of improper aquarium maintenance is the development of pests, and Hydra oligactis – more commonly referred to as just hydra is one of the most dangerous. Also known as freshwater polyps, these pests hail from the Coelenterata family of aquatic invertebrates. They have a tubular body and a sticky foot located on one end and tentacles on the other end. The tentacles contain stinging cells, which the hydra uses to immobilize its’ prey. Why Hydra are Dangerous in Aquariums Though hydras are basic creatures that lack a brain, a respiratory system or even musculature, they are a real threat to aquariums. As mentioned, they use their stinging tentacles to immobilize their prey and are able to kill and eat fish fry and even adult fish. Additionally, they reproduce very quickly, creating buds that turn into new hydra that eventually break off on their own. And, though they do tend to stay in one place (using their sticky foot to secure them to a surface,) they can easily move around if they choose. Given their ability to eat fish, how quickly they reproduce and that they can move about when they want, it’s easy to see why hydra are a real issue in an aquarium. Treating Hydra in an Aquarium Once an aquarium has infiltrated an aquarium, they can be hard to eradicate; however, getting rid of them is possible. The treatment for these pests depends on the extent of the infestation. If the infestation is relatively small, you may actually be able to physically remove them. If they have taken up residence on plants and rocks, they can be killed by removing the plants and rocks and sock them in a solution of 10 percent bleach and 90 percent water for about 15 minutes. After soaking, rinse the plants and rocks with fresh water and let them air dry. If you are looking for a less intrusive method of removal that will not disturb the aquarium, you can do so by introducing fish that will eat the pests. Mollies, Paradise fish and Spot (blue) Gouramis are known to favor hydra and can rid an aquarium of them. Heat is another option that can be used to treat an infestation of hydra. With this treatment method, the fish must be removed from the tank first. Once they are removed, increase the temperature of the water to 40°C (104°F) for a few hours. This will essentially cook the hydra and kill them. Turn the temperature of the water down, clean the gravel and change the water. Ensure that the temperature of the water is safe for the fish before reintroducing them. Chemicals and medicines can also be used to treat hydra; however, do keep in mind that they can be harmful to aquatic life. Copper Sulfate and Potassium Permanganate are two of the most common and safest options in fish only aquariums. Also take a look at the following article regarding common medication used in aquariums: Image credit: Wikipedia: Hydra oligactis3 points
 -
 3 points
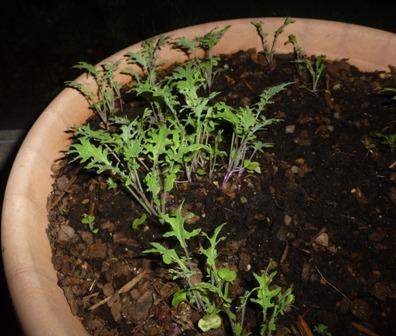 Kale is a great snack for you shrimp, plus it contains approximately 135mg of calcium per 100g. Kale can be dried, blanched or fed fresh to you shrimp. If you plan to grow it yourself simply purchase a packet of seeds or seedlings at your local hardware store or nursery and follow these steps to ensure you grow large, healthy kale. Growing Kale Kale can be planted anytime of the year but is best planted in soil temperatures of 10c to 30c. If you chose to purchase seeds chose a large pot or garden bed to plant them in, making sure it is in partial sun in summer and full sun in winter. The pot or garden bed should be at least 20 square centimetres for a few plants but for more, larger is better, I prefer a 50cm, circular pot. Kale will grow in commercial potting mix but the addition of fertilizers is always a good addition to kick start you kale. Sow the seeds one centimetre deep, planting the seeds a few centimetres apart and keeping the rows fifty centimetres apart. If you need to you can later transplant seedlings to allow more room. Keep the soil moist and within five to fourteen days your kale should germinate and within eight to ten weeks it should be ready to harvest but may be harvested before if needed/wanted. Some Red Russian Kale, approximately three weeks old Pests and Diseases Kale is fairly resistant to pests and diseases but are susceptible to white cabbage caterpillars. Picking them and dried and withered leaves is your best defence as using pesticides will more than likely harm you shrimp. Feeding You can feed to kale to your shrimp fresh, blanched or dried depending on your preference. If blanching, you should boil for approximately one and a half minutes. When feeding, keep the kale down with a wooden/bamboo skewer or tie it to a rock. Your shrimp will love the kale and jump on it as soon as it goes into the tank. Happy Shrimping!!3 points
 -
 3 points
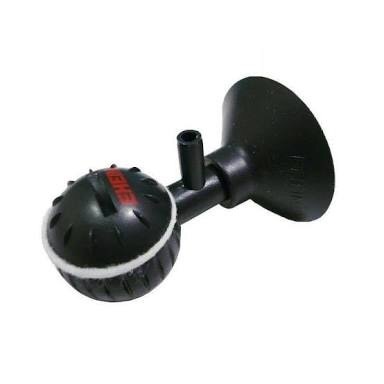 This is a review for the Eheim Air Diffuser that connects to the air hose. Eheim also have one that connects to your canister outflow. I bought 6 of these to get more air into my water. They are sold as an air diffuser, with a good comparison video to a ceramic air stone on Youtube. I have these in 4 tanks from 50 litre to 240 litre, connected to different output air pumps. I have had them for approx. 2 months. Price: $12-$15 each in Australia The pro's: Comes with a suction cup to attach to the glass, looks tidy, very attractive finishing compared to a ceramic air stone. You can vary the size of the bubbles by adjusting the top body of the sphere The Con's: To get more air diffusion, you need smaller bubbles under pressure that travel slower to the water surface than large air bubbles. This is the concept behind buying this air diffuser. This is possible, but by setting the diffuser to such a fine setting, there is a very high pitched noise coming from it due to the pressure going through the diffuser on such a fine setting. The frequency of the high pitched noise does lower by letting off some pressure by either adjusting the diffuser itself to increase bubble size, or by dialling down the airflow from your air pump. This high pitched noise only disappears when the bubbles are the size equivalent to that of a regular air stone. The noise at the finer settings is loud enough to be annoying, and I cannot imagine that shrimp and fish want to be exposed to that noise pollution. I have tanks still running at this noise-level: it does not go away if you do not increase the bubble size. This Eheim Air diffuser gets ??? / 5 Shrimp tails. It is an attractive average-functioning airstone if that is what you are looking for in terms of regular bubble size. As a fine air diffuser, due to the high level of high-pitched noise, I would not recommend it at all. Figure 1 shows bubbles at a lower frequency high-pitch level that is annoying. Figure 2 shows the very fine diffused bubbles that one expects from a diffuser, but with a noise level that will drive you nuts if you are next to the tank and who knows what stress that causes the shrimp and fish.3 points
 -
What makes a good shrimp net? It can be materials, price, function, does it catch shrimp successfully? I've used had many shrimp nets, and the best ones, that actually catch shrimp easily, are the ones whose net stays open and forms a little cup that does not scare the shrimp into swimming the other way when you try to catch them. Because it is not obstructed and looks like an escape route, the shrimp just seem to swim right in. Unlike soft, floppy nets, that look like a barrier. These nets don't have enough stiffness to keep the net open. The solution? A cable tie cut into the appropriate length to keep the net open. Carefully place it into the net like so ... There you have it. A $2 net that will now catch shrimp like the $30 one I have. Jayc.3 points
-
3 points
 Article - Edible Flowers for Shrimps We have been discussed and talked about feeding shrimp leaves and fruits on many occasions. And the results are quite well documented in the use of leaves like Mulberry, Oak, Indian Almond (Kattapa), etc. However, the idea of feeding shrimp flowers is still very new. After all in the wild, things like leaves, twigs, branches AND flowers all drop into rivers where native shrimps will use a food source. In terms of nutritional value, you will find nutrients and minerals in flowers that are lacking in leaves (and vice versa). I'll expand on one of the main benefits of a nutrient found in flowers that aren't present in leaves a bit later. HOWEVER, NOT ALL FLOWERS ARE SAFE FOR EATING!! So we will start with those flowers that are known to be edible. Of course that are literally hundreds of varieties of edible flowers. We all know about cauliflower and broccoli, those are some common flowers we eat regularly. My experiment is limited to what I could source close by. The flowers I tested on my shrimp include Rose, Nasturtium, Dandelion, Chrysanthemum and Pansies. Caveat: I KNOW for sure that these flowers in my backyard have not been sprayed with anything else apart from tap water and rain. No pesticides, fertilisers. If in doubt, DON'T use it. You could try other flowers that are easily sourced in your garden. But please note - I have limited my research and experiments to flowers only. Not the leaves of these flowers. As a cautionary warning, some leaves are sappy and oily, and might not be too safe to feed your shrimp. So I take no responsibility with the leaves of these flowers. Although, Ineke has fed Nasturtium leaves to her shrimp which they seem to like and was safe as mentioned in another thread. Preparation: 1) Pick fresh looking flowers with no visible damage. Select flowers that you KNOW have no previous pesticides or fertilisers, and don't grow down stream from sources of water that might be contaminated. 2) Gently wash them (flowers are very delicate and soft) if there is dirt on them. 3) Remove as much of the base of the flower (the stem, receptacle and sepal). Usually only the petals are what we want. 4a) Place into tank fresh. (Recommended) 4b) Or Blanch it for 1-2 minutes in hot boiling water. Remember, flowers are soft, they don't need to be blanched for much longer. (not a necessary step). 4c) Freezing or Drying. While it's possible to freeze or dry flowers for storage and feeding at a later date, I'm not sure what nutrients will be lost. 5) Ensure any decayed leftovers are removed if left uneaten after a few days. Review of the flowers: I have searched high and low in the scientific literature for quantitative data on the nutrient content of flower petals. There are relatively few references, particularly in English. Most of the literature is focused on evaluating flowers for their sensory characteristics, such as appeal, size, shape, colour, taste, and above all, aroma, which is important for the cosmetic and perfume industry. Available data on a number of edible flowers show that petals also contain an array of vitamins and minerals, particularly vitamins A and C, various B vitamins, folic acid, and minerals including calcium, magnesium, potassium, iron and phosphorus. Apart from the nutritional value of flowers with the abundance of vitamins and minerals, flowers also contain a huge amounts of carotenoids and flavonoids compared to leaves. Specifically, Crytoxanthin, Zeaxanthin and Lutein which is obviously lacking in the leaves. Just look at the pretty colours of flowers. Zeaxanthin and Lutein has been known as a natural source of colour enhancement in fish (and maybe shrimp). These carotenoids are regularly added to fish food from sources like spirulina. Zeaxanthin enhances the Reds and Oranges while Lutein enhances Yellows. Flowers are also high in antioxidants, they are antiseptic, antifungal and anti-inflammatory. This sounds too good to be true. It's like feeding medicine to your shrimps to fight viruses and bacteria. On to the review of specific flowers. Dandelions: Say what?! That's a weed! It sure is, and I have heaps growing in my front garden. Now I have a use for them. Dandelion is a perennial plant with jagged, bright green leaves to 30cm long, a hollow flower stem to 30cm and one terminal yellow daisy. Has been subject of many studies investigating it's ability to even fight cancer! Dandelions, contain numerous flavonoids and carotenoids with antioxidant properties, including four times the beta carotene of broccoli, as well as lutein, cryptoxanthin and zeaxanthin. They are also a rich source of vitamins, including folic acid, riboflavin, pyroxidine, niacin, and vitamins A, B, C and D. Minerals including iron, potassium and zinc. The rich yellow colour of dandelion flowers comes from beta-carotene - Lutein specifically. Side note: the leaves are apparently also really high in Calcium (187mg per 100g), rivalling Mulberry leaves. But I have not tried feeding Dandelion leaves, nor do I know if they are safe. But people eat them. The Chinese, European and Native American have been using the dandelion plant for centuries to treat digestive, kidney and liver ailments. I fed my shrimp a fresh dandelion as one experiment. The first day in the tank, the shrimp investigated it, but didn't seem to be eating. It wasn't till the 3 day that I noticed them actually munching on the flower. The petals probably needed to soften first. The second experiment was with a blanched dandelion. This time the shrimp took to it the same day. And average sized flower was consumed within 3-4 days in my tank. Verdict: Big tick. They loved it. Too early to tell if there is any impact on colouration of the shrimps. Nasturtiums: Nasturtium is a PERENNIAL growing to 0.5 m (1ft 8in) by 1 m (3ft 3in). It is part of the Watercress family. The most common variety is Tropaeolum majus. The peppery flowers are good in salads and pasta dishes. A 2009 study by the Universidad Nacional de Colombia identified the group of phenols or phenolic compounds in the pigments of orange and red flowers of Tropaeolum majus as anthocyanins. Anthocyanins, which are abundant in blueberries and red cabbage, help neutralise the damaging effects of free radicals, thereby helping to protect us from chronic diseases such as cardiovascular disease and cancer. Anthocyanins are anti-inflammatory, antimicrobial, anticancer and antioxidant. Nasturtiums are high in Vitamin C, about 45 milligrams vitamin C per 100 grams, and also contain Vitamin A and flavonoids anti-oxidants like - carotene, lutein and zeaxanthin. They also contain Minerals like Iron, Calcium. Nasturtiums might not pack as much nutritional value as dandelions, but it sounds great to feed shrimp occasionally, to combat diseases due to it's antibiotic, antiseptic, and antifungal properties. I fed Nasturtium flowers to my shrimp in a similar fashion to Dandelions. Fresh and Blanched. The shrimp had very similar reactions. They ate it when the flowers were soft. Verdict: Another big tick. They loved it. Too early to tell if there is any impact on colouration of the shrimps. I do have one shrimp that looks unwell. I'm keeping an eye to it to see if there are any improvements. I won't go into detailed reviews on the Rose, Pansies or Chrysanthemum flowers, as I couldn't find much information on it's nutritional value. But the results are very similar. There are dozens of other edible flowers that could be introduced to your shrimp as long as you take the necessary precautions on where you collect these flowers. Some other possibilities include: Daisies, Sunflowers, Daylilies, Violets, Tulips. Just a word of caution for anyone trying. Please stick to flowers we know are edible. If in doubt check this list. http://www.westcoast...edible-flowers/ Many flowers have antiseptic, antibacterial and antifungal qualities. If you have suspected recent bacterial issues with your shrimps lately, try feeding flowers and report back on your findings. These are some, and by no means the only, flowers that exhibit antiseptic, antibacterial and antifungal qualities:- Basil flowers, Bee Balm (Bergamot) flowers, Borage flowers, Echinacea flowers, Pot Marigold flowers, Chamomile flowers, Chrysanthemums flowers, Garlic flowers, Nasturtiums flowers, Onion flowers, Oregano flowers, Pansy flowers and Violet flowers. Please note - I am talking about the flowers here. So when you see Basil for example, that's the Basil flowers, not the leaves. Even-though the Basil leaves are edible, I cannot vouch for the leaves from some of these other flowers. If nothing else, this is another nutritious, natural food source for shrimps. My shrimps have shown to love eating flowers, and usually devour them within 1 to 2 days after placing in the tank. Hold the flowers down the same way you'd hold mulberry leaves or other plant foods down. While we are at it, it's probably best to name some flowers to AVOID, as these are considered poisonous. Primulas, Primroses, Polyanthus, Iris, Daffodils, Nghtshade, box wood, foxgloves, amaryllis, clematis, bryony, buttercups, begonia, columbine, lily of the valley, sweet pea, Brachycome, Nolana, Rudbeckia, periwinkle, oleander, dogbane, aconite.3 points
 -
 3 pointsThese are some of the more common creatures you may find in your aquarium and a little info about them. A healthy ecosystem contains many life forms and not all creatures found in your aquarium are a problem, in fact many are a sign of a well established and healthy tank/ ecosystem. So before you go starting a chemical war with them, take the time to know what it is you are looking at and if they are actually a problem. Will cause problems for juvenile shrimp in aquariums Damsel fly nymph (Odonata Zygoptera ) Size range 15 - 40mm Damselfly Nymphs are easily recognized by their three long tail-like gills at the end of their slender bodies that grow between 16 and 33 mm. They have great vision, due to their large compound eyes. Damselfly Nymphs have extendable jaws that fold up under their head and legs close behind their head. Damselfly Nymphs are predators that feed mostly on other water insects, but they can also be cannibals. Larger species of Damselfly Nymphs can feed on small fish. They catch their food with a toothed lower lip, called a labium. When a small insect comes near, the nymph will shoot out its lower lip to grab its prey. Dragon fly nymph (Odonata Anisoptera ) Size range 20 - 50mm Dragonfly Nymphs are short and wide growing 18-49 mm long. They have six legs located near the head, wing pads, and internal gills. Dragonfly Nymphs are predators that feed mostly on other water insects, but they can also be cannibals. Larger species of Dragonfly Nymphs can feed on small fish. They catch their food with a toothed lower lip, called a labium. When a small insect comes near, the nymph will shoot out its lower lip to grab its prey. Fresh water bristle worm (Annelida Polychaeta ) Size range 1- 100mm Each Bristle worm has characteristic bristles that are found lining the exterior of their white or pink body. They typically grow between 1 and 100 mm, but have been known to grow up to 150 mm in length. Freshwater Bristle worms can be found in silt substrates and among debris or detritus in ponds, lakes, streams and rivers. They use their two tentacles to capture food or detritus floating by and transport it along cilia to the mouth. May cause problems for juvenile shrimp if in high numbers Planaria or flat worm (scientific name) Size range 0.5 - 15mm Planarians are usually between 3 to 15 mm with a triangular head that contains two eye spots. The colors vary from white, grey, brown, and black. The mouth is located on the underside of the worm halfway down towards its tail. Planarians suck up seed shrimp, clam shrimp, water fleas, and dead animals using a straw like appendage that extends from their stomaches. Planarians can regenerate many of their body parts, including their heads! Hydra (phylum Cnidaria) Size range 0.2 - 15mm Hydra has a tubular body up to 10mm long when extended, secured by a simple adhesive foot called the basal disc. At the free end of the body is a mouth opening surrounded by one to twelve thin, mobile tentacles. Each tentacle, or cnida (plural: cnidae), is clothed with highly specialized stinging cells called cnidocytes. Cnidocytes contain specialized structures called nematocysts, which look like miniature light bulbs with a coiled thread inside. At the narrow outer edge of the cnidocyte is a short trigger hair called a cnidocil. Upon contact with prey, the contents of the nematocyst are explosively discharged, firing a dart-like thread containing neurotoxins into whatever triggered the release which can paralyze the prey, especially if many hundreds of nematocysts are fired.Hydra mainly feed on small aquatic invertebrates such as Daphnia and Cyclops. Not a problem Nematodes (scientific name?) Size range 0.01 - 10mm Nematode species are very difficult to distinguish; over 28,000 have been described, of which over 16,000 are parasitic. The total number of nematode species has been estimated to be about 1 million. Unlike cnidarians and flatworms, nematodes have tubular digestive systems with openings at both ends. Nematodes are slender worms, typically less than 2.5 mm (0.10 in) long. The smallest nematodes are microscopic, while free-living species can reach as much as 5 cm (2.0 in), and some parasitic species are larger still, reaching over a meter in length. The body is often ornamented with ridges, rings, bristles, or other distinctive structures. Tubifex (tubificid annelids) Size range 10 - 50mm Tubifex worms feed on decaying organic matter, detritus, and vegetable matter, which is commonly available in sewage/stormwater drains. Tubifex worms are hermaphroditic: each individual has both male (testes) and female (ovaries) organs in the same animals. These minute reproductive organs are attached to the ventral side of the body wall in the celomic cavity. In mature specimens, the reproductive organs are clearly found on the ventral side of the body. Seed Shrimp (Ostracoda) Size range 0.2 - 30mm The body of an ostracod is encased by two valves, superficially resembling the shell of a clam. A distinction is made between the valve (hard parts) and the body with its appendages (soft parts). In most ostracods, eggs are either laid directly into the water as plankton, or are attached to vegetation or the substratum. However, in some species, the eggs are brooded inside the shell, giving them a greater degree of protection. The eggs hatch into nauplius larvae, which already have a hard shell. Daphnia (Branchiopoda Cladocera) Size range 0.2 - 5mm Daphnia are small, planktonic crustaceans, between 0.2 and 5 mm in length. Daphnia are members of the order Cladocera, and are one of the several small aquatic crustaceans commonly called water fleas because of their saltatory swimming style. They live in various aquatic environments ranging from acidic swamps to freshwater lakes, ponds, streams and rivers. Cyclops, Copepods (Maxillopoda Cyclopoida) Size range 0.5 - 5mm Cyclops or water flea is one of the most common genera of freshwater copepods, comprising over 400 species. Cyclops individuals may range from 0.5 - 5 mm long and are clearly divided into two sections. The broadly oval front section comprises the head and the first five thoracic segments. The hind part is considerably slimmer and is made up of the sixth thoracic segment and the four legless pleonic segments. Two caudal appendages project from the rear. Although they may be difficult to observe, Cyclops has 5 pairs of legs. The long first antennae, 2 in number, are used by the males for gripping the females during mating. Afterwards, the female carries the eggs in two small sacs on her body. The larvae, or nauplii, are free-swimming and unsegmented. Freshwater Limpet (scientific name) Size range 0.5 - 5mm Limpet is a common name for a number of different groups of sea snails and freshwater (aquatic gastropod molluscs). The common name is applied to those snails that have a simple shell which is broadly conical in shape, and either is not spirally coiled, or appears not to be coiled in the adult snail. In other words the shell of all limpets is shaped more or less like that of most true limpets. Rotifers (scientific name) Size range Small. Rotifers have bilateral symmetry and a variety of different shapes. The body of a rotifer is divided into a head, trunk, and foot, and is typically somewhat cylindrical. Rotifers eat particulate organic detritus, dead bacteria, algae, and protozoans. They eat particles up to 10 micrometres in size. Like crustaceans, rotifers contribute to nutrient recycling. For this reason, they are used in fish tanks to help clean the water, to prevent clouds of waste matter. Rotifers affect the species composition of algae in ecosystems through their choice in grazing. Rotifers may be in competition with cladocera and copepods for phytoplanktonic food sources. Rotifers are dioecious and reproduce sexually or parthenogenetically. They are sexually, with the females always being larger than the males. In some species, this is relatively mild, but in others the female may be up to ten times the size of the male. In parthenogenetic species, males may be present only at certain times of the year, or absent altogether. Most information collected from http://en.wikipedia.org/wiki/Main_Page Also a great poster for identifying many of the water creatures3 points
 -
The in depth guide to keeping as well as breeding Amarinus lacustris by Hervey Doerr-Rolley Overview The aim of this article is to educate and warn people of the mistakes I made and how I was successful with breeding and keeping this species. I published an article about this species several years ago so thought it was time for an updated guide for anyone wanting to keep and breed this species. All my knowledge about this species has been developed over the 4 years I've kept this species as well as the many scientific articles I've studied, I first kept this species when I was 15 and now 19, my colony is still going strongly. Currently studying a bachelor of Marine science. Firstly I'd like to point out this species does not have a larval cycle, it is a far too common misconception people have. I believe this thought is derived from their much larger cousin the Amarinus laevis and the Thai micro crab, Limnopilos naiyanetri. Amarinus lacustris have fully formed offspring, meaning their offspring are essentially miniature adults once hatched from their egg. Some points of interest about this species, there are 8 instars before their pubertal moult. Females up to two moults before their pubertal moult can copulate and store spermatozoon, once she reaches the pubertal moult she can then impregnate herself without the need of copulation. The stored spermatozoon can then be used up to 15 separate brood cycles (15 clutches of eggs). Adult females can carry up to *35 eggs (anecdotal) and take around 25-30 days at 15 degrees Celsius to hatch as fully formed offspring. Water chemistry A. lacustris have a strong preference for hard water, I keep and breed mine in; pH: 8-8.2 Ammonia:0ppm Nitrate:0ppm Nitrite:0ppm KH:125ppm *25% water changes are done weekly* Breeding and Husbandry Key points for their care; Gravel substrate - fine pea gravel is best. Air pump sponge filters are essential as this provides cleaner water as well as a feeding ground for the offspring as well as adults. Mulm and moss are essential. A good rule of thumb from my experience is 500ml of aquarium space per baby-sub adult, and then 1L per adult crab, this allows for less aggression from male to male behavior. It is up to you but the less stocking density the better due to the aggression of breeding from males, keep in mind this aggression is only towards other males however females that are being copulated with may sustain serious injuries if too many males are kept together. The best ratios are two males to 8 females. When a female sheds she releases hormones into the water column just like shrimp, if any of you are familiar with breeding shrimp you can note this by the erratic and fast speeds the males zoom around the aquarium searching for the female, this is the same case with A. lacustris except the swimming, rather they crawl quickly around the aquarium in search for the female to copulate with. Once the male finds the female he will grasp the female tightly underside to underside in a 'hug' embrace, he will then fertilize the female. This embrace can last minutes or hours depending on the male. Eggs will soon become visible and as described above hatch within 25-30 days*. This species is a cold water crustacean so you must remember that, breeding will cease if the temperature goes above 22 Celsius. Keep them in a mature mulm filled aquarium with leaf litter (I use oak leaves) with plenty of hiding spots and moss, a 8pH and 15 Celsius and before you know it you will have berried females. Feeding Surprisingly my A. lacustris do not eat commercial foods, I feed mine cultured white worms which are perfect as they grow to a max size of 3cm and survive underwater for several days. I also add snails to my aquarium as the crabs feed on their feces. Funnily enough baby crabs will eat the white worms too once they are 2 instars old, so it is not uncommon to see a 2mm baby crab hanging on to a 2cm long white worm! I feed my crabs every 3 days and small amounts of the worms to reduce water quality issues. Common questions I am asked As I was the first person in Australia and the world to raise fully tank raised F2 offspring i have come across many commonly asked questions. "can I get these crabs in country x?" so far you can legally only get these crabs in their native geographical regions, however once these crabs are even more commonly bred their popularity over the Thai micro crab will be clearly abundant simply due to their ease of breeding which you know, therefore I wouldn't be surprised if these hit the international market once they're being large scale bred. "Do you have any for sale?" when I have crabs for sale I have a waiting list, If you want to ask questions or be on the waiting list email me: [email protected]. "can these go with fish x?" if the fish is 4cm or less they are fine generally, my opinion is keep the species only or with shrimp which leads to the next question "are the shrimp safe" and yes they are, however they are naturally scavengers so if you have dead or sick shrimp they will eat them, if your shrimp are healthy they will not predate on them. "how long do they live for?" they live for around 2-3 years+. "why are all my crabs dying" this question is addressed below; Major issue that needs to be addressed Since my first sales of A. lacustris I suddenly saw a spike of ads for them in Australia, unfortunately I could tell the individuals for sale were all wild caught and at best had only lived in an aquarium for a couple weeks of their life. This then would result in people encouraging the decimation and local extinction of the species in our waterways due to peoples greed of wanting to make a quick buck off this amazing native species. The crabs that I breed and sell are all aquarium raised individuals ONLY, I have put time, money and effort into the crabs I breed to ensure I do not impact the wild populations and offer aquarium suited specimens for people wanting to keep them. I have had a plethora of emails from people asking me why crabs they had sourced outside of my individuals had suddenly died off, this is simply due to the fact these crabs have not been aquarium raised and selectively bred for years like mine have. I find it horrendous that people think it is okay to collect many wild individuals to then sell knowing full well they will die within around a 3 month period just for their sake to make some 'fast' money. So please before you buy from a seller of these crabs ask as many questions as you can to find out how many generations old your crabs are and how long they've been bred for etc. If they cannot supply a high amount of detail or simply quote my articles about them do not buy from that seller. Do not support poachers for your aquarium! This applies with all species, worldwide. Thank you for reading my article, again if you have any questions feel free to email me as I'm always happy to help out ethical keepers and potential breeders of this species. Author and credits: Hervey Doerr-Rolley2 points
-
 2 points
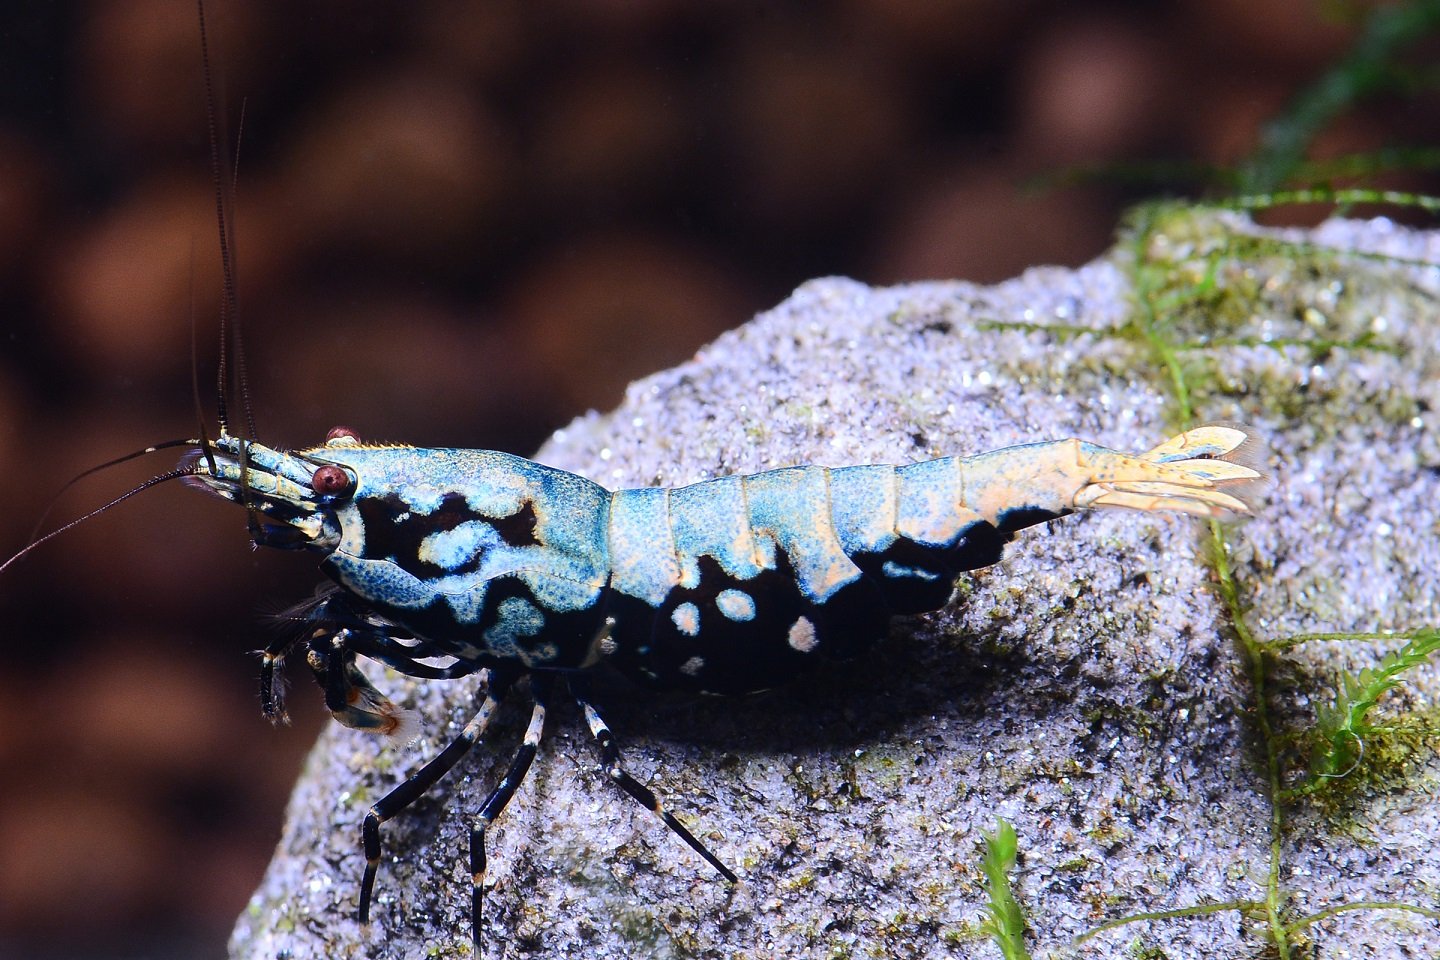 Great New Specie of Pinto, with beautiful color on the back and head, please visit our website at www.aj-aqua.com.2 points
 -
 We are blessed with a beautiful climate here in Australia, arguably mild summer and winter seasons compared to other continents around the world. However, we experience the infrequent heat waves and harsh summer days which inevitably require hobbyists who keep heat sensitive shrimps to explore cooling options for their tanks, perhaps more so for those living in the warmer regions. Shrimps require a consistent environment to flourish and temperature is one of such parameters that can be easily controlled with a chiller. Step 1: Determine the total water volume to be cooled This is simply a measurement of your total water volume to be cooled. Please remember to include the water volume of the sump if your system runs on one. Most tanks are rectangular or cubic shape so a simple Length x Width x Height measurement will suffice. Example: For a 4’ x 18” x 18” tank, 120cm (L) x 45cm (W) x 45cm (H) = 243,000 cm3 = 243,000 ml = 243L Step 2: Select a chiller based on total water volume to be cooled Chillers are usually rated to cool a specific volume of water to a set temperature below ambient air temperature. Simply select a chiller that is rated to cool the water volume calculated in Step 1. The general rule of thumb is to consider a chiller that is one size larger than what you require in order to be energy efficient. A chiller works a lot harder if it kicks in frequently. Selecting a larger chiller that kicks in less often can save you money in the long run. Example: With reference to the example in Step 1, (a) Hailea HC-100A is rated for 50L to 220L*. (b) Hailea HC-130A is rated for 50L to 300L*. (c) Hailea HC-150A is rated for 50L to 400L*. Based on the above specifications, the HC-100A would not be adequate for our purpose. While the HC-130A is rated appropriately and adequate to cool 243L, I would select the HC-150A following the general rule of thumb to go one size larger. The efficiency of a chiller is affected by a number of factors ranging from ambient conditions, physical location of the chiller, flow rate, whether the air filter has been kept clean, etc. It is also dependent on the cooling requirements to your specific environment. If you live in a very warm region and you would like to cool your tank 15 or 20 degrees Celsius lower than your ambient air temperature, you might have to consider a chiller that is two sizes larger. Step 3: Select the appropriate flow rate to drive the selected chiller The appropriate flow rate to drive the selected chiller is an important consideration. If the flow rate is too slow, the water within the chiller gets cooled too quickly and the thermostat switches the chiller off. Warm water then enters the chiller triggering it to kick in again within a short period of time. This is not energy efficient and frequent kicking in of the compressor would result in more wear and tear. If the flow rate is too fast, the water flows through the chiller too quickly to be cooled effectively. The chiller takes a longer time to cool the water in the tank, which is also not very energy efficient. Example: With reference to Step 1 and Step 2, the Hailea HC-150A has a recommended flow rate of 250lph to 1,200lph*. We need to consider a few things before we can decide the appropriate flow rate for the Hailea HC-150A. This depends on how you would like to drive the chiller. Below are 3 typical scenarios on how most hobbyists would drive their chillers. Canister filter A canister filter’s flow rate is usually rated without any filtration media (i.e. an empty canister) or without taking into account any inline equipment (e.g. inline heater, UV, pre-filter, CO2 diffuser, etc.). If you plan to have other equipment connected inline to your canister filter, I would recommend getting a canister filter that is rated on the higher side of the chiller’s recommended flow rate. Also, as the canister filter gets cycled and matures, dirty filtration media, hoses and pipes would also reduce the flow rate. In this instance, I would recommend getting a canister filter rated at 800 lph to 1,200 lph. Sump If you are planning to drive your chiller from a sump pump, you could potentially select a sump pump that is higher in flow than what is recommended for the chiller. The flow rate through the chiller can be easily adjusted by teeing off from the sump pump and controlled using a valve. This also allows you to ‘future proof’ your design if you should add more equipment in future (e.g. fluid reactors, UV, etc.). In this instance, I would recommend getting a sump pump of 1,200 lph to 2,000 lph, factoring in other considerations like pressure head, hose/pipe diameter, etc. Dedicated pump If you should elect to drive the selected chiller with a dedicated pump, with no intention of connecting any other inline equipment, I would recommend selecting a flow rate that is slightly above the mid-range of the chiller’s recommended flow rate. In this case, I would select a dedicated pump of around 800 lph. A dirty impellor would have a slower flow rate so it is recommended to clean your pump impellor periodically. A few tips: Locate the chiller in a cool location away from direct sun. Do not enclose the chiller in a confined space (e.g. in the aquarium cabinet) without proper ventilating devices (e.g. exhaust fans, etc). Clean the air filter of the chiller (if applicable). Connect your chiller as the last piece of equipment before the water is returned back to the tank. You would want filtered clean water to be passing through the chiller as it is easier to clean canister filters, sump pumps or dedicated pumps than it is to flush out a dirty chiller. *Specifications are taken from Hailea website (http://www.hailea.com/e-hailea/index.htm) as at 21 December 2015.2 points
 -

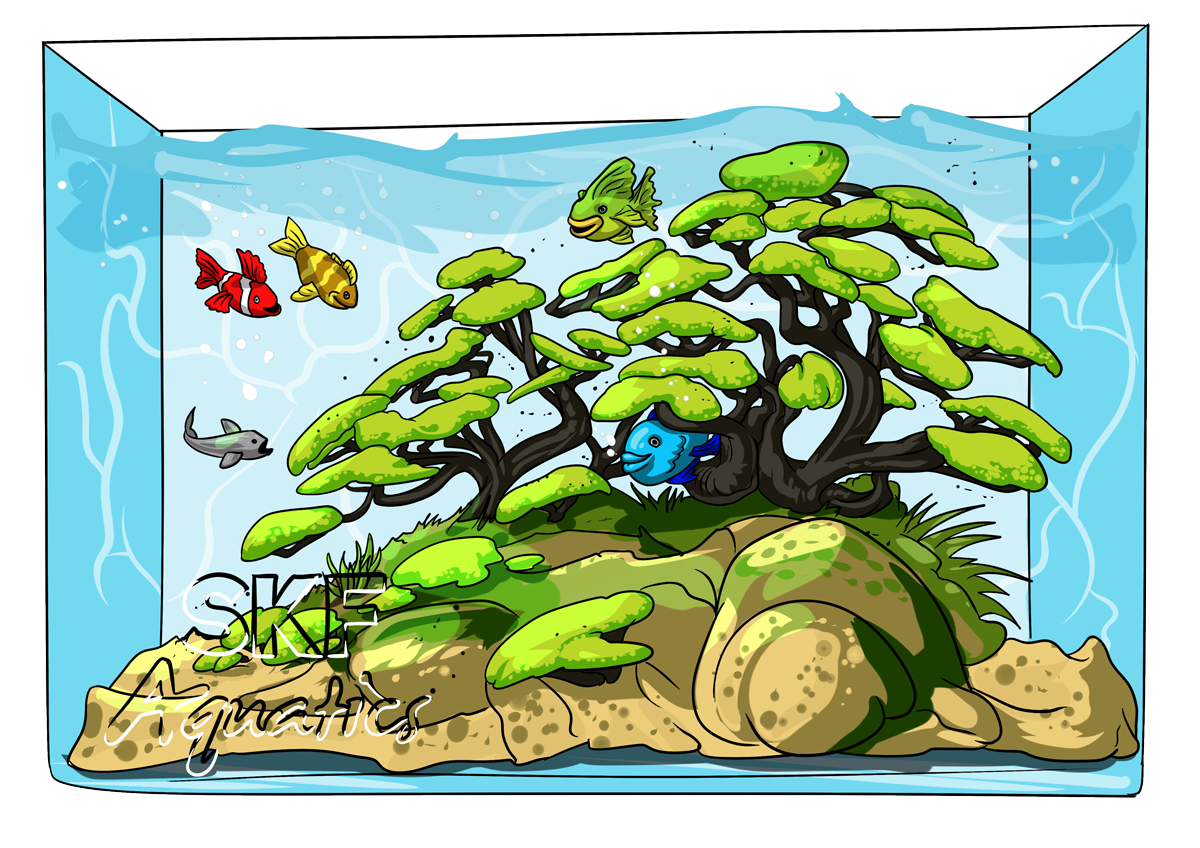 dding an aquarium to your landscape must be the ultimate due to its unique nature and aesthetic value. Although it may seem a complicated art, aquascape has been in existence for several decades, and thus one can borrow some of the previously used ideas and add their personal touch. Some of the old ideas include adding rocks and wood in the aquarium. New aquarium trend In the recent past, it has become impossible to talk about designing a landscape without mentioning the use of aquarium driftwood. One of the reasons is because Bonzai offers landscapers the choice of many colors and sizes. Most importantly, Bonzai can be crafted so to suit unique needs but at the same time maintain its natural feel. Similarly, Bonzai driftwood has a become a trendy design idea in aquascape for its ability to create a natural scene Noteworthy; aqua scaping involves a lot of science because of the aqua-life involved. On the other hand, it involves exhibition of beauty which should not be lost in the midst of preserving the aqua-life. It is, therefore, a tough balance of beauty and life because having an aqua-life is solely not about raising fish. To landscapers in the aqua space world, bonsai driftwood is the ultimate accessory. This is because bonsai driftwood carries with it an extraordinary touch of beauty but at the same time provides the much-needed safety for the qualify. Maintain lower PH level Foremost, aquascape with bonsai works to soften the PH level in water which in turn lowers the PH level. Specifically, bonsai contain tannic acid that softens the water thereby lowering the PH level. The lowering of the water PH can be very beneficial more so for fish species that grow well in an acidic habitat as opposed to the natural PH. Also, it has been shown that bonsai makes the aquarium look more natural by making the water look natural. In fact, the water resembles natural environments such as rivers. Moreover, bonsai driftwood is now available as a handcrafted piece that binds the fragments of wood considered aquarium- safe together. The bonsai driftwood is crafted in many shapes and sizes and uniquely imitates a beautiful underwater tree for the aqua space. More so, aquarium driftwood a proves an ideal piece in aqua space as it can be used to change the natural hue of water. Noteworthy, Only certain species work in this regard. Therefore where one wishes to have an aquarium with slightly differently colored water, they should ascertain that they use the correct species. Another benefit is that bonsai driftwood is a source of food for the aquatic species. More so, bonsai driftwood is rich in nutrients for fish. Some of its nutrient content are ignin and cellulose. In addition to acting as a safe hide away for fish, bonsai driftwood is beneficial as it provides an ideal habitat for the good bacteria. The good bacteria works to eliminate the harmful substances that may be contained in water such as nitrates and ammonia. Remember, the key to providing a comfortable aquatic life is providing an environment that is nearly similar to the natural habitat. Bonzai act as a filtration system Further, the bonsai leaves act as a filtration system for nitrates and thus aid in creating a balanced carbon cycle. Moreover, just like most aquatic plants, adding fish tank ornaments in the aquarium helps in the aeration of the water. Essentially, aerating the aquarium is saturating the water column with oxygen thus making the water an ideal space for the fish to thrive in. The wood, while undergoing photosynthesis will release oxygen and consume the carbon dioxide that fish respires. Besides, Bonzai driftwood is a 100% natural and therefore does not contain any chemicals that may be said to cause harm to the fish. Though the wood releases carbon dioxide at night, this has been proven to have no detrimental effect on the fish. Besides, having driftwood in your aqua space makes the fish more comfortable. This is because the fish will feel more protected as they have a place to hide when they feel danger around them. The twisted nature of bonsai driftwood the fact that and works well to give the fish a safe hiding space. To add to this beauty, landscapers should consider layering the bonsai driftwood with rocks. Most importantly, if considering to buy bonsai driftwoods from aquatic shops. Also, ensure that there is enough space to place the driftwood because the wood tends to be large.2 points
 -
2 points
-
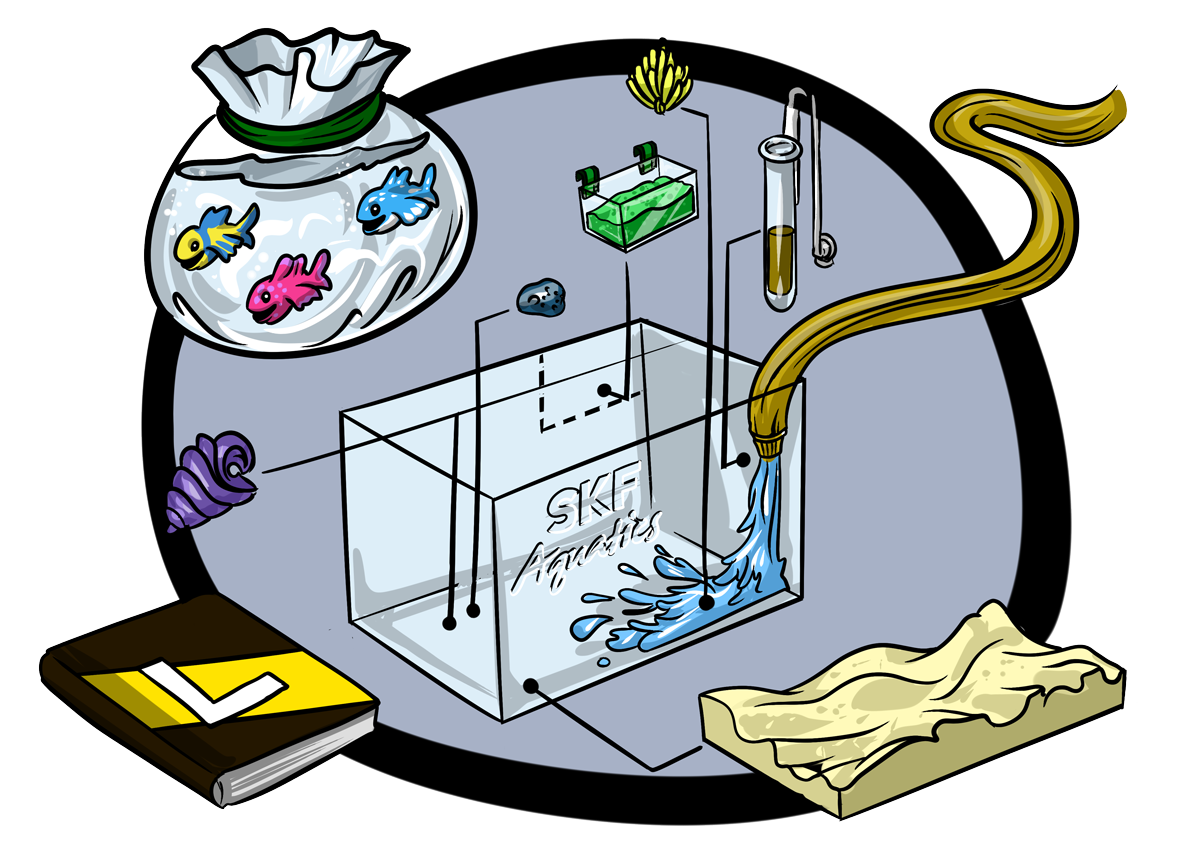 If you are setting up a new aquarium, here is a short primer on how to set up your aquarium properly and efficiently. It may seem daunting at first, but assembling your new aquarium is easier than you think. Get all the aquarium materials ready First get all the aquarium materials ready by washing them thoroughly with warm water. Don’t use commercial soaps and detergents as they are toxic to fish. Stick to the most common and the simplest aquarium ornaments. Sift the gravel over a bucket and drain, repeating the process until you are sure that the gravel is debris-free. Fill your tank with water and set up equipment The next step in the process is to fill your tank with water. Initially fill around 30% of the tank using room temperature water. You can add the rest of the water right after the internals such as airline tubing, live or plastic plants and other ornaments are added. The air tube is an essential part of the aquarium as it helps with the oxygenation of the water. Plants are generally added to hide equipment, help with the aqua scape or simply aid in the tanks biological ecosystem. The air pump, power filter, and heater are other types of equipment that should be added. De-chlorinate You need to treat the water in the aquarium to remove chlorine, which is harmful to your biological filter and could be lethal to your fish. It is important not to overdose on de-chlorinators, as they can have an impact on water chemistry. Cycle your aquarium When an aquarium is cycled, it means that you cultivate or grow a bacteria bed in your tank, specifically in the biological filters. The filters will grow bacteria that digest ammonia which converts to nitrite, which is naturally produced and lethal to fish, shrimp, and coral. Controlling these lethal elements is done by introducing healthy nitrifying bacteria into the aquarium. Before you add fish or shrimp, an aquarium must be cycled properly. This is called the fishless cycle. If you place all your fish or shrimp inside the aquarium without the cycling process, chances are they will probably die within a few days. Cycling your aquarium takes time and it’s important not to rush it. In some cases, it has taken 6 – 8 weeks to properly cycle a tank. Adding the inhabitants Before adding your livestock, it is imperative to test the water. Specifically, the levels of ammonia and nitrite. You need to make sure that these two toxic nitrogen compounds are non-existent in the tank. Wait for two months before cleaning your new filter to allow significant growth of good nitrifying bacteria to populate. Acclimatise the livestock Acclimatising your livestock is a very important procedure because it helps your newly-acquired fish or shrimp adjust to their new habitat. Even a minor relocation can affect them because of changes in water parameters. Setting up a new aquarium takes a lot of planning and patience. Just follow the basic guidelines and the recommendations in this primer, and you will find that owning an aquarium is fulfilling and enjoyable.2 points
 -
 Melanoides tuberculata, commonly known as Malaysian Trumpet Snails (MTS), originated from all over Africa and Southern Asia. MTS are generally introduced into fish tanks accidentally by being attached to new plants or used aquarium decorations. They can come in a range of shapes, patterns and sizes. Opinions on MTS are divided with most having a strong dislike to them due to how quickly they breed and take over a tank. However, these snails can also be beneficial. As they move eating detritus and leftover food under the substrate, they are also aerating it. This in turn supports root growth and air exchange which are great in planted tanks. How Do They Breed Malaysian Trumpet Snails breed extremely fast, particularly in good tank conditions. The rapid breeding abilities of the MTS is one of the main reasons they are a concern to aquatic tank keepers. One method that works well with our members here is to use some vegetables like a sliced cucumber. Turn the lights off, wait a little while and remove. You can also limit their population growth by being strict with your feeding regime and removing any uneaten food from the tank. Take note though, without the use of a chemical deterrent, which is harmful to your other invertebrates, it will be unlikely that you can remove 100% of them. What Do They Eat They are not difficult to feed. Primarily, Malaysian Trumpet Snails consume large amounts of algae and detritus. They are also good scavengers – eating leftover food and fish waste as they burrow underneath the substrate; thus, doing their share of cleaning the tank. They are especially helpful to aquarists who collect messy freshwater fish, including goldfish, and who keeps live plants. No, MTS generally do not eat live plants. You can also supplement their diet by feeding them with leafy vegetables or any plant-based fish food. Just don’t overfeed them as this will cause a snail outbreak. Water Parameters These snails are not difficult to care for as they only require minimal attention. If the tank is good enough for your fish and/or shrimp, there is a good chance that it will be fine for them. That said, if you want to get technical, they should be kept in a freshwater tank range with the following water conditions: water temperature from 21° C to 26° C pH of 7.0 to 7.5 Sources: Vogler, R. E., Núñez, V., Gregoric, D. G., Beltramino, A. A., & Peso, J. G. (2012). Melanoides tuberculata: The history of an invader. Chapter, 3, 65-85. Image credit - @Paul Minett Image credit - Nogi2 points
 -
2 points
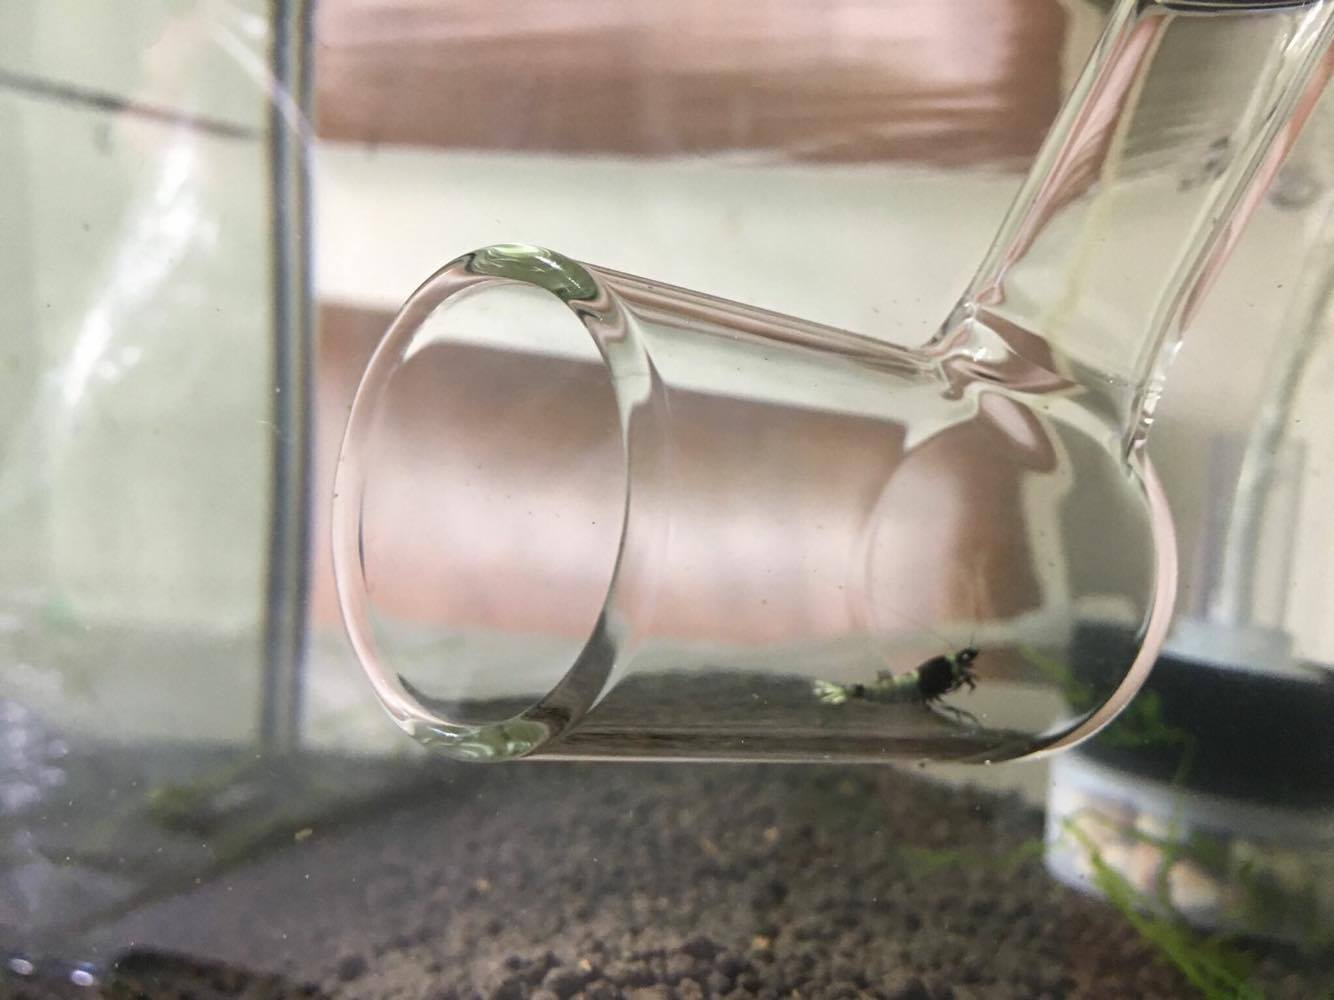 Glass Shrimper Net: Photo Credit: practical fishkeeping UK I was very kindly gifted one of the new Glass Shrimper Nets by @newbreed at the National Shrimp Championships- Thank you Jamie. Review: Look and feel: The glass is light, but thick and strong enough to resist bashing against tank glass and during washing. The hollow handle is 40cm in length. First thoughts: Because the Glass Shrimper net is unlike any other net I have handled before, it took some getting used to wielding it correctly and moving at correct angles and directions under the water. I felt like a bit of a buffoon at first! What I like about it: -The shrimp are not stressed when you try and catch them, most get into the glass net themselves. A slow to moderate speed approach does not upset them at all. -When you put your finger over the handle hole at the top, you can lift the shrimp out of the tank without them being exposed to air and out of the water at all, avoiding stress. I found this really cool when catching shrimp for sorting. -The shrimp move into the handle when you hold the net horizontal and this enables excellent viewing: when put in front of a light, you are able to see dark shrimp saddles that are usually not visible with the naked eye in dark shrimp like king kongs or dark tigers. I also found this excellent for culling shrimp as I could inspect them closer than I could have ever done before without stressing them too much, making sorting easier. - I am able to sterilise this glass shrimper net properly unlike regular nets - I also successfully used it as a glass feeding chute to transfer powder food into a feeding dish without getting lost in the current by injecting the food directly into the handle and tipping it out on the feeding dish without getting my hands in the tank. Tip: this net works on the principle that you put the Glass shrimper net against a surface like the tank glass or moss until the shrimp swims to the back or to the handle, then you can move the shrimp to the water surface. It will not work in cornered surfaces for obvious reasons. Because of the reduced shrimp stress and easy close-up inspection, I give this very useful Glass Shrimper net ???? out of 5 stars.2 points
 -
2 points
 Spiny Marsh Snail The Spiny Marsh Snail is an Australian native that is rarely found in the trade. This is a shame as it has an interesting shell shape and is well suited to aquarium life, providing a few simple conditions are met. The Spiny Marsh Snail was first described by Linneaus in 1758 as Helix amarula, with a subsequent remaining of the genus to Melania in 1822, and finally to Thiara in around 1943. It is found from the east coast of Africa, through Madagascar, north to the Philippines, through the Solomon and other Pacific Islands, and along the north-eastern coast of Australia (See Schutt & Glaubrecht, 1999 for a global distribution map). Given this widespread distribution, it is surprising that its distribution in Australia is limited. It is found from the Bloomfield River (south of Cooktown) to approximately 100km south of Cairns. Thus it is limited to around 6 major tributaries. The Spiny Marsh Snail is found in the lower freshwater sections of rivers, generally just above the tidal range. It is probably tolerant to low levels of salt as it would be exposed to brackish conditions in drought years, and therefore may be suitable for brackish aquaria. This requires further investigation. In its natural habitat, the Spiny Marsh Snail is found amongst rocks and pebbles, but also sandy areas, which is where I found them in the Johnstone River. In aquaria, they regularly bury themselves, especially when exposed to bright light. However in low light, or if the tank is densely planted or shaded, they are happy to move on top of the substrate and even climb the walls. This makes them useful for removing dead spots in substrates, but may mean they could dislodge plants in heavily planted aquaria, but I have not kept them under these conditions – something to watch for. I have noticed they are particularly active at night and may graze algae from the glass during this time. I've seen no indication that it eats plants, and indeed plants are generally absent from its natural habitat, other than Vallisneria or Aponogetons. They happily eat prepared foods (shrimp/fish food) as well as some greens (cucumber/zucchini). However, they seem to spend most of their time grazing. The Spiny Marsh Snail grows to a maximum size of approximately 50mm, perhaps slightly larger. From what I've seen, they are fairly slow growing and long lived. This makes them excellent candidates for aquaria, because unlike other pest snails, it makes it easier to control their numbers. Indeed breeding in aquaria is unlikely because it is thought the Spiny Marsh Snail releases planktonic larvae that move into the brackish/salty areas of rivers before migrating back up the river to settle. However, the true breeding habits of this snail are still unknown and present a challenge for aquarists. Nevertheless, these characteristics make it unlikely that the Spiny Marsh Snail would ever be a pest in aquaria. One condition that seems to be an absolute must for this snail is that pH needs to be 6.5 or above. In acidic conditions (pH < 6.0), the shell dissolves and the snails refuse to come out of their shells. If your snails are not active, check your pH. That said, this doesn't mean that they require lots of dissolved minerals (e.g. calcium carbonate). The TDS of the Johnson River where I found these was only 28 ppm at the time, so Spiny Marsh Snails may be the perfect tankmates for Neocaridina shrimp (cherries) and Australian native shrimp, but less so for Caridina (crystals, bees, etc.). So if you are after a snail that is good looking, hardy, a good algae eater, turns over the substrate, easy to feed, won't bloom into a pest population, is native and presents a breeding challenge, I highly encourage you to track down some Spiny Marsh Snails. Why not try a biotope tank with Vallisneria or Aponogetons and Caridina gracilirostris? Some additional material worth reading. Field trip to Johnson River, Queensland Australia with habitat description and pictures. http://www.naturkund...brecht_1999.pdf Atlas of Living Australia – shows the collection points of Thiara amarula in Australia. http://bie.ala.org.a...e-f394430ec676#2 points
 -

 I utilised this method when moving house last January. I have given this as advice on the forum previously a long time ago but not written as an article. Unfortunately i didn't take photos because i was moving house but i have obtained images of the main items required and done an image in paint to explain the holes. i hope this will suffice?. You will require: 20 litre bucket with lid (Source from bunnings or masters) Sponge filter I recommend the ones which have suction caps and a minimum of two if you go for single sponge. Optimum at least 2 dual sponge filters Battery operated air pump. Air hose Drill or sharp pointed object. Excess plants (the more the better) pH buffering substrate. Preparation Step 1: Ensure your sponge filters are running on your existing tank for as long as possible to ensure you have beneficial bacteria culture growing on the filters. The longer they are running the better. Step 2: Take the lid from your bucket and make holes in the lid. The holes should be big enough for your air hose to fit through one of the holes and I did the extras to ensure new air was able to enter the bucket. Mine was done in a similar pattern to this Step 3: Add existent tank water to the bucket. I would recommend at least 3 quarters full as if you are unfortunate enough to suffer an ammonia spike etc (worst case) the more water the lower the impact in theory. Be mindful of how much you add due to holes in the lid, the more the water the more chance of spillage. Step 4: Add some of your existing substrate to the bottom of the bucket. I used benibachi for the ph buffering ability which had already been in my tank. I felt it would assist in reducing stress due to resembling the tank. Step 5: You want to add the sponge filters to the inside of the bucket and thread your air hose through the holes in the lid. Step 6: Add any plants you have available to your bucket. The aim of the plants is to assist the bacteria on the sponge filters in maintaining healthy water due to the small amount. I utilised needle leaf java fern and it also provides a food source for the shrimp. Step 7: Add your shrimp and turn on the sponge filters and replace the lid on the bucket. Step 8: Store the bucket out of direct sunlight during travel and storage at arriving destination to prevent major fluctuations in water temperature. I had approximately 5 CBS inclusive of shrimplets in a bucket utilising this method alive for close to two weeks. They survived 8 hour car trip and then about 12 days whilst my tank cycled being set up in the new house with temperatures averaging over 35 degrees a day. TIPS: Prepare your sponge filters in the tank and have them running for as long as possible prior to transfer. The later you leave your shrimp to be added to the bucket the better. Keep your bucket out of direct sunlight to avoid over heating and mass fluctuations in water temperature. Avoid over feeding your shrimp as you dont want an ammonia spike from left over food. Depending on amount of plants these should be sufficient to supply micro organisms to feed on the leaves. Battery air pumps are also able to be used in a black out so dont throw them away.2 points
 -

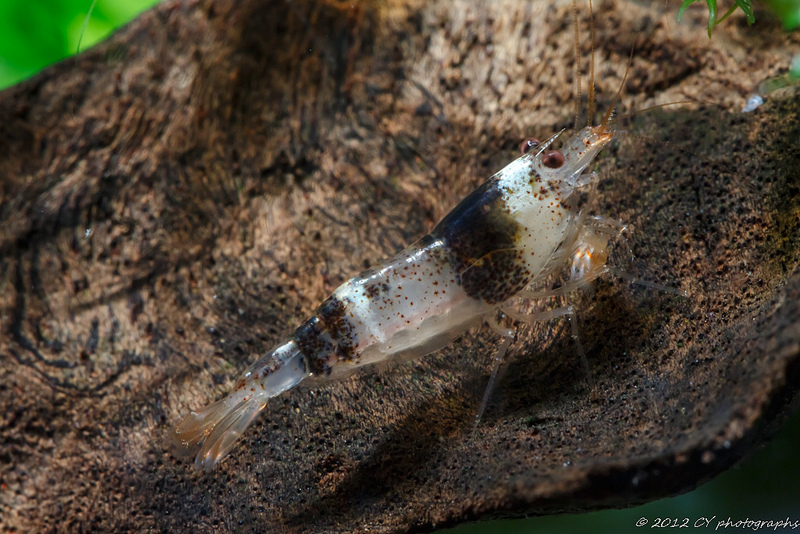 C. zebra is found predominantly in the head waters of the Barron rv, Tully rv, Johnston rv and the Herbert rv on the Atherton table lands. There is also a population in the Tully gorge and no doubt in other lowland locations, these places are inaccessible for the most part because of the rugged terrain and dense forest. They are a rain forest shrimp and die out on disturbed creeks, most likely from siltation that occurs when they are disturbed. Average environmental tests from April to October upper Tully gorge Air temp 25 Humidity 60% Water temp 21.6 PH 7 KH 0 GH 0 Under water visibility 3mt+ Flow rate: 1 to 2 mt pr second Microsiemens 35 PPM 18 Height above sea level from 40 meters to 300 meters No flood readings taken, the access is too dangerous in the wet. Readings October/ November and March/ April Air temp 30c Humidity 85%+ Water temp high flow (not flood) 18c Water temp low flow 26c PH 7.4 av KH 0 GH 0 Under water vis even in high flow (not flood) 2mt+ Flow rate 3mt pr second Microsiemens 10 PPM 8 Height above sea level from 40 to 300 mts. These undisturbed rain forest streams run clear even in flood. There are times of the year when the PH will fall to 6.4 or there about. This is caused by the massive leaf drop at the start of the wet season and the accumulation of leaves from the previous season. The first flood washes the leaf litter away. These are all personal observations and tests taken by myself. I have some of the scientific info to add as well like, who described them where they were found and if interested some of the DNA work. Bob (northboy)2 points
 -
2 points
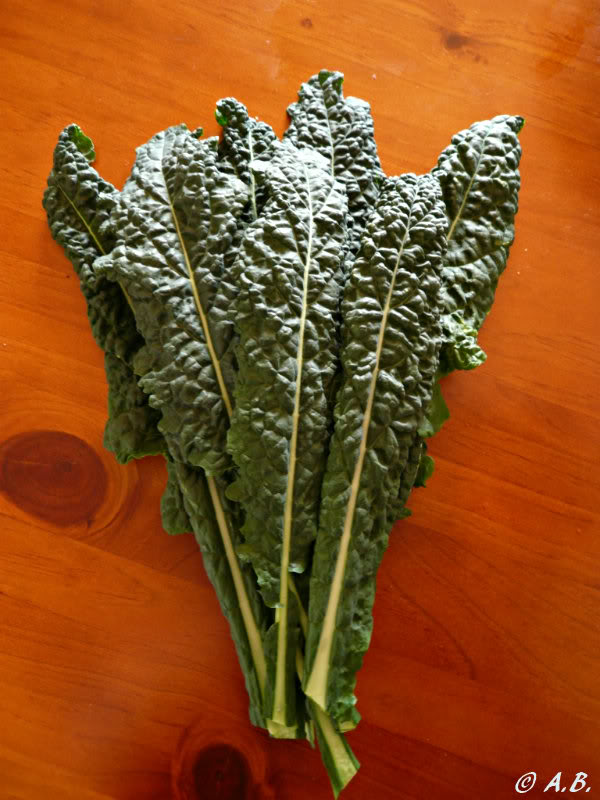 Why feed your shrimp Kale?-135mg of vegetable calcium per 100g serving! Easy to grow, Cheap to buy. Instant attraction for the shrimps. They will be crawling over the leaf in no time :) User Feedback. How to prepare Kale? Blanch in hot or boiling water for 1-2 minutes. Then drop the amount needed into your tank. If it floats, skew it with a bamboo skewer and stab into the substrate. How to grow Kale? Wait..... This is Tuscan Kale from Bunnings bought in a pack of 3. The leaves are about 30cm long.2 points
 -
 2 points
 There are two people that I have to give credit to for teaching and helping me develop this technique. 1. Blue Bolt. He was my sensei and I was the grasshopper when I first lost a pregnant female. I was going to dispose the females and told him via sms from one friend to another and he said NOOOOO WAIT!!! He taught me how to cut crap up aka dissect the poor dead females. 2. African cichlid enthusiasts who strip a lot of eggs from mouthbrooders have shown me how to save and tumble eggs. OK so here's how to do it! step one - Grab a little container and lid to put the dead female in it. Get a cheap surgery/dissection kit (costs $30?) with a scalpel, or alternatively use two toothpicks and a blade. This is mine Now using the toothpick to hold the body, legs and head (one by one), cut off the body parts from the eggs and try to get almost every single milligram of meat away from the eggs. When you are done with that, slowly seperate each egg individually by using the toothpicks with each hand. It took me over 30 mins the first time, so yes this is a long process but worth it. I got it down to 10 mins by my third try. This is what the end result looks like (not for the faint hearted and it breaks my heart doing this every time. I have done it 6 times in the past year). With the eggs, you can siphon them out with a baby syringe or something similar. You can tumble the eggs in two ways, both have been very successful for me. method one_ Place the eggs in a one litre circular container with an airstone that will tumble the eggs. Be careful with the amount of bubbles; enough for them to constantly move BUT NOT LIKE A WASHING MACHINE! To help prevent fungus, add two to three drops of methyl blue. method two, my prefered method. Get a breeding box where the water is constanly running. Using a baby strainer, add the eggs into it with an airstone below and let the air bubbles tumble the eggs. ...and there you have it. Always keep a look out for fungused or unfertilized eggs. Remove eggs if they are opague or look a little bit like cotton. Good luck to all you fellow shrimpies out there. Remember, always look for a positive in anything that goes wrong, cause there's usually one :) p.s the last photo was of a recent death a week ago. i will post up a photo of the babies when they hatch as proof of this method and there u go! so far, half are hatched they are at the top left. and so tiny~!!! there u go guys. all hatched2 points
 -
1 point
 Australian Freshwater Crab Freshwater crabs can be found in the tropics and subtropics in most parts of the world. Out of a total of 6,700 species , there are more than 1,300 described species of freshwater crabs,and many more currently unknown to science. The IUCN (International Union for Conservation of Nature ) Red List has assessed all described species as “ data deficient”, as data on their ecology, reproductive biology and habitat requirements is lacking. (Austrothelphusa Transversa) The majority of species studied to date tend to occur in small geographic areas, have poor dispersal abilities and low fecundity (the ability to produce an abundance of offspring) thus making them highly susceptible to land use alterations, river regulation changes and climate change. Scientists in Australia are investigating the biology and ecology of our remarkable freshwater species in the tropical regions of northern Australia and the Torres Straits. Very little is known about many of the far northern species, however science has discovered that they have an amazing lifecycle, these crabs will dig tunnels in the creek banks at the end of the wet season and spend the hot and dry times in a prolonged state of torpor/dormancy, emerging again at the onset of the next seasons rains presumably to feed and reproduce. Females of the species A. Transversa have been documented carrying their young under their abdomen underground during the dry season and when the wet season arrives they will leave their mother growing up quickly before the next dry season. A.Transversa The most common species of freshwater crab found in the aquarium market in Australia are the Holthuisana sp. (Austrothelphusa) There are several sub species in this order: A. Agassizi A. Angustifrons A. Receki A. Tigrina A. Transversa A. Valeatula A. Wasselli With the most common on the market being A. Transversa and A. Agassizi : A. Agassizi (Freshwater Brown Back Crab) CARE: The two species A.Agassizi and A.Transversa are by nature amphibious and should be provided with an “Island” where they can leave the water at will . It seems they require atmospheric air for their gills to operate properly. In nature these crabs frequent inland rivers and billabongs in northern Australia that dry up in the winter. Water Quality: Temperature: 18 deg C. to 25 deg C. pH: 6.5 ------7.5 General Hardness Soft /Moderate The freshwater crab can not survive for long in very acid water. Make sure their wateris free from ammonia,nitrate and copper. Feeding: A true scavenger, they will eat most types of sinking fish food, blood worms, fresh vegetables and sometimes aquarium plants. Colour and Varieties: The A. Agassizi ( Brown Back Crab) can come in a variety of colour patterns e.g with an attractive pale fawn colour, with a chocolate brown irregular band crossing from front to back of the carpace or even a tiger stripe pattern. While the Colours of A. Transversa is mainly a shade of brown from yellowish to deep redish. Housing: Both species are great escape artists and can easily climb the silicone in the corners of most tanks. I have had them climb up air hoses and the water pick ups for the filters. They are fairly peaceful and can be trained to come to your fingers for food. If kept in a community tank ensure that there are no slow fish as the crabs are not adversed to a little fresh fish in the m Disclaimer: A. Transversa The information provided here is of a general nature only. Citation: The IUCN red list Dr Nathan Waltham: Ecology of Freshwater Crabs in Tropical northern Australia1 point
 -

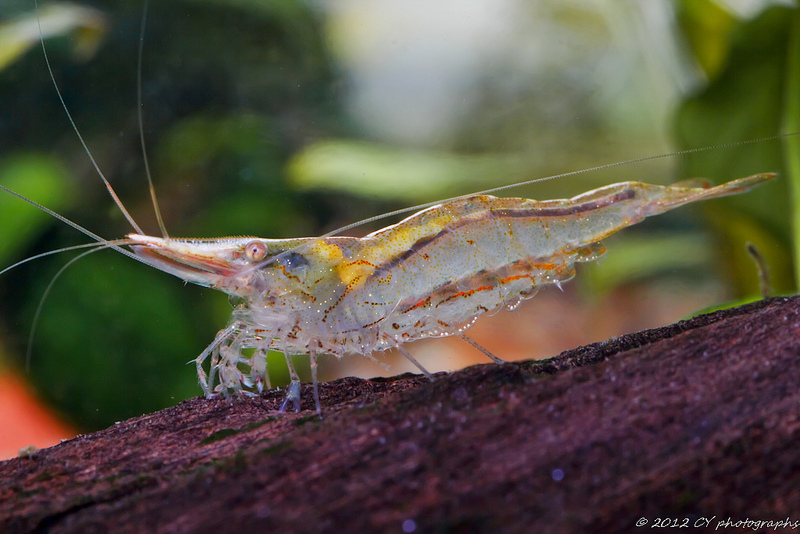 This is a native Australian shrimp species found in the NT that is renown for eating various types of algae, especially string type algae. The males are smaller and less colorful than the females. This shrimp is a relatively large species and can grow to approx 5cm. There has been little success in breeding this species in fresh water. The females become berried easily, but the fry do not survive. It is thought that only brackish water contains the food that the fry require.1 point
 -
 Common medication used in Aquariums Comprehending the active ingredients of medication can be as important as understanding what the medication treats. Here is a list a few of the more common medication that is found in Aquarium medication. It is probably also important to remember that friendly nitrifying bacteria aka nitrifiers, aka beneficial bacteria can also be impacted by medication. Therefore, knowing what each active ingredient does is all the more important to avoid killing off the friendly bacteria. On the other spectrum, we have the unfriendly bacteria which are pathogenic causing bacteria. Pathogenic bacteria are opportunistic, as long as the fish is healthy the symptoms are not perceptible. Small amounts of bacteria are always present and a healthy, stress free fish or shrimp’s immune system is able to cope with battling these harmful bacteria. It is when stressed (heat, ammonia, nitrite, high organics, low dissolved oxygen etc.) or through injury that the bacteria numbers multiply and overwhelm the bodies immunity system that we start seeing signs of disease. This article will also cover non bacterial medications and medication used for parasites. Hopefully the next time you pick up a bottle of medication for your pet, you will know exactly what the active ingredients do and how to apply it to use in your particular situation. Antibiotics vs Antibacterial There are two terms when dealing with medication that needs to be clarified. Antibiotics are naturally produced by another organism, be it plant or animal or microorganism, that kills the pathogenic bacteria. Antibacterial substances are manufactured artificially to combat pathogens. We will use the term Antibiotic going forward in this article to refer to both terms. Which antibiotic to be used for a pathogen is determined by the pathogen’s cell wall. Pathogens have either a thin or a thick cell wall. The method of determining the main types of bacteria cell wall is a technique called Gram Staining. Where dye is used to stain the bacteria. A blue-purple colour indicates a thick cell wall and is called “gram positive”, while a pink-red colour indicates a thin cell wall and is referred to as “gram negative”. Gram Positive antibiotics prevent the development and repair of the cell wall which eventually will lead to the cell content leaching out, consequently killing the bacteria. Gram Negative antibiotics attack by interfering with the protein synthesis (metabolic process) therefore preventing the bacteria from multiplying and growing. Of the two types, Gram Negative is a lot more common in aquatic diseases. Using the correct medication is important for the pathogen, as Gram positive antibiotics will not have any effect on gram negative bacteria and vice versa. Keep in mind that beneficial bacteria in our aquarium that does the nitrifying are Gram Negative. Some antibiotics may also kill off beneficial bacteria, especially the gram negative medication. Using a Hospital tank for treating sick fish or shrimp is always a good idea. Separating the patient into a smaller tank has many benefits like reducing the required medication dose, reducing the impact of medication on healthy livestock (remember that sentence above about reducing stress), eliminating the risk of harming beneficial bacteria, being able to observe the progress of the treatment without trying to find the sick patient – who will often be hiding. Refer to the article on Hospital tanks for further details. It goes without saying that using the right medication for the disease is essential. It narrows down the treatment time and the types of medication used. This article is not about disease identification. Although we will talk about what diseases these medications will treat. The application, dosage and duration should be strictly followed according to the manufacturers instructions, including any follow up dosages, even if the fish or shrimp looks better after the first treatment. This prevents flair ups again, and reduces the pathogen’s ability to become immune to the antibiotic. The latter is probably more imperative in the long term. The common antibiotics used in aquariums ERYTHROMYCIN treats gram positive bacteria. Some aquarists also recommend Erythromycin to treat cyanobacteria blooms but this should be used with caution and the cause of the cyanobacteria still needs to be addressed. Useful for Fin and tail rot, infections attributed to kidney disease (often not true kidney infections), pop eye. Neon Tetra disease (faded colour). Black Molly disease. Most gram-positive and some gram negative bacteria and fungus. And it’s this small impact on gram negative bacteria that you should be aware of, which could impact beneficial bacteria. I say could in italics because I have not experienced a tank crash personally IF correct dosages are followed. Aminoglycosides sold as KANAMYCIN, NEOMYCIN, and STREPTOMYCIN are active against gram negative bacteria and work well in higher pH alkaline water conditions and is therefore also used in brackish or salt water, especially for Vibrio. It is used to treat many sensitive gram–negative and some gram–positive bacteria. Works well combined with Nitrofurazone for flexibacter (columnaris) (Symptoms: Fuzzy, thin, white coating on the body and fins. Looks like a fungus), as Neomycin is not very good at treating columnaris by itself. Kanamycin can treat many sensitive gram–negative and some gram–positive bacteria. Works especially well in salt water aquariums. Effective for whirling disease, suspected kidney disease, pop eye and dropsy. Works well combined with Nitrofurazone for flexibacter (columnaris) and Pseudomonas-Open red sores or ulcerations, fin and tail damage, fins and tail are eaten away. Kanamycin sulphate appears to prevent bacteria from making their cell walls, so the cells die. Neomycin sulfate is also used in aquarium medications as a broad spectrum antibiotic used to treat bacterial infections and wounds. Some Gram-negative bacteria, and gram-positive, and possibly mycobacterium tuberculosis. Particularly effective with notoriously resistant bacterial strains like Aeromonas, Pseudomonas and Mycobacteria. Neomycin is an excellent choice when soaked in foods for intestinal diseases. Neomycin is not absorbed by the intestinal tract and is therefore effective in treatment of intestinal diseases. But Neomycin can damage the kidneys as it is nephrotoxic, so this is a poor treatment choice for Dropsy. Neomycin is also poor at treating fungal infections. SULFONAMIDE known as sulfa or triple sulfa or trisulfa – Active ingredients are Sulfamerazine, Sulfamethazine, Sulfathiazole. Sulfas have antibacterial characteristics inhibiting the growth of bacteria but do not kill them. Sulfa drugs arrest cell growth by inhibiting the synthesis of folic acid, a component required for growth by bacteria. Folic acid is a large molecule and is unable to enter bacterial cells, so the bacteria must synthesize the compound intracellularly. Animal cells are unable to synthesize folic acid and it must be provided in the diet. For this reason sulfa drugs are not toxic to animal cells. Sulfas are a broad spectrum antibacterial medication. Fin and tail rot, mouth fungus and collapsed fins, columnaris, and hemorrhagic septicemia. Very useful for damaged fins caused by fin nipping. Can be used in combination with Malachite Green or Acriflavin (do not combine with copper sulfate) to increase effectiveness. Sulfas are more effective in high pH or alkaline environments, so sulfonamide as well as aminoglycosides can be used in marine environments. FURANS AND NITROFURANS (Furazolidone, furane, nitrofurazone) are also antibacterial but will lose their potency with increasing pH levels. They are therefore preferred freshwater treatments as is the tetracycline group as they can be used in lower pH environments. Bactericidal for some gram-positive and many gram-negative bacteria causing disease in fresh water. Often used with pond fish to treat Aeromonas infections, and can be used to treat Columnaris, Vibrio, and Furunculus. Also effective in controlling flexibacter/columnaris. Furans are good at treating minor skin infections. Can be used with Kanamycin for Aeromonas and Vibrio. Do NOT use with Invertebrates or Shrimps. Note: Nitrofurazone comes in a yellow powder and can temporarily turn the tank water yellow. TETRACYCLINE is bacteriostatic, that is, it inhibits bacteria from protein synthesis. It interferes with the production of proteins that the bacteria need to multiply and divide (bacteriostatic). This drug will get less effective in hard waters as it readily binds with calcium and magnesium. Gram-positive and gram-negative bacteria. Best used mixed in with food if your pH is above 8.0, as it will not work in pH above 8.0. Marine ulcer disease, cold water disease, bacterial hemorrhagic septicemia (Symptoms: Red streaks in body and fins, or redness in the body. Open sores or loss of scales) and mouth fungus. OXYTETRACYCLINE products are very similar to Tetracycline. Oxytetracycline is the second of the broad spectrum tetracycline antibiotics to be discovered. Both work to interfere with the production of proteins that the bacteria need to multiply and divide. QUINOLONES An antibacterial to treat gram negative bacteria, prevents DNA synthesis and can be used in a broad pH spectrum. Particularly useful on resistant strains of Ich. If your normal Ich meds don’t seem to be effective anymore, try this. Works to control Protozoan infestations, sliminess of the skin and Rams disease (whirling disease). Works great for Hexamita when combined with Metronidazole. Non Antibiotic Medication METHYLENE BLUE work best to prevent fungal and bacterial infections on fish eggs before they hatch. It can also be effective against parasites like Ich and protozoans – though not as effective as the other medications mentioned. Great when used as a dip for topical treatment of parasites, bacterial, and fungal infections. Best used in a hospital tank rather than treating the main tank. Methylene Blue can harm beneficial bacteria, and plants in the main tank. As a result, Methylene blue is used less often to superior products like Malachite green and acriflavin. MALACHITE GREEN Used for it’s antiseptic properties for treatment and control of external parasites of freshwater and marine fishes. Can also be used to treat fungal infections on fish eggs which include Achlya and Saprolegnia. Malachite green is toxic and is not safe for some sensitive fish and invertebrates however. Some research also shows that the toxicity increases in higher pH so medications with Malachite Green should be used with caution in saltwater aquariums. Can be used on Ich, Costia, Chilodonella, Ambiphyra, Cryptocaryon, Epistylis, Trichodina, Oodinium. Can be combined with Acriflavin or Formalin. FORMALIN / FORMALDEHYDE Well known as a preservative, as can be seen in the jars preserving scientific specimens. For treatment and control of the diseases caused by fungi, protozoan and monogenetic trematodes of freshwater and marine aquarium fishes. Including Ich (Ichthyophthirius). Most formaldehyde-based medications work better as a bath or dip instead of being used to treat the entire system, and any of these medications should never be used with invertebrates. DO NOT USE WITH SHRIMP. Formalin depletes oxygen in the water, so aerate the water during treatment. Works well combined with Malachite Green. ISONIAZID An antibiotic used to treat fish tuberculosis (not harmful to humans) cause by Mycobacterium marinum, gram negative bacteria. As can be seem in Discus, Bettas and Gouramis. But thankfully, fish TB is relatively uncommon. The fish is generally unwell for several months and showing signs of lethargy, anorexic. Fin or scale loss and a sunken stomach are also likely signs of fish tuberculosis. Isoniazid works in part by disrupting the formation of the bacteria's cell wall which results in cell death. ACRIFLAVIN HYDROCHLORIDE An antiseptic agent for the skin. Used as treatment of mild bacterial and fungal infections on fish such as mouth fungus, fin and tail rot, fungus, saproglenia. Can also be used for skin parasites such as oodinium (velvet), sliminess of skin, and very mild ich. Acriflavine is generally used for infections based in the slime coat and skin of the fish, not for “larger” parasites like Ich or worms. Parasitic Medications Most parasitic medications need to be used with care, as they can be harmful to sensitive fish, and will most definitely kill inverts and shrimps. COPPER SULFATE Copper has long been used as medication for parasite treatment in aquariums, especially for “Ich”, Oodinium, fungus and protozoan parasites. Sequestered sulfate copper being the active ingredient. Often you see Chelated copper as the active ingredient for some treatments. Chelated meaning “inactivated”, is often used as a safer alternative to sequestered copper. Many algaecides also use copper to eradicate algae. Removal of sequestered copper is difficult. Only EDTA and water changes can remove it – Carbon will not remove sequestered copper. Seachem Cupramine is a very safe chelated formula and is the safest copper for use in the Aquarium, while also being the easiest to remove after treatment. Being a heavy metal, Copper is NOT safe for Inverts, Shrimps or marine/reef aquariums. METRONIDAZOLE Metronidazole is most commonly used as an anti-parasitic medication to treat protozoan and flagellate infections. Used for Hole in the head disease HTH (hexamita), Head & Lateral Line Erosion HLLE, chilodonella, plistophora (parasite disease usually seen in neons and cardinals that causes loss of colour, darting, and eventually death), salt water ich (Cryptocaryon), bloat. Safe for many fish or shrimp that are sensitive to the copper-based alternatives. Most effective mixed with food. FENBENDAZOLE Fenbendazole is predominantly a dewormer, and is used even in cattle, sheep, birds, reptiles and amphibians. Used as a treatment against internal parasites like roundworms, tapeworms, hookworms, calamus worms. It can also be used to treat planaria and hydra. Fenbendazole is very effective against these parasites. It is relatively safe with inverts and shrimps, however, there have been cases where inverts are harmed when using Fenbendazole at dosages safe for fish. In aquariums with inverts and shrimps, start with half the dosage recommended by the manufacturer. Follow up with a second half dose treatment if necessary rather than performing a full dose in one go. POTASSIUM PERMANGANATE Aka PP, can be very useful against external parasites, but can go very wrong if used wrongly. PP is a deep purple colour when used, that turns progressively yellow-brown as oxidation occurs. PP is used against larger parasites like flukes, lice and anchor worms and can be used to treat the entire aquarium or, preferably, as a dip or bath. PP oxidises with air, and should be stored carefully. It also stains fingers and clothes !! As I found out accidentally. PRAZIQUANTEL Praziquantel is an anthelmintic or de-worming medication. And is particularly good at it. Used for gill and skin flukes, tapeworms, flat worms, anchor worms and Schistosoma (a worm that lives in the blood stream of the fish). Prazi however is not very good for treating pinworms or roundworms at all. Prazi is safe for fish, invertebrates, plants or biological filtration and is even used as a dewormer for cats, dogs and even humans. This medication can be used in tank or soak in food. No water change is necessary, but removal of carbon and uv light is advised to maximise the medication’s usefulness. Always complete a full course of treatment. Don’t be fooled into thinking that the fish is cured with the first dose of the treatment. PIPERAZINE Piperazine is a drug that belongs to the family of medicines called anthelmintics. These medicines are used in the treatment of worm infections. Where Prazi fails at treating pinworms, roundworms and nematodes - Piperazine is good at treating these type of worms. However, to be effective Piperazine needs to be ingested with food. Piperazine is heat stable, which means you can mix into food that need to be prepared hot, like agar agar. Always complete a full course of treatment. Don’t be fooled into thinking that the fish is cured with the first dose of the treatment. LEVANISOLE HYDROCHLORIDE (HCL) is another anthelmintic (anti-worm) agent commonly used in large livestock such as cattle, pigs and sheep – and more recently fish. Levamisole HCL is safe to use in aquaria and effective against many internal parasites, especially nematodes, when used in appropriate dosages. Roundworms, Hookworms, and Nematodes species such as Capillaria, Eustronggylides, Camallanus, and Contracaecum are treated by Levamisole HCL. It does not harm the bio-filter, plants, invertebrates or uninfected fish. Levamisole HCL is ineffective for Tapeworms, flatworms or flukes. Use Praziquantel for those. Levamisole HCL is most effective when absorbed through the gut, which means treating the food you feed the fish. Some medication can be absorbed by the skin from the water as well, and Levamisole HCL is stable enough in the water for up to 90 days to do it’s job. Levamisole affects the neurotransmitters and paralyses the worm (spastic paralysis). The fish then passes the inactive worms. Good gravel vacuuming is advised after treatment to remove the paralysed (but still live) worms. It is not ovicidal, which means it will not affect eggs already present, but it will affect the larval stage of the worm. To ensure complete eradication of the parasite treat again after remaining eggs have hatched. Treatment in a hospital tank is advised strongly. The hospital tank can be sterilised after treatment thoroughly. Levamisole HCL is light sensitive. Store product in tightly closed light resistant containers. Leave off tank lights when treating. Levamisole HCL is a safe and effective anthelmintic for use in aquariums. It does not harm the biofilter, plants or invertebrates including shrimp. Always complete a full course of treatment. Don’t be fooled into thinking that the fish is cured with the first dose of the treatment. TRICHLORFON Trichlorfon aka Dylox, is usually used in freshwater aquariums or ponds, as it degrades rapidly in high pH, reef aquarium water. Primarily used to treat parasites like: Hydra, Lernia (Anchor Worms), Parasitic Copepods, Monodigenetic and Digenetic Flukes, Fish Lice (Argulus), Leeches. Trichlorfon is very highly toxic to invertebrates. DO NOT USE ON FISH THAT ARE CHEMICALLY SENSITIVE such as: Silver Dollars, Rays, Bala Sharks, Arowanas, Tinfoil Barbs, Hemiodus, Piranha, Most Silver Scaled Fish, Marine sharks, Lion Fish.1 point
 -
1 pointFor anyone wanting to know about baby Amarinus Lacustris care, development etc I hope I answer your questions below, Once a female crab has shed her skin a male crab with copulate, 'hug' belly to belly for about 10 mins to 1 hour, after 24hours eggs should be visible in the females abdominal egg flap, females can carry anywhere from 10 - 40 (possibly 50) eggs at a single time, depending on water temperature eggs hatch in 3-6 weeks, in cold water hatching speed will decrease (4-6 weeks) and tropical (3 weeks Minimum), young are fully formed transparent replicas of their parents after 2 moults they achieve their sandy brown colouring. the young feed on bacterial, decaying organic matter and infusoria. it takes about 2.5 months to reach sexual maturity (faster in warmer water). It is best to separate baby crabs from adults as they may predate on the offspring if food is scarce. I cannot add images due to file size restrictions, email me if you would like photos or to talk via email at [email protected]1 point
-
 It is important that we as a community are responsible as hobbyists. Recent threats include the white spot virus that has been found in prawns in Queensland and the possibility that the crayfish plague has been introduced to our country via exotic crays from North America that might host this fungus and that have immunity to it. For example entire crayfish populations in Europe have been decimated by this disease because only the North American crays have immunity. It is well known that many in Australia keep and breed exotic shrimps and other creatures and in most cases this is not problematic but there are exceptions and so it is necessary that we have a handy resource on the forum that discusses this topic and provides relevant links. Australia has very strict quarantine laws; although we are allowed to keep and breed a number of different shrimps in Australia the importation of shrimp species not in the "suitable specimens for import" is extremely illegal and if you are caught you will almost certainly be handed a jail sentence. Local fish shops will often freely take any unwanted animals (even sick ones) and there are always plenty of other hobbyists who will jump at the chance to take them as well. Below are some simple rules that are universally applicable - ? Do not release any fish or invertebrate from your aquarium to nature regardless of whether it is native to the area or came from that exact place; this is because they may have acquired a disease or parasite in your aquarium/pond and you could do much more harm than good. ? Do not allow any of your aquarium water or other contents to enter stormwater drains or go anywhere that might find its' way into a body of water e.g. creek or lake etc. The Australian government advice is to dispose of your water down the sink/toilet. ? Do not bring exotic animals into the country unless they are on the approved specimens list (link is below). ? Do not collect wild specimens unless you have checked first that you are allowed to do so. ? Do humanely euthanise your animals if/when necessary. (link is at the end of the article). ? Do enjoy keeping aquariums and treat your animals and our natural environment with the respect they deserve. Below are links to lists of noxious species and guides at a state and national level as well as links to RSPCA instructions for humane euthanisation Instructions for safe disposal of aquarium contents and animals and general guide to aquatic diseases - http://www.agriculture.gov.au/pests-diseases-weeds/aquatic/disease_watch_aquatic_animal_health_awareness/other_aquatic_biosecurity_materials National Guidelines for management of exotic fish trade including list of specimens suitable for import - http://www.environment.gov.au/biodiversity/wildlife-trade/exotics/exotic-fish-trade A.C.T. ???????? NSW Guide / Intro: http://www.dpi.nsw.gov.au/fishing/pests-diseases/freshwater-pests/ornamental-fish Full list of noxious species: http://www.dpi.nsw.gov.au/fishing/pests-diseases/noxious-fish-and-marine-vegetation N.T. Guide / Intro: https://nt.gov.au/marine/for-all-harbour-and-boat-users/aquatic-pests-marine-and-freshwater/about-aquatic-pests-and-biosecurity List of aquatic pests: https://nt.gov.au/marine/for-all-harbour-and-boat-users/aquatic-pests-marine-and-freshwater/list-of-aquatic-pests SA Guide / Intro: http://pir.sa.gov.au/biosecurity/aquatics/aquatic_pests Full list of noxious species: http://pir.sa.gov.au/biosecurity/aquatics/aquatic_pests/noxious_fish_list TAS Tasmania has especially strict requirements regarding importation of live animals. The three links below contain lots of relevant information (Thanks to @jayc for finding these) http://dpipwe.tas.gov.au/biosecurity-tasmania/biosecurity/importing-animals/animals-that-can-be-imported-with-entry-requirements/freshwater-aquarium-fish http://soer.justice.tas.gov.au/2009/indicator/84/index.php https://www.ifs.tas.gov.au/about-us/fishery-management/environment-and-conservation/prohibited-activities VIC Guide and list of noxious aquatic species: http://delwp.vic.gov.au/fishing-and-hunting/fisheries/marine-pests-and-diseases/noxious-aquatic-species-in-victoria QLD Guide / Intro: https://www.daf.qld.gov.au/fisheries/pest-fish/noxious-fish Full list of aquatic pests(refer to schedule 1 part 4 through 6): https://www.legislation.qld.gov.au/LEGISLTN/CURRENT/B/BiosecurityA14.pdf WA Guide / Intro: http://www.fish.wa.gov.au/Sustainability-and-Environment/Aquatic-Biosecurity/Translocations-Moving-Live-Fish/Pages/Noxious-Banned-Fish.aspx Full list of noxious species and proposed additions list can be found here: http://www.fish.wa.gov.au/Sustainability-and-Environment/Aquatic-Biosecurity/Translocations-Moving-Live-Fish/Pages/Noxious-Banned-Fish.aspx News article reporting on an incident of illegal shrimp importation: http://www.couriermail.com.au/news/queensland/taiwanese-student-jailed-for-illegally-importing-crystal-red-shrimps/news-story/f735730cdafd30cfb23f319bbe29215d?sv=d06fddccb50ab7281cfc7e74da630b8f Euthanisation Key Points / Summary: Not everyone can bring themselves to end the lives of their own animals but regardless; if you deem it necessary to end the life of any tank inhabitants and they are not a highly illegal specimen then please dp ask your local retailer first if they might be willing to try to save them for you. If this is not an option then please see below links. Humane euthanisation of fish: http://kb.rspca.org.au/what-is-the-most-humane-way-to-euthanase-aquarium-fish_403.html Humane euthanisation of crustaceans: http://kb.rspca.org.au/What-is-the-most-humane-way-to-kill-crustaceans-for-human-consumption_625.html disease-watch-brochure.pdf1 point
 -
1 point
 Mizu Sakura "Daizu Snow" is a 100% organic soy husk pellet fibre supplement for shrimp, which is low Gi, low in fat and cholesterol and high in calcium. Healthy media for mycelia culture. A great natural leave in food that won't foul your water. Low Cu content formula.1 point
 -
 Dragonflies or Odonata Anisoptera, are a group of insects belonging to Class Insecta, Order Odonata and Suborder Anisoptera. Considered as ancient, their ancestors were around during the Jurassic Period, along with the dinosaurs. They are predators. Their life cycle breaks down into three distinct stages: the larval stage, the nymph stage and the adult stage. Nymphs can spend a number of years living in fresh water. The adults, which may only last a few days or weeks, can fly. Adults emerge to mate and repeat the dragonfly life cycle. The body length of the average adult dragonfly can vary between 2.54 cm to 10.16 cm. Ancient dragon flies could have a wingspan as large as 70 to 75 cm in extent. The juvenile, dragonfly nymph can range in size between 1.27 cm and 3.81 cm. The dragonfly nymph is a formidable predator. It spends its life just below the water surface, and has a “hinged labium, a form of a “toothed” lower jaw. It can extend this out every quickly then retract it. This way, the juvenile dragonfly can catch and eat tadpoles, mosquito larvae and even small fish. Does the dragonfly nymph pose a threat to fish and shrimps in an aquarium? The short answer is definitely yes. There may be as many as 1500 eggs originally hatched. Having come down to us from the Jurassic period, the Odonata Anisoptera juvenile is equipped with the equivalent of a “rapture like lower jaw”. They would have no problems consuming both small fish and shrimps in an aquarium. Bringing fresh water from natural sources may sound a good idea, but there could be a good chance that this could be contaminated with the dragonfly nymph. Another indication would be that both the small shrimps and fish are showing signs of stress. They are aware that there are dragonfly nymphs in there with them. Removing Odonata Anisoptera may not be that easy once the aquarium is infested with them. One method could be to use a plastic straw to suck the juveniles out individually. Plants and other water vegetation need to be agitated to get them to move, as the dragonfly nymph can remain very still. Dropping the water temperature in the aquarium by three to five degrees Celsius, might stress shrimps in the tank. This might also bring the dragonfly nymph to the surface. References https://en.wikipedia.org/wiki/Dragonfly https://en.wikipedia.org/wiki/List_of_Odonata_species_of_Australia http://www.state.ky.us/nrepc/water/dragfly.htm Photo Credit: dmills727 Flickr cc Photo Credit: Exmoor National Park Flickr cc1 point
 -
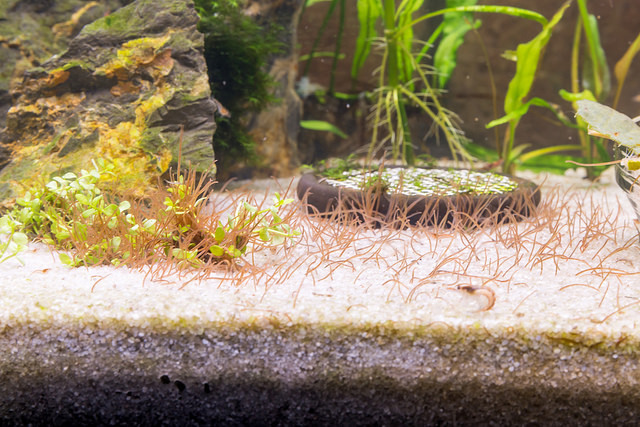 From the various topics, here on SKF Aquatics, you can see that there is a wealth of food options available for your fish. From flakes to pellets, wafers to granules, you won’t be short of variety and options. While these processed foods may be inexpensive and convenient, if you want to ensure your fish live the healthiest and longest life possible, you are going to want to limit the amount of processed foods and instead, feed them a diet that is supplemented with live foods. Live fish food offers the highest amount of vital nutrients for your fish, and as such, will allow them to thrive. However, if you have never fed your fish live food before, you may not know what to look for or where to begin. Here’s a look at the different types of live fish food options and their culturing. Brine Shrimp Brine shrimp that have just hatched are highly nutritious for fry and small fish. The majority of aquarium fish will also feed on adult brine shrimp. The best way to attain live brine shrimp is to grow and hatch them yourself. You can purchase eggs online or at your local pet supply store. To hatch the eggs, place them in a plastic bottle filled with clean water and attach an air pump to it. Once the eggs have hatched, siphon the shrimp out and place them in your tank. Live Black Worms Scientifically known as Lumbriculus variegatus, live black worms can be found in various pet stores or in their natural habitat around the country. You can find them in ponds and marshes. They are one of the best food to feed you fish. Not only are they rich in protein and other nutrients, but they can also survive for long periods of time in a freshwater tank. If you want to culture your black worms, you can keep them in worm boxes, and they reproduce at room temperature, roughly doubling in volume every four weeks. However, if you do not plan to breed your black worms, you can keep them in a container in the refrigerator. The water in the jar should just cover the worms. Feed your fish every other day. Bloodworms Bloodworms are actually the larvae of flies, and they are highly nutritious for aquarium fish. To procure blood worms, visit ponds, lakes or any stagnant water where flies can be found and you should be able to find bloodworm larvae attached to plants. Flies mate in the air and drop their eggs into water. Collect the bloodworm larvae in a tank or plastic containers filled with organic matter, such as soil and dry leaves and some water. Once the bloodworms grow, collect them after dark, as this is when they are the most active, and feed them to your fish. Daphnia Daphnia are commonly called water fleas. These small crustaceans are also a great source of food for fry. They seem to be a little hard to source in Australia but some aquatic hobbyists opt to catch and breed them themselves. You can culture them by placing algae scrapings from your aquarium into their water, or by adding plankton or even powdered milk to the water. Some pet stores sell live fish food but it is usually easier, less expensive and more satisfying to raise live food yourself. Additionally, by raising the food yourself, you will have a constant supply on hand for feeding. By feeding your fish live food, you can ensure that they are receiving the vital nutrients that they need to thrive. Providing your fish with live food can be very rewarding for both you and your fish. If you are interested in learning more about culturing live fish food, there is plenty of literature available that will provide you with detailed information. Check out this topic for example: If you are passionate about your aquarium and want your fish to thrive, you should seriously consider culturing your own live fish food. References Photo Credit: Merv Hall (@Madmerv) via Flickr with permission Photo Credit: 阿鶴 Flickr via cc Photo Credit: dullhunk Flickr via cc1 point
 -
1 point
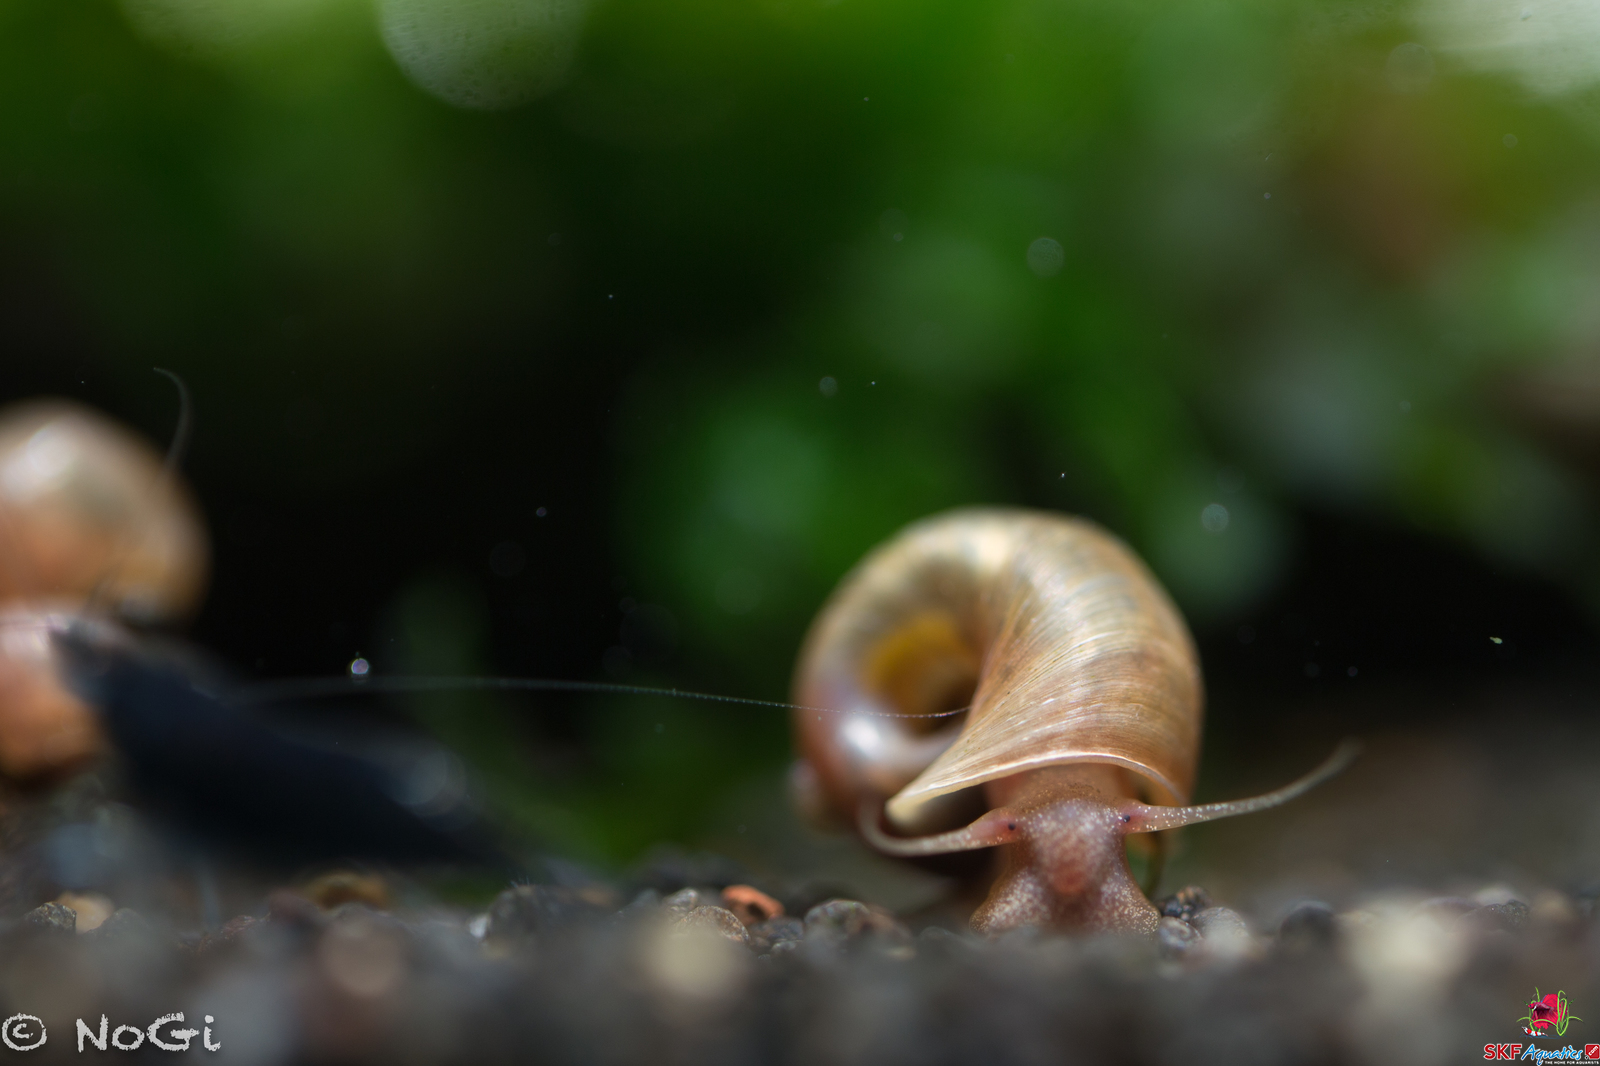 Planorbidae make up a significant portion of aquaitic pulmonate gastropods. In Australia alone, there are over 20 species group taxa that have been described. Their common name, ramshorn snails, comes from the spiral shape of their shells, which looks like a ram’s horn. Ramshorn snails come in a wide range of colours, including red, brown and black, and they can even be shimmery and translucent in colour. Because of the unique design on their shells and their colour, they can be a welcomed addition to an aquarium, offering vibrant colour and interest. However, oftentimes, these snails inadvertently appear in aquariums, hitchhiking on the live plants and/or accessories that have been transferred from one tank to another. If there is enough food available, these snails can quickly breed and take over an aquarium; but, if they are properly maintained, they can be a welcomed addition, even if their presence was not intended. These snails eat food that is leftover in the water, dead plant material and algae, and as such, they can help to maintain the health and appearance of an aquarium. Maintaining Ramshorn Snails Whether you are interested in adding ramshorn snails to your aquarium or they have taken up residence unexpectedly and you decide that you want to keep them, it’s important to understand how to properly maintain them, which fortunately, is easy to do. They do will in aquariums of various sizes. They are also very adaptable, which means that they can do well in various types of water conditions, though they prefer water that is filtered. Additionally, they do best in tanks that do not undergo sudden changes in their condition. These snails consume algae and food remnants from fish, but they prefer to eat dying and dead plant matter that is shed from live plants. They will also eat dead fish, shrimp or other snails. Things to Avoid If you are interested in maintaining Ramshorn snails in your aquarium, you should be aware that there are species of fish that will eat them. The most common predators of Ramshorn snails include bettas, loaches and dwarf puffer fish. Assassin snails will also prey on these snails. Live Plants Some people claim that Ramshorn snails destroy their live plants, while others have reported they do not cause any issues. However, in most cases, they do very little damage to live plants, but if a large amount of them are present and there are delicate plants in the aquarium, such as Water Sprite and Cabomba, they can do damage. Behaviour Ramshorn snails are peaceful and non-aggressive. They will not cause issues with fish, shrimp or other types of snails in an aquarium. They spend their time moving about the tank eating and adding interesting colour, texture and dimension to an aquarium. References Arctos. (n.d.). Retrieved May 7, 2017, from http://arctos.database.museum/name/Planorbidae Brown, D. S. (2001). Freshwater snails of the genus Gyraulus (Planorbidae) in Australia: taxa of the mainland. Molluscan Research, 21(1), 17-107. doi:10.1080/13235818.2001.10673736 Image credit - @Paul Minett1 point
 -
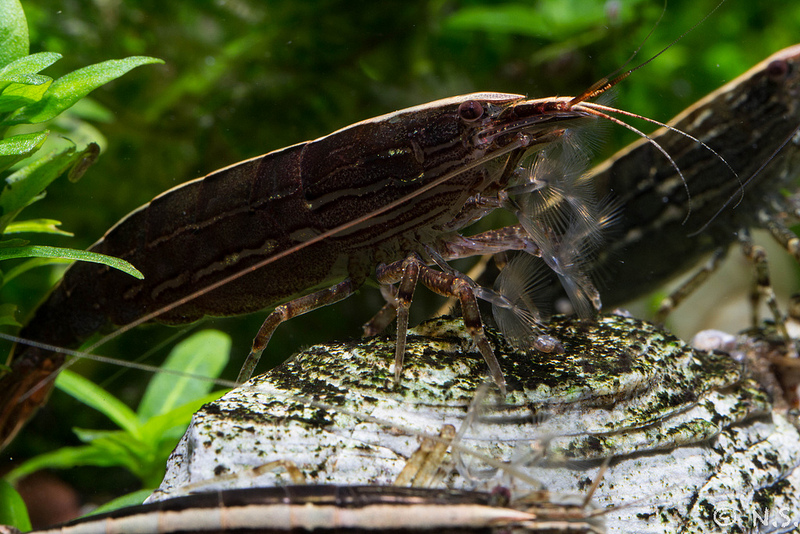 By Fishmosy (Dr. Benjamin Mos) and Northboy Habitat and Water Conditions Riffles are so named because they are found in riffles, shallow fast flowing sections of creeks. They occur in easterly flowing creeks from Northern Queensland down to Victoria, Australia. Two famous collecting areas are the Atherton Tablelands in QLD and Never Never Creek, near Bellingen NSW. Riffles can grow to over 6cm, reports of 8cm is not uncommon. However, these shrimp change sex at around 3.5-4cm from males to females. If you want to breed these shrimp, ensure you have both size ranges. Breeding Breeding riffles is fairly easy. The entire lifecycle is carried out in freshwater. BBS or brine shrimp nauplii are a great conditioning food for adults. Eggs are carried by the female and hatch out as miniature adults. Shrimplets take the same food as adults, including brine shrimp nauplii and flake food, as well as grazing on algae/biofilm. Food One of the greatest attributes of these shrimp is watching them use their filter feeding feet to catch food items wafting in the current. They may even learn 'feeding time' and take up positions in the tank to grab food drifting by. Riffles also become less timid over time, and are often seen out and about in the aquarium. Adults are also reported to feed on BBA and cyanobacteria (BGA). General Notes Riffles are adaptable to most aquarium conditions as long as extremes are avoided, but require highly oxygenated water, temperatures not exceeding 27 degrees C for long periods of time and are sensitive to phosphates and CO2. Stressed riffles will change colour to bright red or dark blue. However, their natural colouration is highly variable, greens to blues, black and white, and stripes, so colour changes aren't always indicative of problems. Riffles also seem to like hanging out on timber. Warning: These shrimp can and do climb, so keep tight-fitting lids on your tanks. You can keep riffles with fish as long as they can't fit in the fishes mouths, although the fish may hassle the shrimp. However, riffles can turn the tables and eat small fry. Further Information Riffle Shrimp from the Atherton Tablelands by Bob Kroll in AquariumKeeper Australia Vol 1, Iss 2 (Out of print) Below is some water parameters from a creek where riffles are found on the Mid North Coast of NSW, Australia, near Coffs Harbour. Time of year: Late Spring (Nov, 2012). Water parameters were as follows: Temp - 22.5*C Ammonia - undetectable Nitrite - undetectable Nitrate Undetectable pH 6.8-7.0 Hardness - KH below 10mg/L, - GH 20-40mg/L Ca - less than 20mg/L PO4 - undetectable Other than temperature, these parameters were measured using a Hagen Nutrafin Master test kit. Here are some pictures from the area. This is a typical area where riffles can be found, if you are looking in the shallow pool at the bottom of the picture, you won't find them. Look for the riffles like mid photo (enlarged in the second pic), no matter how shallow it may appear, riffles should be there. Male and female riffles often congregate in different areas. Here is an area where I found only females. Notice the width of the riffle and the presence of lots of habitat structure (rocks). Here is a place that was dominated by males. Notice that there are very few points to access upstream areas. The males were quite dense directly beneath the overflows of the concrete river crossing. Up to 6 riffles under each rock was not uncommon. My theory is that males congregate at these 'choke points' to access females (for breeding) which travel through to access upstream areas. This point was 50m or so downstream of the female habitat. Alternatively females may seek out these areas at moulting time (I have found recently moulted females in these areas). Another interesting point as to why riffles might not occur in shallow pools was because of the amount of eels in this creek. There was literally one per pool. The large pool above the creek crossing contained one that must have close to 1metre in length. Finally another interesting factor I've found in finding riffles is that they seem to prefer the darker rocks (possibly granite, but I'm no geologist) indicated in this picture by blue dots, avoiding the lighter coloured rocks (red dots). In areas where this light coloured rock dominate, I have found no riffles at all, even if it seems like optimal habitat. Maybe it is a camoflague preference? Hope you have found this interesting and informative. Best of luck with keeping your riffles.1 point
 -
 1 pointBACKGROUND I have been keeping fish and aquatic plants for nearly 300 years now and have been blessed with a wonderful career in Horticulture. When planted tanks were popularised by the work of Amano, I started looking at various aquarium related forums to see what sort of information was available to hobbyists. It didn't take long to see that most of this was based on the opinions of aquarists who had achieved some success growing plants. Much of it was contradictory and I saw lots of talk about deficiencies, dosing of individual elements, misdiagnosis of problems and expensive mistakes. There didn't seem to be much of an organised approach to growing aquatic plants and there was a real need for reliable answers to the problems facing beginners in the hobby. For me it came to a head when my good friends, Billy and Victor opened Aquaristic Aquarium Gallery. Their mission was to provide top quality products, great customer service, inspiration and of course, to make lots of money. THE REALITY They stocked the best and most popular substrates, amendments, fertilizers, lighting and CO2 injection technology.They also set up display tanks to show their clients what they could expect from the various products in stock. Despite the wonderful results obtained in their shop, it became apparent that there was no simple way to prepare their clients for the problems they would face in the attempt to produce a lovely nature aquarium. One such problem was to find a substrate that could be used by a novice without the pitfalls of ammonia spikes, melting plants, algal blooms and cloudiness when disturbing the substrate. THE ANSWER Billy asked me if it was possible to develop a media he could happily recommend to his clients, confident that they would have a positive experience. I felt sure that with sufficient yelling, name calling and arguing, this could be done. So here we are, 2 years later, well tested by his experienced friends, ready to flood the market with SMARTSOIL. WHAT IS IT? SMARTSOIL is a balanced blend of high quality Clay, Peat, Sand and some secret amendments of my own which do not cause cancer, infertility or death in fish, inverts or humans. SMARTSOIL addresses the problems that can cause headaches, mentioned above. SMARTSOIL is sold in bags of approx 2 litres, sufficient for a standard 60cm tank. HOW DO YOU USE IT? First,you spread the SMARTSOIL evenly over the tank floor, covering only the areas to be planted. If you are very particular, you can spray this layer with a fine mist of water, press it gently and leave it overnight to harden. This step is useful to professionals who cannot afford to risk murky water when they fill a clients tank. Then you spread at least 5cm of the sand or gravel of your choice and carefully fill the tank with water. Unlike other media, you are not obliged to thickly plant your tank from day one. I find it best to simply leave things alone. DO NOT DOSE ANY FERTILIZER FOR AT LEAST A MONTH!! The SMARTSOIL will absorb any excess ammonia during the settling period. It contains enough ferts to support growth for at least a month without burning plants or causing algal blooms. If you wish to move plants around, some clay will be stirred up but the cloudiness will quickly settle. SMARTSOIL is a long term choice and will last longer as an effective media than any of the soils I have trialed. Shrimp friendly too. Thanks for reading AR1 point
 -
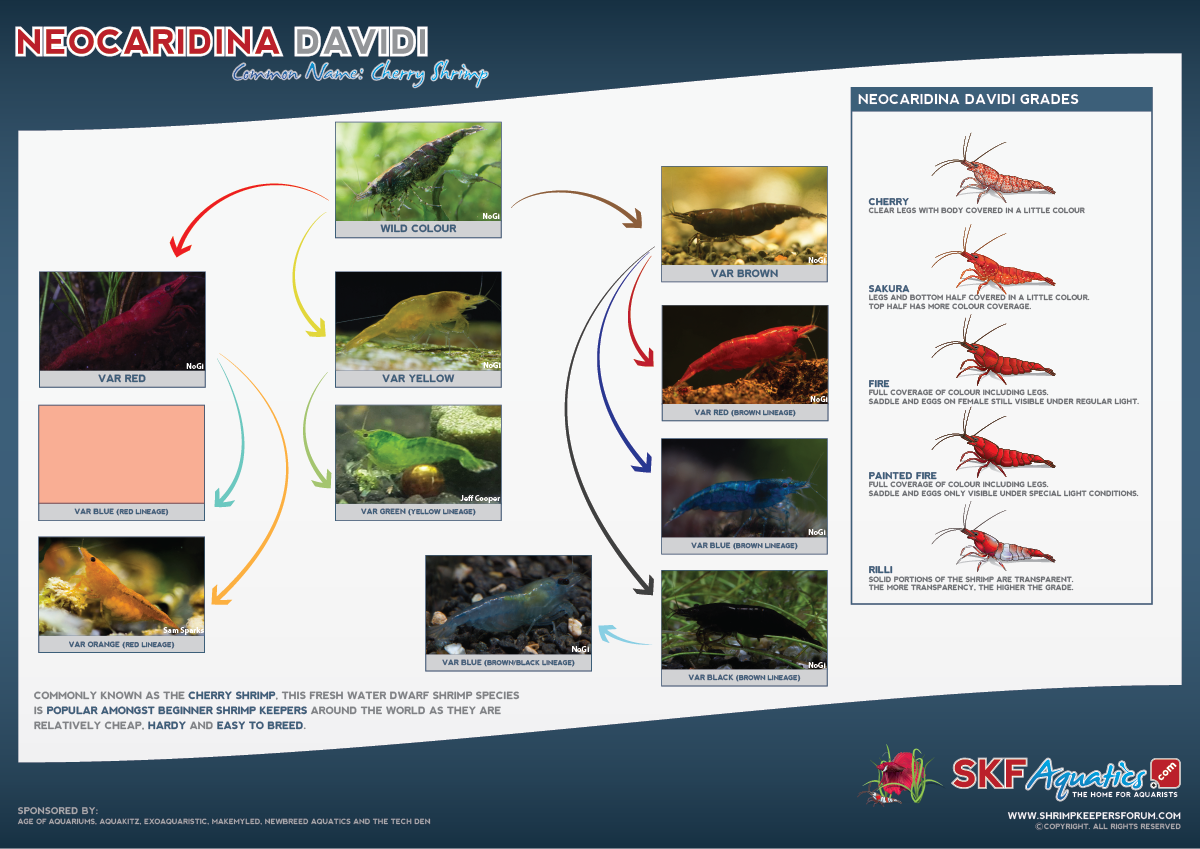 Different Grades Cherry - Clear legs with body covered in a little colour. Sakura - Legs and bottom half covered in a little colour, top half has more colour coverage. Fire - Full coverage of colour including the legs. Saddle and eggs on the female still visible under regular lighting. Painted Fire - Same as Fire except the saddle and eggs on the female only visible under special lighting conditions. Different Patterns Rilli - Solid portions of the shrimp are transparent. The more transparency, the higher the grade.1 point
 -
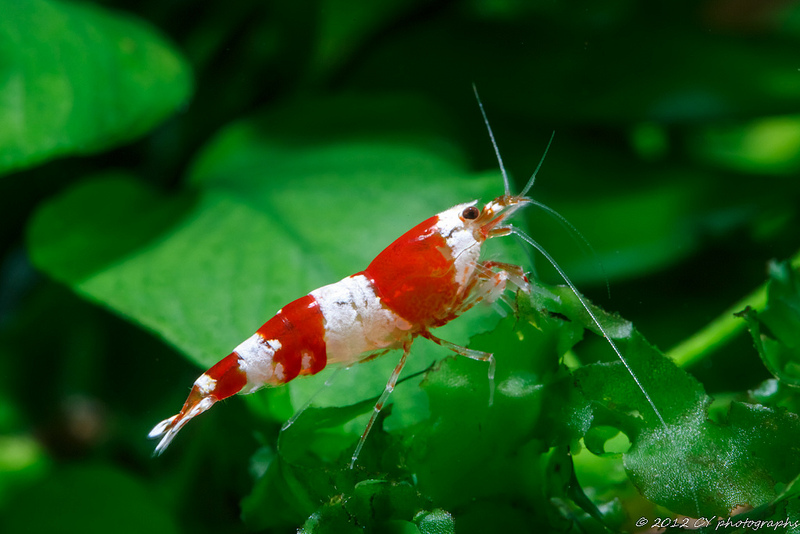 There are a few different shrimp that fall under the category Crystal Shrimp. Crystal Red Shrimp Crystal Black Shrimp Golden Bee Shrimp Snow White Shrimp Crystal Red​ Crystal Black Golden Bee Snow White1 point
 -
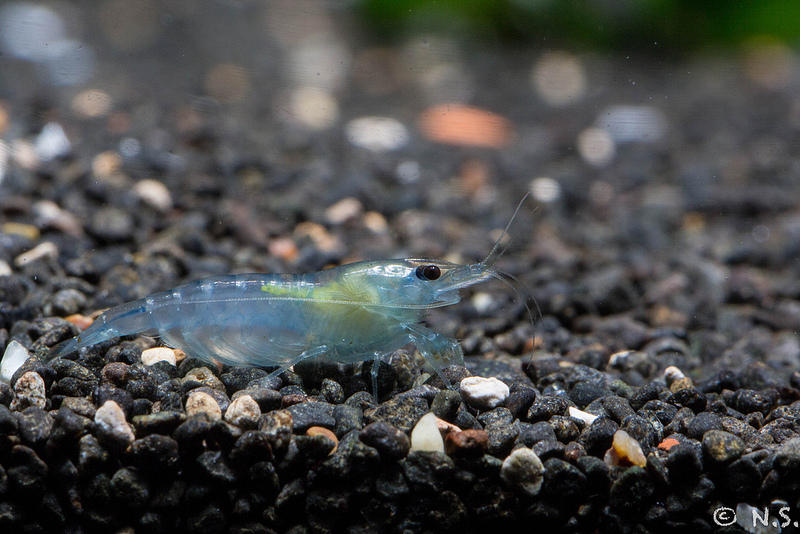 Neocaridina davidi (aka Cherry Shrimp) are a non-native species of shrimp which, according to Google search history, have been in Australia for at least 10 years. They are a popular shrimp for hobbyists as they are relatively cheap, hardy and easy to breed. In Australia, the following lines and grades have been kept and bred. Colours: var Red var Yellow var Sunkist Orange var Blue var Blue Velvet var Chocolate Brown (Delight) var Black1 point
