Leaderboard
-

@ashrimplab
Members2Points21Posts -
FMuscle
Members1Points134Posts -

CNgo2006
Members1Points2369Posts -

ageofaquariums
Members1Points178Posts
Popular Content
Showing content with the highest reputation on 06/16/17 in all areas
-
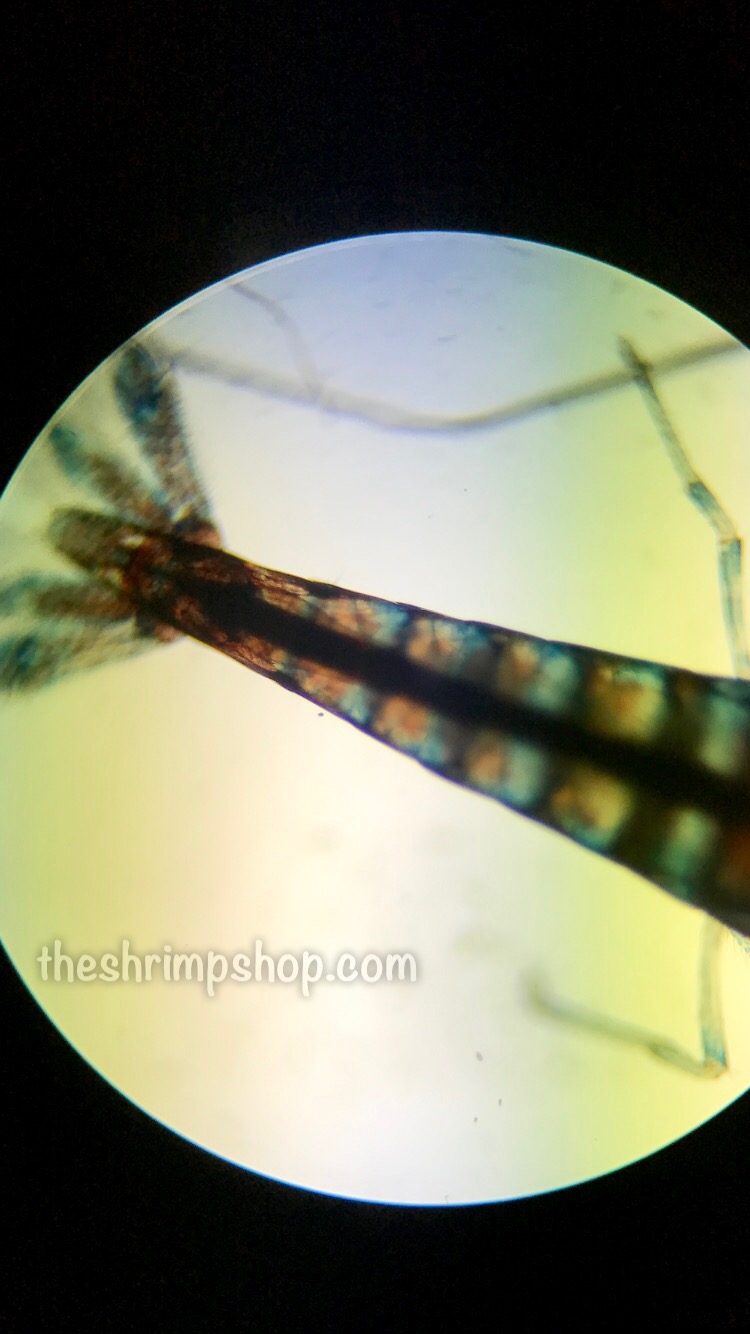
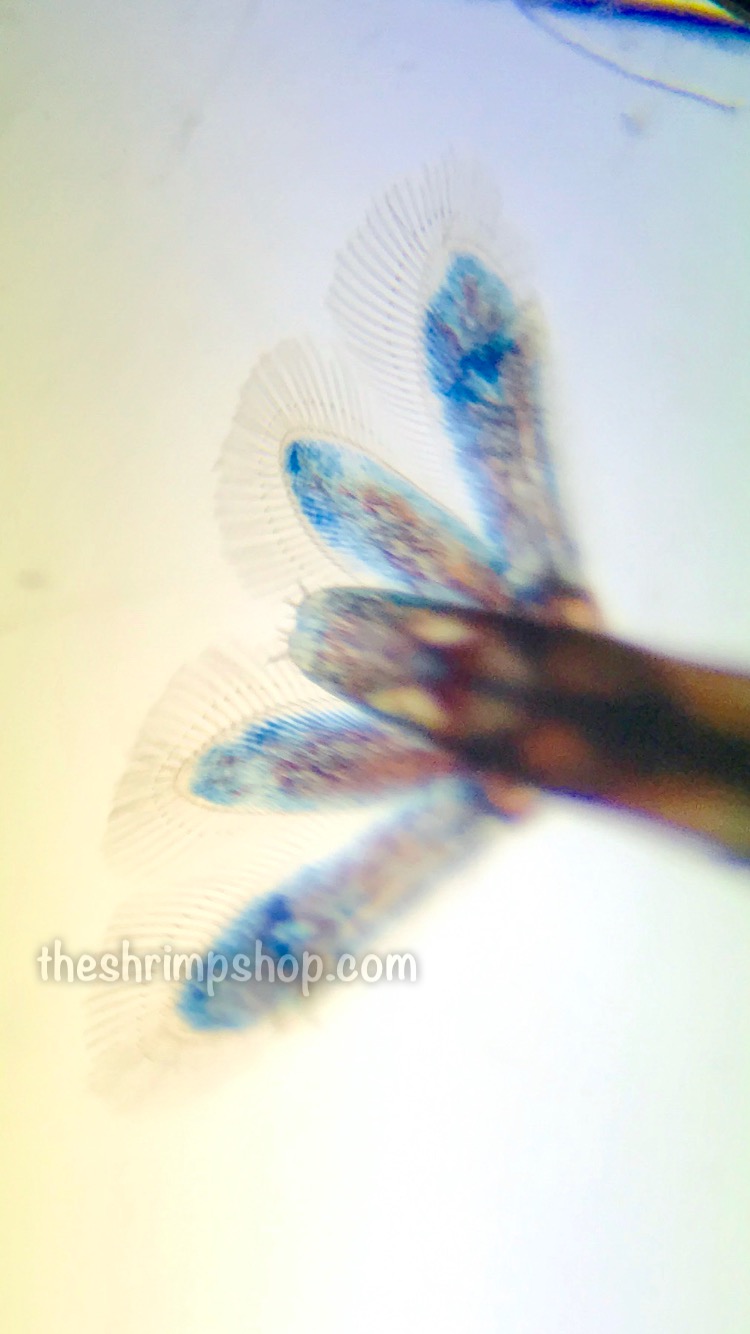
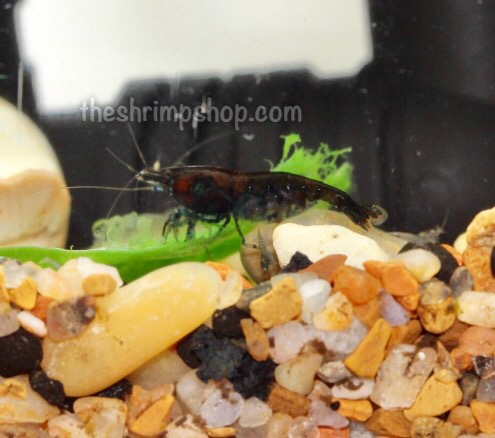
It's official! Red and Blue marble offspring are... red and blue! #shrimplab #coolgenetics #neocaridina #microscope See the hatchling right below mom in photo! Video found: https://youtu.be/XELenET9vfA


 2 points
 -
1 pointYou could say that females have a "skirt" where-as males are straight. They are both rather large and "colorful". Males tend to be smaller and, where applicable, less colorful.1 point
-
1 pointKusuri Klay is good value for a specific calcium bentonite tailored for aquarium use. If you are interested in a journey down the rabbit hole with smectite clays, try giving bentonite a google on qldaf. You know what I mean when you find the thread.1 point
-
 1 point
 -
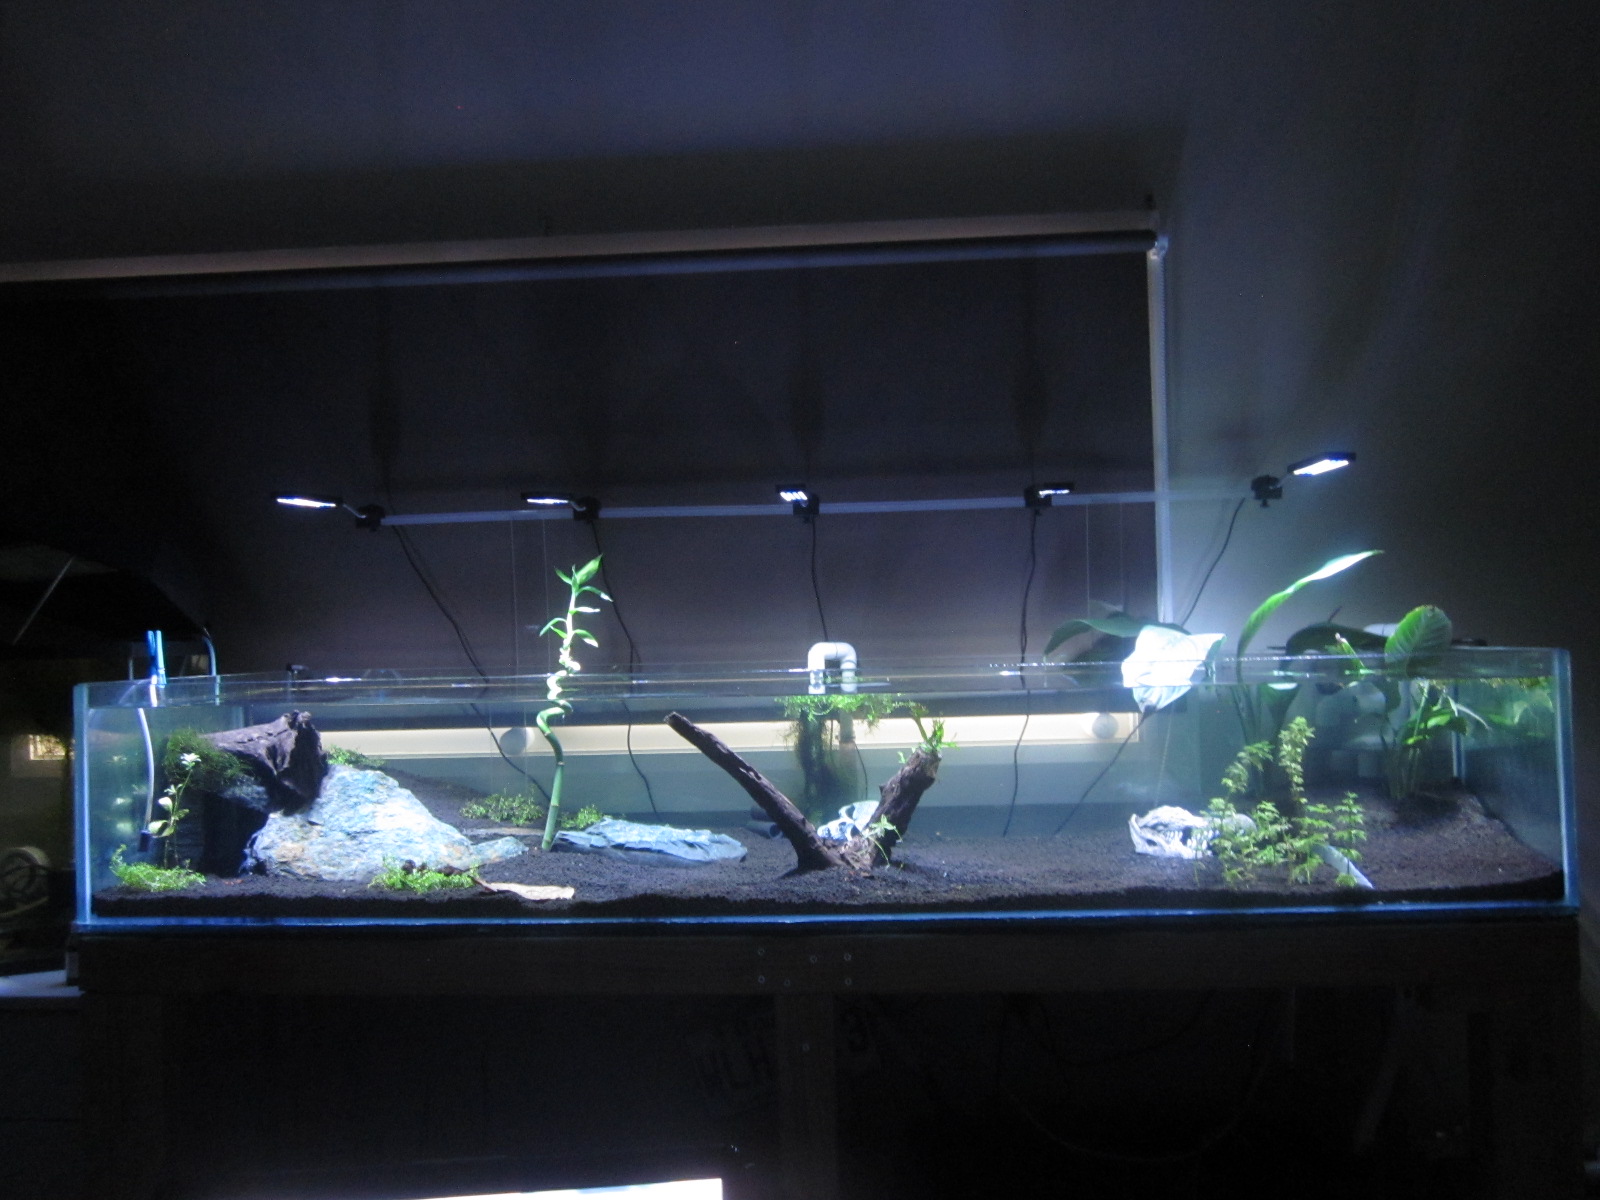
1 pointSome of you have probably noticed. But for confirmation, I am a big fan of not paying if I don’t need to. This means I’m a big fan of DIY. I made PVC overflow and return pipes tailored to my 3ft, I made a $10 sump for it as well, I built an air powered substrate vacuum. I made my life cheap and easy for this hobby. This article came at the expense of a disaster. I bought a 6x2x2 tank. It cracked. Not to throw the towel, I took it apart, had panels cut in half, new panels made, and here is my tutorial on how to build your own fish/shrimp/planted tank. First, build a stand for the tank. Get your glass panels ready. To figure out what sizes you need, remember that the bottom supports the sides. Your bottom panel has to be the exact width and length as you planned tank. A 100x50x40 tank with 10mm thick glass needs a 100x50cm bottom panel. The front and back are the same width as the bottom, but the glass’ thickness shorter than the projected height. For the example, front and rear panels would be 100x39cm. The sides sit on the bottom, and between the front and rear panels. Subtract the thickness from the height once, and for the width twice, here the sides would be 48x39cm. If you are reusing old aquarium panels, scrape them clean with a razor blade, then wipe off any silicone residue with acetone. Let dry. Tools needed: A good razor blade or sharp utility knife, tape, either electrical, masking or both, a caulking gun, twice the silicone tubes you think you’ll need, optional are suction cup handles to move the glass around, I did this build alone, it helped for the big panels. Get your work area ready, cover the floor, table, bench you’re working on. Have moist rags and/or gloves at your disposal. Make sure your work surface is flat, clean of debris and level. Put your panels within easy reach. You have limited time to work with silicone, it starts to skin, to dry its surface fairly quickly, so you have to be organised. The longer the seam, the faster you need to work. Apply the first bead of silicone on the bottom panel where the rear panel will sit. How thick depends on how experienced you are, and how thick your panels are. In my case, I did a bead of around 10mm, because my glass is 10mm thick. Do not worry about putting too much. Too much is better than not enough. Put the rear panel in place, making sure it sits right on the edge of the bottom panel, flush on both sides. Have someone or something hold the panel up for a moment. Apply a bead of silicone on one side of both the bottom and the rear panel, and while keeping the rear panel slightly tilted back, put one of the side panels in place on the bottom panel. Then bring up the rear panel and push it against the side panel, making sure they’re square and flush with each other. They will now hold each other with the silicone. Put a piece of tape or two across the corner as extra support. Repeat the operation on the other side, this time lay the side panel a few mm off to the front and slide it in place against the rear panel. Make sure they’re square and flush, and tape them. Apply silicone on the front top edge of the bottom panel and the edges of both side panels. Bring your front panel at an angle, sit the bottom first, make it flush to bottom panel, then press it against the sides. Square, flush, tape. Let the tank cure for about 24 hours. Watch your berried shrimp in the meantime. Once the silicone is dry, remove the excess with a sharp blade. Trim the inside carefully, just to remove the excess and not to dig and cut between the panels. There is no real need to use acetone there, it is mainly used because new silicone doesn’t stick well to old silicone. So unless you went crazy on the amount of silicone you put on the first part and it went everywhere, you can leave the little bits around the corners. Tape the edges of the tank leaving the corners exposed. About 5-10mm is good, some prefer to leave a wider gap around the bottom. Apply silicone to the corners, starting around the bottom, then go up in the corners. You don’t need much there, a good bead size would be around 80% of the gap you left with the tape. Smooth out the silicone with your finger to give it a nice concave shape. Remove the tape while the silicone is still wet. Take care of not putting silicone everywhere and not to destroy your awesome corners as you remove it. Let the tank cure once more, for three to seven days this time. Why not watch your fish play in the bubbles? After the curing is done, do a test fill. If possible do it outside. If not, I suggest doing it slowly, adding a few cm at a time and constantly monitoring the seams for any signs of leakage. The test fill is also a good moment to see if you need to brace your tank. As you fill your tank, measure the distance between the front and back on both sides and compare the results with the measure in the center. If your panels are bowing by the same or more than their thickness, I’d recommend a brace. In this case, the bowing is only 1-1.5mm while the tank is ¾ filled. I do not need bracing. If everything is in order, scape, plant, fill, cycle, stock and enjoy your new DIY tank. Side note: if you are building a small tank, the cure period between the assembly and the reseal may be skipped by working fast enough to smooth the silicone as you go. On bigger tanks, like my 6ft, by the time I fit the panel, the silicone is already drying where I started to lay the bead, making it impossible to create a clean seam. My tank's specs: 6X2X1 (1830x610x310mm) 10mm thick glass. Filtration: Sponge + double overflow to sump (to be built). Stand: DIY 70x35 timber, 1830x610x800.1 point
-
1 pointThese can be made to fit any size tubing at the fraction of the cost of what is sold and is so very easy to make. So lets get started! Note: It is recommended that you use protective goggles and gloves, as frayed mesh wires can get pretty sharp. Here is what you will need to make the filter guard: Stainless Steel Mesh sheet hole size #30 (can be purchased at the mesh company online, I got the A3 size sheet which is enough for a lot of guards!) Tin snips Heat Shrink (depending on the size of your tube get the heat shrink at least 5mm bigger, can be purchased eBay) Heat source (Lighter, hair dryer, heat gun, etc) A tube of the size required Pencil, marker Ruler Cable ties Craft knife Steps Prepare cable ties as you will need both hands free Cut mesh sheet to size depending on how long you want the guard and how thin the tube is (I cut mine 10cmx10cm) and wrap tightly around the tube, secure tightly with cable ties Cut another piece of mesh depending on the width of the mesh wrapped around tube (mine was 18mm), cut a square piece (18x18mm), place on end of mesh and bend corners over Cut a bit of heat shrink (mine was 2cm) and place over the mesh making sure the piece of mesh covering the end stays in place, leave about 0.5cm above. Using the heat source you are using (I just used a lighter) and heat the heat shrink until it shrinks tightly around the mesh (make sure you don't heat the same place for too long as it will melt! Just quickly run the flame over the shrink) and then quickly push the end down on a flat surface for a minute. The outcome should be something like this (you can use the craft knife to make the opening bigger if you wish) Now for the other end, repeat the steps above but shove the tube in instead. Leave for a minute or so. Remove the tube and cut the cable ties, cut a thin bit of heat shrink to place in middle of guard for extra support, heat it until tight. And there you have it, your DIY filter guard. For a fraction of the cost you can make all the filter guards needed, can be HOB, canister, overflow pipe, etc. for your 20 shrimp tanks!1 point
-
 1 point1 point
 1 pointi would say yes. they are not just for mineral content, they are also for helping keep water clean :) i have them in every tank i run. as for increasing TDS, your tanks TDS will increase without them everyday regardless, as organic matter is dissolved etc.1 point