Leaderboard
-
fishmosy
Members4Points4594Posts -

Madmerv
Members2Points219Posts -

jayc
Moderators1Points6248Posts -

Mr. F
Members1Points22Posts
Popular Content
Showing content with the highest reputation on 11/25/16 in all areas
-
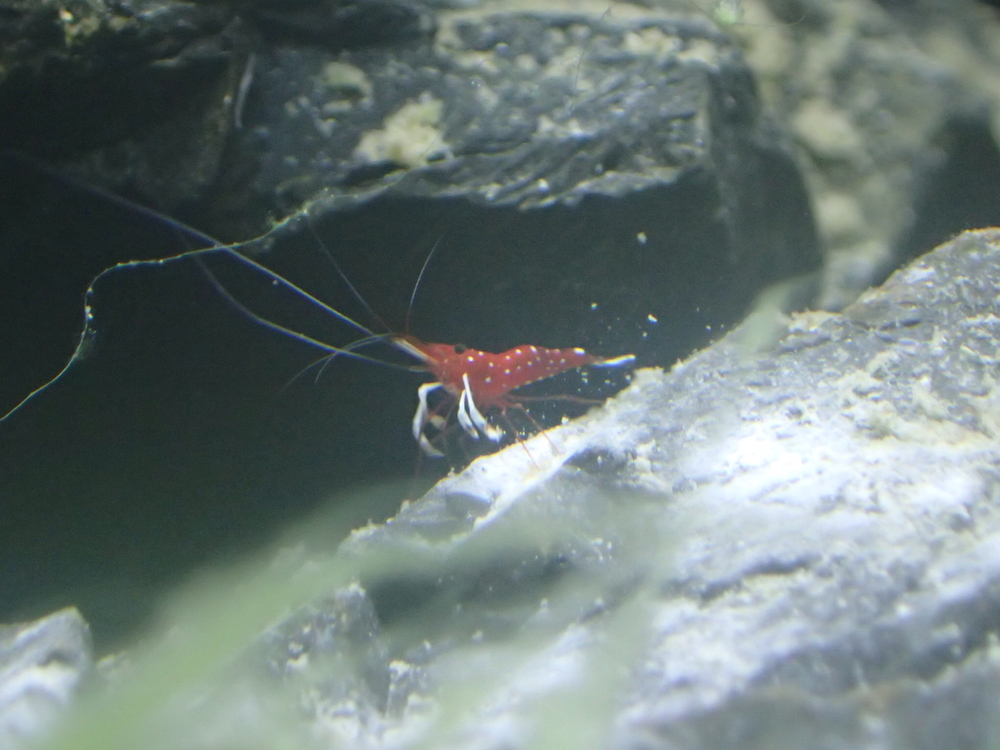
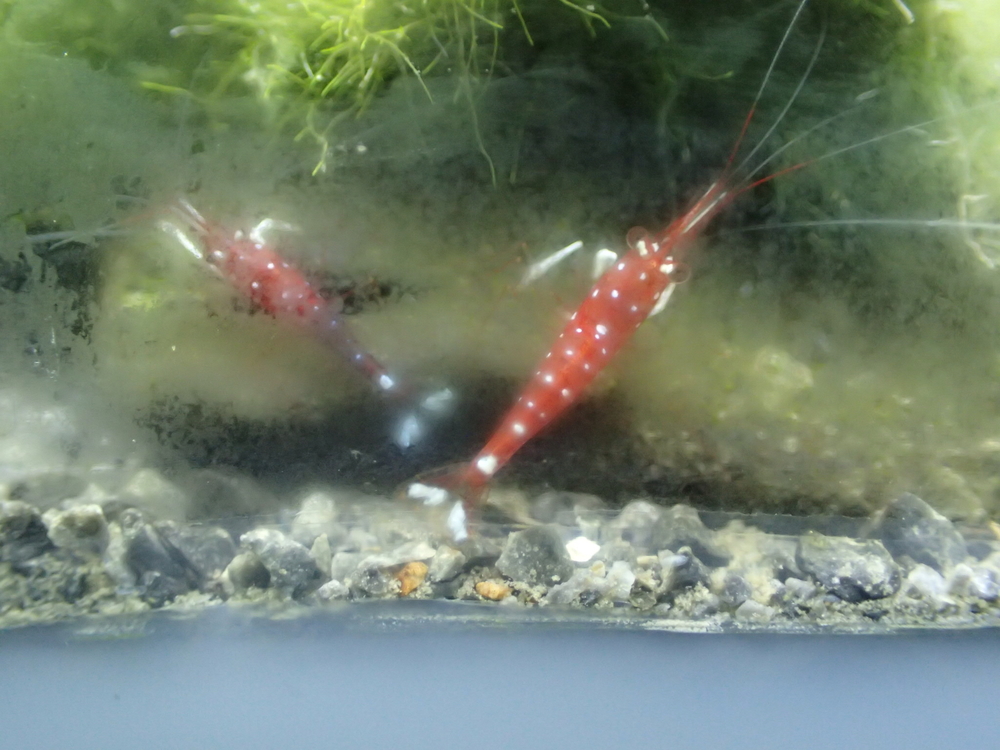
1 pointAlways wanted sulawesi shrimp and snails since they first appeared in PFK magazine (from memory) back in the mid 2008. Today I got realised a bit of that dream with the arrival of some juvie cardinals - thanks to @JPN07 After acclimating them over a couple of hours they went into the tank and within seconds they had coloured up and were feeding away. It might just be because they are new, but these shrimp are really fascinating to watch. Cant wait until they get bigger. Excuse the dirty glass.


 1 point
 -
1 pointIf you want them to *die you want temperature close to 80. Neos will pretty much breed in any temp between like 65-80 F. What I'm saying is that your shrimp will not live nearly as long. I've found 74 F to yield the most shrimp in a given tank over time. Any higher or lower and the count declines- much faster on the higher side.1 point
-
1 pointAnother point worth mentioning is that 'safe' levels for fish are not necessarily 'safe' levels for shrimp. Nitrates are a good example here, fish can handle much higher levels of nitrates than shrimp can.1 point
-
1 pointMaybe an RO drip could work, but I haven't found it necessary. Small frequent water changes seem to be enough.1 point
-
1 pointOk as Tuesday and Wednsday are my weekend i got a bit of progress on this tank. I did get called in for a small 5 hour shift on Tue so not as progressed as i wanted. I had some issues so plenty of learning done. The media was added to the sump with only one small hiccup. I cut the foam filter material slightly oversize so it would be a snug fit. You may remember that i had a positioning issue with the first panel, well the added pressure from oversize foam popped one side of that panel free and i had to re do it. Starting from the bottom is spacer material, 2 sheets of 65 micron, 2 sheets of denser foam, 3 sheets less dense and 1 sheet of coarse foam. The next chamber has spacer material. noodles and a sheet of 45 micron. Easy to get to it on the top and will help distribute the water evenly. The last chamber has Bio balls as i had a bag spare and thought why not. The balls will be fully submerged, apart from top 2 inches when the pump is running, and i know this is not the most efficient but it will help. As I'm running this on the cheap i have been using whatever is available around the house. Not always the best idea.. I have a tap spliter spare so i put it on the outlet of the sump for a garden hose attachment and when i filled the sump for testing it turns out the splitter was not on a tap for a reason. I had to do a bit of modifying until i get a new valve. Next job was the overflow box and sump plumbing. Mmmm things didnt go as planned here. Glass hole saws can be pretty expensive and as i was only doing 6 holes i went the cheapest i could find. It did the job but not super clean and not super easy. The overflow holes were where i started to give me some practice and because i could cut some more glass to size if things went pear shaped. They did..Lol You can see i used a wood template and i used it for the tank also. The bit walked a bit and i must have been using to much pressure, along with a cheap bit, as there are some nice shards on the back side of the holes. Finally it was attach the overflow box and do the plumbing. The box was going to be held in place by a ratchet strap to allow the silastic to dry but it tended to pull the box down so i ended up going with some wood and clamps. Now the plumbing has been my biggest headache. The Beananimal design is silent and has a stack of redundance so there should be no accidents (overflows). The problem is the thread for this design is 300 pages long with 15-20 posts per page and unfortunately the link i had directed me to the middle of the thread so i missed a lot of the basics. I worked on this until i was emotionally exhausted last night and was up at 3am today pulling a bit more hair out until i saw that i was in the middle of the thread. A quick jump to page 1 and a few posts later i see where i went wrong. Basically i had plumbed all 3 lines into a single sump return which created a constant gurgling sound when running. Not what i was after. Anyway i have modified it and now she is going well. The first photo shows the overflow box but without 2 of the tank outlets in as i still have to make up the shrimp safe filters. The second is the sump return with my modifications from this morning.1 point
-
Thanks @zn30. @NoGi, I think the Ammonia/Nitrite column needs a "Do Nothing" heading for the Too Low row. Just like the Nitrate column.1 point
-
1 point
-
 This is the tank now :) I think I'm finally actually happy with one of my scapes haha1 point
 -
1 pointBugger. Better luck next time. I agree with everything you have said as I've come to the same conclusions. I think you have to treat them the same way you treat Sulawesi shrimp. You are better off not feeding them anything as they are just going to ignore it most of the time. They seem to find enough food from the algae that grows on the rocks.1 point


