Leaderboard
-
jayc
Moderators9Points6248Posts -
jc12
Members6Points385Posts -

NoGi
HOF Member5Points5858Posts -

s1l3nt
Members4Points116Posts
Popular Content
Showing content with the highest reputation on 12/21/15 in all areas
-
8 pointsTDS and why is it important Preamble: Total Dissolved Solids or TDS for short is an area of water parameter we talk about very often, and is usually one of the first things we ask about when checking water parameters. This article will hopefully go into some depth for anyone who might still be new to the hobby, and likewise, might teach the veterans a thing or two that they might not have know about TDS. I have tried to keep the language appropriate to newcomers in mind, so please don’t expect a paper that reads like a scientific thesis. This article is also written from the perspective of a fish and a shrimp keeper, as I am, and draws from my experiences in these areas. You will see frequent mention of killis, Apistos, and shrimps. For the sake of simplicity, we will regard Electrical Conductivity (EC) to be of similar importance and similar definition to TDS. A definition of EC is the measure of the water's ability to "carry" an electrical current and indirectly, a measure of dissolved solids or ions in the water. Whereas a definition of “Total Dissolved Solids (TDS) is the total amount of mobile charged ions, including minerals, salts or metals dissolved in a given volume of water, expressed in units of mg per unit volume of water (mg/L), also referred to as parts per million (ppm). TDS is directly related to the purity of water and the quality of water purification systems and affects everything that consumes, lives in, or uses water, whether organic or inorganic, whether for better or for worse.” – (source: HM Digital) From the perspective of an aquarist, TDS can be defined as: a count of all the dissolved inorganic solids in the water. TDS gives an overview of mineral content in the water. It does not just necessarily provide information on hardness even though it does include the measurement of minerals like calcium and magnesium. Instead, TDS also includes measurements of all the other dissolved minerals in the body of water. So you cannot use TDS to give you an indicator of hardness, that is, how much calcium carbonate is dissolved in the water. GH is at its heart a measure of divalent cations, namely Ca (calcium) and Mg (magnesium); and we know KH is a measure of carbonate concentration. Both GH and KH can influence hardness and TDS levels – ‘an aquarium high in GH & KH can have a high TDS’. However, a fish tank could have a high TDS reading but still have low GH and KH readings. In this situation the aquarium water might be high in one or more of the other dissolved minerals apart from Calcium and Magnesium. Therefore, TDS is a better reflection of the total mineral content than hardness measurements. In conclusion, Total Dissolved Solids consists of dissolved ionic elements, both cations and anions. Whereas, GH only measures two elements, Calcium and Magnesium. Let’s see what those other minerals, that a TDS meter/pen measures, might be. In chemical terms, if a neutral atom loses one or more electrons, it has a net positive charge and is known as a cation (source: Wikipedia). Cations are elements that can be found mainly on the left side of the periodic table (metals) and when it reacts, they usually become positive ions. Cations include ions such as calcium, magnesium, potassium, sodium, barium, iron, copper and zinc. If an atom gains electrons, it has a net negative charge and is known as an anion (source: Wikipedia). Anion elements can be found on the right side of the periodic table which reacts with metals to take electrons to form negative ions called anions. Anions include elements such as chloride, nitrate, iodine, bromide, fluoride, sulphide, chlorate, permanganate, phosphate and sulphate. Because of their electric charges, cations and anions attract each other and readily form ionic compounds, such as salts. All these ions and other inorganic ions are what is included in the measurement of TDS. Occasionally you will also hear of the term Total Suspended Solids (TSS). Total suspended solids (TSS) are particles that are larger than 2 microns found in the water column. Anything smaller than 2 microns (average filter size) is considered a dissolved solid. Most suspended solids are made up of inorganic materials, though bacteria and algae can also contribute to the total solids concentration. These solids include anything drifting or floating in the water, from sediment, silt, and sand to plankton and algae. Organic particles from decomposing materials can also contribute to the TSS concentration. As algae, plants and animals decay, the decomposition process allows small organic particles to break away and enter the water column as suspended solids. Even chemical precipitates are considered a form of suspended solids. Total suspended solids are a significant factor in observing water clarity. The more solids present in the water, the less clear the water will be. – (Source: Fundamentals of Environmental Measurements http://www.fondriest.com/environmental-measurements/parameters/water-quality/turbidity-total-suspended-solids-water-clarity/) Therefore Total Suspended Solids refers to solids both suspended and dissolved in water and is directly related to conductance and turbidity (optical determination of water clarity – how cloudy/clear the water is). Dissolved solids (invisible) are therefore the substances that can flow through the filter media, too small to be trapped. And the substances in TSS include undissolved solids (visible), like bits of plant matter, or detritus and therefore includes substances that can be trapped by the filter media. High levels of TSS also have the following impacts: increased levels of TSS obstruct light and therefore reduce photosynthetic absorption in plants. High TSS can gradually decrease the amount of oxygen produced by these plants. Decaying plant matter uses up a lot more oxygen and subsequently reduces the amount of dissolved oxygen available in the water. Unless there is a significant amount of surface agitation (oxygenation). It’s always a good idea to have your filters, be it air driven or canister, break the surface of the water. It will reduce protein scum off the surface and maximise the oxygen exchange. While TSS is not specifically measured in a TDS meter, it’s good to know the difference between TDS and TSS, as well as its influence in the aquarium environment. Measuring Total Dissolved Solids TDS is the measuring of the amount of salts in a solution. For a lot of applications the amount of salt is indicative of the levels of other stuff in a solution. TDS/PPM meters sold for gardening and aquariums figure the amount of salt in Parts Per Million by measuring the Electrical Conductivity of the solution under test. So a PPM/TDS meter is an EC meter that converts the EC value into PPM values. EC is a measure of Electrical Conductivity from two probes 1cm apart. 1 EC is = 1 microsiemens, to convert from EC to siemens multiply by 1E-6. EC can be converted to PPM by multiplying by 500. PPM can be converted to EC by dividing by 500. To convert from siemens to Ohms is s=1/ohms, you can also go the other way and do ohm=1/s for siemens to ohms. Siemens is also known as Mhos, which comes from ohm written backward. The number 500 used to convert between PPM and EC is called the Conversion Factor. Different salts will have different conversion factors because some conduct better or worse than others. NaCl's is 500, this seems to be the most common standard used, and is what was used for the calibration solutions. Though there is a close relationship between TDS and Electrical Conductivity, they are not the same thing. Total Dissolved Solids (TDS) and Electrical Conductivity (EC) are two separate parameters. TDS, in layman's terms, is the combined total of solids dissolved in water. EC is the ability of something to conduct electricity (in this case, water's ability to conduct electricity). The measurement of dissolved solids is expressed in ppm of NaCl (sodium chloride) – TDS can be compared to Electrical Conductivity (EC) and the approximate conversion formula to get TDS(ppm) = 0.64 x EC mS/cm Conductivity measures electrolytes. Aquarists can now measure TDS levels via tests performed using a TDS meter (or TDS pen) in ppm at a relatively cheap price. Alternatively, you could use an EC pen and convert to TDS using the manufacturer’s conversion factor. Picture of a TDS meter or TDS pen TDS meters are usually calibrated using a solution of Sodium chloride NaCl. While Electrical Conductivity meters (EC) are usually calibrated with a solution of Potassium Chloride KCl. How do TDS pens work? Two electrodes with an applied AC voltage are placed in the solution. This creates a current dependent upon the conductive nature of the solution. The meter reads this current and displays in either conductivity (EC) or ppm (TDS). Electronic TDS meters essentially measures the conductivity of water, ie. how well the water conducts electricity. The higher the concentration of ions, results in the higher the conductivity of the water, and thus the higher the TDS level will be. And most of our softwater shrimp and fish don’t like high TDS. Many brands have meters that use a conversion ratio to change EC (conductivity in microsiemens) into TDS (ppm) along with a temperature compensation. It really does not matter too much, which one you choose to use, since they use the standard conversion for tap water of 0.5. For example, an EC measurement of 300 mS is converted to a TDS measurement of 150 ppm (TDS = EC x 0.5). In fact, most (if not all) TDS pens are actually EC meters that convert to TDS automatically saving the user from performing the mathematical step. There are TDS meters that perform a combination of functions (TDS/EC/pH/temp) which allow conversions to be adjusted between 0.47 and 0.85. There is one weakness with TDS measurements however, it does not measure which ions are responsible for the conductivity. So if you are testing tap water you don’t know if it’s the “good” ions like Calcium, Magnesium, Potassium or the undesirable ions like Iron, Copper, Nitrates, or any other number of dissolved solids that makes up the abundance of the reading. That is why many experienced aquarist will recommend using RO water and remineralising it so you know exactly what is in the water. A few general observations on TDS When water reaches a TDS count of 50ppm it becomes electrically conducting, that is, it’s able to conduct electricity at this level. The EPA Secondary Regulations advise a maximum contamination level (MCL) of 500mg/litre (500 parts per million (ppm)) for TDS. Numerous water supplies exceed this level. When TDS levels exceed 1000mg/L it is generally considered unfit for human consumption. A high level of TDS is an indicator of potential concerns, and warrants further investigation. Most often, high levels of TDS are caused by the presence of potassium, chlorides and sodium. These ions have little or no short-term effects, but toxic ions (lead arsenic, cadmium, nitrate and others) may also be dissolved in the water. Higher levels can be a likely cause for corrosion in plumbing. The visual quality of water is also impacted at levels higher than this. A general observation of high TDS water is that it is slightly alkaline in pH, that is it is lacking in hydrogen molecules. As with everything in nature that tries to reach equilibrium, high TDS or alkaline water will want to seek out hydrogen molecules to reach a neutral state. As such, slightly alkaline water often causes dehydration at a cellular level. Low TDS water on the other hand is loaded with positively charged hydrogen molecules and is therefore slightly acidic in pH. Low TDS water is therefore very hydrating at a cellular level. TDS and Low pH fish When we discuss soft water fish or shrimp that like low pH, what that generally means is that these fish are really low TDS fish. While it is not impossible for many of these low TDS fish to adapt to harder water, and higher pH (and often relatively higher TDS levels), the problem is, especially for South American soft water fish and Caridina shrimp, that calcium and magnesium rich water makes the egg’s membrane harder, and dramatically reduces the chances of hatching. And in more recent experiences, I’ve had greater success hatching killi fish eggs in lower TDS levels than at higher TDS levels. I have also observed that high TDS levels (due to high levels of chlorides, calcium and magnesium, fluoride, sulphides as found in tap water) is generally the cause. This is where it can be a common mistake for many people, including myself, to try all sorts of methods to lower pH and hardness but give no attention to TDS values. This is where Reverse Osmosis water can help with this predicament. I now use RO water to successfully lower calcium and magnesium levels, as well as TDS. This in turn has an impact on reducing pH as well as KH and GH. The fish seemed to be much more contented using this method of preparing clean, low TDS water. And as a reward, the fish promptly rewarded its keeper with eggs which hatched into fry (apistos, rams, other South American dwarfs and Killies). If you want to also match the tank water with the shrimp’s or fish's natural habitat parameters, keep the TDS levels low. What is low? Soft water is generally considered to be in the range of TDS 70 – 150ppm. My personal observations have shown me that high levels of dissolved mineral content in the water, are the main reasons for the failed breeding of many Killis, Shrimp (Caridina) and South American dwarf cichlids. This is attributed to inappropriate levels of calcium and magnesium, and subsequently carbonates and bicarbonates. Placing the emphasis solely on pH alone does not rectify the issue since it can be said that pH is a symptom of the overall mineral content in the water, rather than the actual root cause. To make matters worse, pH down chemicals only adds to the TDS count, not decrease it. When breeding low pH fish, keep your emphasis on TDS instead of just pH. Some aquarists can often find themselves in a situation with tap water parameters that are no where near their shrimp’s or fish's preferred water conditions. My tap water in Sydney for example, is pH 7.8+, and GH & KH are also somewhat high for breeding caridina shrimp, Killi, or Apisto dwarf cichlids, which means we need to find a way of reducing it. We need to really stop thinking about just the permanent hardness of pH, KH and GH, or even temporary hardness for that matter. Concentrate on reducing calcium and magnesium hardness instead. Mixing the tap water with just plain RO at a ratio of 50:50 can be the simple solution to solving the problem of TDS, pH and Hardness. We want to keep calcium and magnesium hardness in check since this can affect the fertilisation of the egg, as the egg’s membrane can get too hard to a point of making fertilisation extremely hard (pun) and nearly impossible. Sometimes I will mix RO water with peat treated water along with tap water to make water whose parameters closely approximates the needs of the Killi or South American dwarf cichlids. Tap water can be included in order to stabilise KH levels and thus keep the pH from fluctuating. Occasionally, I will add my own remineralising DIY mix to RO water to bring TDS up to a certain specific level on the occasions that adding tap water was undesirable, especially for my shrimp tanks. TDS readings for my Caridina shrimp are around 140-150, with a lower KH value of 0-1 and GH of around 5-7 have been proving to be successful for me. Neocaridina dwarf shrimps are capable of tolerating slightly higher TDS levels of up to 200. They might survive higher, but it would be unethical of me to advice you that it’s okay beyond 200. TDS readings for Killi and South American cichlids of between 70 and 110ppm with a stable KH reading between 3 and 7. New soft water low pH fish and shrimp don’t merely survive in this treated water, but instead will thrive and multiply. You will find quite frequently that you will need to mix your water changes to a much lower TDS value that your target in order to maintain the tank’s overall TDS. This is normal, as the dissolved solids in the tank is continually increasing from various sources, like fish/shrimp waste, minerals introduced in food, water evaporation, or even decomposition of plants and organic matter. You might even get to a point where you need to change 80%+ of your tank water just to reset the TDS values. Don’t forget to re-acclimatise the shrimp back into this new water. TDS: Water Changes Many professional fish breeders practice the following method of TDS monitoring; it is one important parameter used to keep healthy fish. You could also use TDS levels as a means of deciding on the frequency of when it is time for a water change. A rise in TDS levels means it is time for some water to be changed, returning TDS levels to a lower count. Sharply increasing TDS levels can also indicate overfeeding, an over-stocked tank, or too much added minerals or fertilisers. But I would use caution in relying solely on TDS readings for water change indications. This is best reserved for those that are very familiar with their tank and understands what the TDS reading is showing. “pH Shock” - Moving fish from one tank to another For many years as a fish keeper, and now also as a shrimp keeper, I have understood changing the pH on fish or shrimp too quickly is a bad thing. It was only until I was researching the importance of TDS, a revelation has come to mind. TDS levels can represent different states of osmosis. Many aquarist have largely believed fish that succumb to what we call 'pH shock' is caused by the rapid variation in TDS levels. This places osmotic pressure stresses on the fish's osmoregulatory mechanisms which cannot become accustomed fast enough to the changing environment and hence the fish goes into a state of suffocation and in many cases can cause death. Fish have been shown to withstand fairly significant pH shifts when the TDS was low in both waters. It was not 'pH shock' as it is often alleged– that is, where the difference in pH is significant between one tank to another. But it was TDS shock! Maybe it’s because TDS meters are not as readily available, whereas, pH kits can be found in every fish shop. So the misguided recommendation was to test for pH, rather than TDS – who knows. One could declare that TDS measurements help to give an indication of the differences in osmotic levels between the water of one tank and another. In water with less total dissolved minerals compared to the amount of dissolved minerals in the tissue of the shrimp/fish, will cause the shrimp/fish to lose fluid from its cells via its gills (over hydration). In high TDS water, it has the opposite effect, they become dehydrated. Which causes the fish to have difficulty passing toxins out via its kidneys. This is a longer term impact to the fish, and you might not notice any impact immediately. IMHO, TDS meters are often the most under estimated tool that can be used to give a good indication of how successfully a shrimp or fish will adapt to the water in one tank to another. “Killies are dependent on osmotic pressure to regulate the amount and salinity of bodily fluids, just like any other fresh-water fish. Conductivity, which we measure as tds, is very closely linked to the osmotic pressure across the cell membranes in such fish. Sudden changes in it are what gave rise to all the old "pH shock" myths. The jury is still out on the effect of the hardness ions (divalent metals like Ca, Mg, Fe, etc.) on rain-forest killifish egg development. There is little dispute of the fact that suddenly dunking a killi from high tds water into RO or DI will damage gills and usually kill it dead. The tendency of discus breeders to use that very low GH water may have made them more aware of this problem earlier, but the situation is very similar for killies. In general, tds is many times as critical for killi health as the Ca, Mg, etc., concentrations. The rest of your explanation was right on. tds and GH are only related by a loose coincidence, and the value of one is a poor predictor of the other.” (Source: http://fins.actwin.com/killietalk/month.200009/msg00323.html) “99% of reported "pH-shock" cases were probably from sudden drop in tds. That causes cells in gills to explode as they take in too much water. Going the other way (to higher tds) is dehydrating, but seems to be less fatal, usually. Drip acclimation to major changes in tds is always a good idea. That allows the complex three-level osmoregulatory process to adjust slowly to the new water." ( Source: Wright Huntley, http://fins.actwin.com/killietalk/month.9906/msg00151.html) As a second reference, reading one of J. J. Scheel’s articles on dissolved solids also brought me to this realisation of ‘TDS shock’. Between 1959 and 1965 Col. Jorgen J. Scheel of Denmark sent out some letters about the science and systematics of killifish to any hobbyist that was interested. Scheel had what might be considered today some unorthodox opinions regarding water chemistry. He felt differences in salinity, or total dissolves solids mattered much more than pH (which could be safely ignored). Given this observation was made over many decades of working with killifish, it's a pervasive argument. Here are the relevant passages from Rivulins [killifish] of The Old World: Page 25 "If you move rivuline [killifish] individuals from water containing much dissolved mineral matter to water containing little such matter, these individuals probably soon will be swimming at the surface and they soon die. If you inspect the gills under a microscope you will realize the reason for this. You will find the gills completely ruined. The many brittle cells of the gills burst shortly after the individuals had been placed in water of low salinity, because of the large difference in osmotic pressures. If the fishes are moved from water containing very little dissolved minerals to water containing much matter nothing will usually happen. Page 26 I spawn my non-annual species in rather small tanks (about one gallon of water) and the tanks contain nothing but a mop and the water. Females are separated from males for at least one week, while both sexes are heavily fed. Only one female is placed with the male in the tank, because one female may eat eggs when the other is spawning. As my two types of water have similar salinities I can move the individuals right in and right out of one type of water without any harm. Differences in pH values, even from 5.0 to 8.0 have not produced any harm when individuals suddenly are moved from one type of water to the other (Source: http://info.killie.fish/ref/articles/by_Author/Scheel/ and Jorgen J. Scheel’s book “Atlas of Killifishes of the Old World” is an absolute must have if you are into Killifish.) TDS can also significantly impact the osmoregulation of the gills. Low TDS can cause the red blood cells to be depleted of water in fish that might not be acclimatised to the low TDS. While in high TDS, the red blood cells in the gills can be saturated with water causing the red blood cells to expand. Both will cause respiratory problems. As a result, always drip acclimatise new shrimp or fish to your tank prior to introducing them. Use your TDS meter/pen to match TDS values in your tank and the water of the new shrimp/fish. It usually takes doubling the amount of water from the tank to match the TDS in the bag of the new fish/shrimp. More caution needs to be placed on reducing TDS levels, compared to increasing TDS levels, as the former seems to be more lethal. Methods of lowering TDS There are several methods of lowering TDS, however, we will focus on only two methods as the other methods are unsustainable in the long term. These sources of low TDS water will need to be remineralised with Calcium & Magnesium mix in a ratio of 4:1. Remineralising raises the low TDS water back to a more suitable amount specific to the requirements of your fish or shrimp. Do not use low TDS water except to top up water loss due to evaporation. RO (Reverse Osmosis) Water Reverse osmosis works by forcing water under great pressure against a semi-permeable membrane that allows water molecules to pass through while excluding most contaminants. RO is the most thorough method of large-scale water purification available. There are a huge number and variety of RO systems around. Studies have revealed how the concept of osmotic pressure can assist in decontaminating water. With a fine particulate membrane and the act of forcing water through that membrane with sufficient pressure, will produce clean water on the other side of the membrane. The clean water is stored and the filtered waste is either thrown away or used for other non consumption uses like watering plants. RO systems can removed up to 98% of all ionic and organic impurities like pollutants, sediment, bacteria and contaminants. And as a result, TDS levels are drastically reduced. The RO filter membranes do not last forever unfortunately. As the TDS of the output water rises, it is generally an indication that the membranes need to be changed. The frequency of use and the level of TDS of your source (tap) water will determine the frequency of replacing the membrane. Deionisation (DI) In large scale DI systems water is passed between a positive electrode and a negative electrode. Ion selective membranes allow the positive ions to separate from the water toward the negative electrode and the negative ions toward the positive electrode. High purity de-ionized water results. Deionization is an on-demand process supplying purified water when needed. This is important because water at this extreme purity level degrades quickly. The nuclear grade deionization resin or polishing mixed bed resin removes almost all the inorganic contaminants in the water increasing the resistivity of the water to a maximum of 18.2 megohm-cm. However, deionization alone does not remove all types of contaminants like dissolved organic chemicals. Deionization filters are not physical filters with a pore size and cannot remove bacteria or particulates. The water is usually passed through a reverse osmosis unit first to further remove non-ionic organic contaminants. RO vs DI: RO purity is relatively continuous while DI gets progressively worse as the resin nears its regeneration point. · DI chemicals are expensive and therefore operating costs are higher than RO per litre of purified water. · RO membranes are a physical barrier that remove bacteria, viruses, algae and suspended solids, while DI systems cannot remove these contaminants. · DI uses two hazardous chemicals, hydrochloric acid (HCl) and caustic soda (NaOH) for regeneration of the resin beds. These chemicals needs special storage and disposal requirements. As you can see, DI water is also uneconomical for aquatic hobbyists. More portable DI systems nowadays use Ion exchange resins to exchange non desirable cations & anions; and replaces them with hydrogen and hydroxyl, respectively, forming pure water (H20), which is not an ion. One type of resin will remove positive IONS, while another type of resin will remove negative IONS. Cations Anions Removed by Cation Resins Removed by Anion Resins Calcium (Ca++) Chlorides (Cl-) Magnesium (Mg++) Sulfates (SO4=) Iron (Fe+++) Nitrates (NO3=) Manganese (Mn++) Carbonates (CO3=) Sodium (Na+) Silica (SiO2-) Hydrogen (H+) Hydroxyl (OH-) (Table care of Puretecwater) You might come across the term "Mixed bed" or "Dual Bed" system - this is a DI filter with both Cation and Anion resins. RO/DI portable systems Modern portable RO/DI systems solve both the individuall RO and DI shortcomings. These systems combine an RO membrane with DI resins to produce near 0 TDS water. The RO removes the organic waste like bacteria, viruses and algae that the DI cannot. While the DI removes the minerals like Calcium, Magnesium, Chlorides, Sulfates, etc that the RO membrane misses. By combining the two, we get the best of both worlds. Most Reverse Osmosis filters you can buy today, like those sold by FSA, https://www.filtersystemsaustralia.com.au/store/index.php/reverse-osmosis-water-filter/aquarium-systems.html are in fact RO/DI systems. Rain water What can be better than water from mother nature? After all, our river systems are made up of water that falls as rain. So this has to be the best source of water, is it not? In most cases it is. However, many of us live in polluted cities, and we collect and store rain water in manmade receptacles that might add to the contamination of rain water. So some form of caution is necessary. If you are confident that the water is collected off relatively clean, rust free roofs and stored in plastic drums, then rain water is a perfect free source of low TDS water. Rain can be sporadic and unpredictable in some countries, so an RO system as a backup is always a good idea. There are other methods of lowering TDS, as mentioned in the next section, but I will not focus on them as it’s not really a preference. I mention it here only as a last resort. Peat All over the internet and on forums, many can attest to using peat in helping to lower pH, GH, KH, and TDS. This greatly depends on your own water conditions and how much the peat treated water affects TDS. If your tap water is particularly hard, you might need more peat to lower the mentioned parameters compared with someone else’s tap water. It is not uncommon to mix the peat with RO water (and/or maybe some tapwater) in an attempt for one to achieve a stable chemistry that agrees with the shrimp/fish you are keeping. The addition of tannins, phenols, humic acids along with the combination of peat treated water allows you to create water conditions close to your livestock’s natural environment. Peat water (even small additions) is positively regarded by many aquarists, as essential for low TDS fish, especially dwarfs such as Discus, Tetras, Corys, Angels, Rams and Apistos. The problem with recommending peat is finding it in Australia is difficult. Especially peat that does not also have fertilisers included. Then there is the extra effort in making peat water, and the need to make it several days ahead of use and store it in containers. The colour that results from the added tannins from peat is also not to everyone’s liking. Distillation Distillation involves boiling the water to produce water vapour. The water vapour then rises to a cooled surface where it can condense back into a liquid and be collected. Because the dissolved solids are not normally vaporized, they remain in the boiling solution. However, some impurities with the same boiling point of that of water can be transferred to the collection water, and for this reason, Reverse Osmosis can produce purer water. The absolute advantage of the distilled water is the complete absence of harmful substances like bacteria, viruses or algae. Considerable amount of cost is required to produce and maintain the thermal requirements for a distillation process. As a result this method is uneconomical for aquatic hobbyists. A quick word on Water softeners Water softeners do not necessarily produce water that is suitable for Softwater fish and shrimps. Water softeners work by removing the temporary hardness (such as carbonates) by replacing it with permanent hardness such as chlorides. This increased level of chloride is unnatural to any environment where the fish or shrimp may be found. While the water is now softer, from the fish’s or shrimp’s point of view the water is still chock full of dissolved minerals (chlorides or sodium) and TDS will still be high. The cautious approach is to avoid using water softeners altogether if you are trying to reduce the hardness of your aquarium water. Increasing TDS We have discussed reducing TDS, but how do you increase TDS the right way? Increasing TDS is one of the easiest things to do. In fact, you could do nothing to the tank and TDS will increase over time. You could add salt or sugar to the water and TDS would increase. However, that increase is due to waste from fish, food, etc. and not always a good thing. And neither is adding salt or sugar - Don't do it ! The main minerals/chemicals that you want to use to increase TDS in an Aquarium is Calcium & Magnesium at 4:1 ratio and to a smaller extent other minerals like Potassium and trace elements. There are several off the shelf products that will remineralise low TDS water, increasing it to a suitable level. If you'd like to Do It Yourself, I even have a recipe here ... Summary One of the most vital aspects of keeping softwater shrimp or fish is the significance of TDS - Total Dissolved Solids. The majority of aquarists will put their attention on the pH only for soft water fish or shrimp but completely forget about TDS. A simple $20 piece of equipment will be able to rectify that. The various years of observation has lead to a realisation that low pH actually means low TDS be it for fish or shrimp. Both water parameter readings need to go hand in hand. We cannot ignore one or the other when you are trying to replicate the aquarium’s environment. The effects of shock can be offset by slowing mixing the water. And this can be important between your own tanks too, as TDS is unique to each tank. A TDS meter is an absolutely essential tool in an aquarist’s cabinet. For the shrimp keeper, monitoring TDS is of vital importance. In an environment where the shrimp are constantly using up Calcium to grow their shells, and dissolved solids are constantly changing due to food, nitrogenous waste being produced, and even evaporation of water can cause fluctuations in the level of dissolved solids in the tank water. This constant fluctuation can cause stress in the shrimp. This stress can lead to a reduction in their immune systems, and sometimes eventuate in death. Close monitoring of TDS is required to ensure the shrimps environment is stable. TDS should never fluctuate wildly. Aim for a constant TDS reading in the tank. In doing so, you might find that you will need a lower TDS reading for water changes in order to maintain a target. For example, if your target is 150ppm TDS, then you might need to aim for 110ppm TDS in your change water. Aiming for 150ppm TDS in the change water will result in TDS rising overtime as dissolved solids gets concentrated in the tank. Over time, TDS continually and constantly rises each day. They enter the aquarium via fish food, water conditioners, plant fertilizers, medications, and any substance that treats water in some way. Water evaporation will also cause the dissolved solids already in the tank to be more concentrated. TDS readings can also be used as an indication of when it is time for a water change. If you see TDS rising to the upper limits of your target TDS, then it’s time for a 5-10% water change. If the small 5-10% water change is still not enough to reduce TDS to your ideal target, another water change might be necessary two or three days later. Don’t rush in reducing TDS. Slow is always advisable. TDS readings also come in handy when acclimatising shrimp and fish. We all know how to drip acclimatise shrimps or fish. This process reduces the impact of large fluctuations in differing water parameters. I often hear of people saying “I drip acclimatised my shrimp/fish for 3 hours” or “6 hours”. But how do you know that 3 hours or 6 hours or even 12 hours was enough for that matter? Instead, rather than acclimatising new shrimp or fish by amount of time, we should be monitoring the TDS. Once the TDS reaches the same reading between the tank and the water the new shrimps/fish came in, then you can be sure that GH, KH and pH will all be matching as well. This can take a varying amount of time depending on how fast you add the tank water and how much water is already in the bag containing the new shrimp/fish. Once TDS is matching, then place the bag or container into the tank for a few more minutes to ensure temperature is the same before catching and releasing your new pets into the tank. It can take 6 hours or it can take 16. It doesn’t matter, but I have never lost a fish or shrimp using this TDS monitoring method of acclimatising. JayC Shrimp Keepers Forum http://shrimpkeepersforum.com/forum/8 points
-
We are blessed with a beautiful climate here in Australia, arguably mild summer and winter seasons compared to other continents around the world. However, we experience the infrequent heat waves and harsh summer days which inevitably require hobbyists who keep heat sensitive shrimps to explore cooling options for their tanks, perhaps more so for those living in the warmer regions. Shrimps require a consistent environment to flourish and temperature is one of such parameters that can be easily controlled with a chiller. I will endeavour to outline easy-to-follow steps on how to select a chiller for your tank. As the target audience of this article is for the general hobbyists, I will not delve into physics, thermal dynamics or explain how a heat exchanger works. Step 1: Determine the total water volume to be cooled This is simply a measurement of your total water volume to be cooled. Please remember to include the water volume of the sump if your system runs on one. Most tanks are rectangular or cubic shape so a simple Length x Width x Height measurement will suffice. Example: For a 4’ x 18” x 18” tank, 120cm (L) x 45cm (W) x 45cm (H) = 243,000 cm3 = 243,000 ml = 243L Step 2: Select a chiller based on total water volume to be cooled Chillers are usually rated to cool a specific volume of water to a set temperature below ambient air temperature. Simply select a chiller that is rated to cool the water volume calculated in Step 1. The general rule of thumb is to consider a chiller that is one size larger than what you require in order to be energy efficient. A chiller works a lot harder if it kicks in frequently. Selecting a larger chiller that kicks in less often can save you money in the long run. Example: With reference to the example in Step 1, (a) Hailea HC-100A is rated for 50L to 220L*. (b) Hailea HC-130A is rated for 50L to 300L*. (c) Hailea HC-150A is rated for 50L to 400L*. Based on the above specifications, the HC-100A would not be adequate for our purpose. While the HC-130A is rated appropriately and adequate to cool 243L, I would select the HC-150A following the general rule of thumb to go one size larger. The efficiency of a chiller is affected by a number of factors ranging from ambient conditions, physical location of the chiller, flow rate, whether the air filter has been kept clean, etc. It is also dependent on the cooling requirements to your specific environment. If you live in a very warm region and you would like to cool your tank 15 or 20 degrees Celsius lower than your ambient air temperature, you might have to consider a chiller that is two sizes larger. Step 3: Select the appropriate flow rate to drive the selected chiller The appropriate flow rate to drive the selected chiller is an important consideration. If the flow rate is too slow, the water within the chiller gets cooled too quickly and the thermostat switches the chiller off. Warm water then enters the chiller triggering it to kick in again within a short period of time. This is not energy efficient and frequent kicking in of the compressor would result in more wear and tear. If the flow rate is too fast, the water flows through the chiller too quickly to be cooled effectively. The chiller takes a longer time to cool the water in the tank, which is also not very energy efficient. Example: With reference to Step 1 and Step 2, the Hailea HC-150A has a recommended flow rate of 250lph to 1,200lph*. We need to consider a few things before we can decide the appropriate flow rate for the Hailea HC-150A. This depends on how you would like to drive the chiller. Below are 3 typical scenarios on how most hobbyists would drive their chillers. Canister filter A canister filter’s flow rate is usually rated without any filtration media (i.e. an empty canister) or without taking into account any inline equipment (e.g. inline heater, UV, pre-filter, CO2 diffuser, etc.). If you plan to have other equipment connected inline to your canister filter, I would recommend getting a canister filter that is rated on the higher side of the chiller’s recommended flow rate. Also, as the canister filter gets cycled and matures, dirty filtration media, hoses and pipes would also reduce the flow rate. In this instance, I would recommend getting a canister filter rated at 800 lph to 1,200 lph. Sump If you are planning to drive your chiller from a sump pump, you could potentially select a sump pump that is higher in flow than what is recommended for the chiller. The flow rate through the chiller can be easily adjusted by teeing off from the sump pump and controlled using a valve. This also allows you to ‘future proof’ your design if you should add more equipment in future (e.g. fluid reactors, UV, etc.). In this instance, I would recommend getting a sump pump of 1,200 lph to 2,000 lph, factoring in other considerations like pressure head, hose/pipe diameter, etc. Dedicated pump If you should elect to drive the selected chiller with a dedicated pump, with no intention of connecting any other inline equipment, I would recommend selecting a flow rate that is slightly above the mid-range of the chiller’s recommended flow rate. In this case, I would select a dedicated pump of around 800 lph. A dirty impellor would have a slower flow rate so it is recommended to clean your pump impellor periodically. A few tips: - Locate the chiller in a cool location away from direct sun. - Do not enclose the chiller in a confined space (e.g. in the aquarium cabinet) without proper ventilating devices (e.g. exhaust fans, etc). - Clean the air filter of the chiller (if applicable). - Connect your chiller as the last piece of equipment before the water is returned back to the tank. You would want filtered clean water to be passing through the chiller as it is easier to clean canister filters, sump pumps or dedicated pumps than it is to flush out a dirty chiller. *Specifications are taken from Hailea website (http://www.hailea.com/e-hailea/index.htm) as at 21 December 2015.4 points
-
3 points
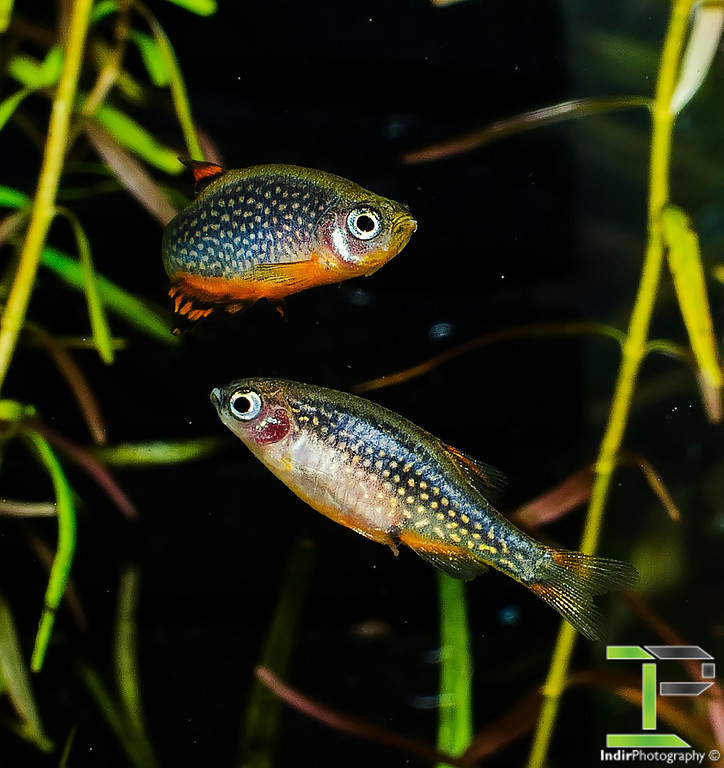 Breeding Celestial Pearl Danios (Also known as Galaxy Rasboras) Firstly I will start by saying that these are a fantastic little fish that show no aggression to any other species nor within their own species. Males will spar with each other sometimes and often display to females, no damage is ever done. They are shrimp friendly, but will take down shrimplets if they get hungry. So they can be added to a mature and established shrimp community tank to ensure maximum shrimp numbers surviving also. These fish prefer a nice planted tank with a dark substrate, this helps reduce skittishness and bring out their colour even better, it also gives refuge for fry that will pop up in the display tank! Feeding Celestial Pearl Danios will need to be fed small foods, due to their small mouth size. Though they are always excited to see live black worms (2-3 of these will make them VERY fat). Mine love grindal worms so they get this often, as well as baby brine shrimp and cyclops regularly. They will readily take dry foods of small size, I have had great success with Sera Vipagran Baby. To keep them in shape for breeding on a regular basis, I feed them twice a day with baby brine shrimp and a higher protein food like grindal worms, black worms, and so on. I find live high protein foods keep them in better shape and increase egg numbers. Sexing CPD Celestial Pearl Danios are fairly easy to sex, especially when they are of mature/breeding age. Females will have a much rounder body shape, when they are younger they will also have a taller body (older/more mature males develop this also, usually 6+ months old). Females also have a prominent black spot in front of the anal fin, the difference becomes more obvious as they mature more. Males are more slender in the body but will have much better colour in the body and fins, they develop a nice blue to purple colour to the body with nice orange fins and often the under belly too (the under belly colour can also be the case in females though, so isn’t a guarantee). In the below photos you will see the younger male has a slender body and orange under belly, as well as better colour than the female. However, as you can see in the older pair, the male has developed the deep body also and the female has a light orange hue to her under belly. The male in the second photo is a prime candidate for breeding as he is quite nicely coloured and has developed good body/fin shape and colour. Young Pair – Male on the bottom right and female on top left: Older/More Mature Pair – Male on top and female on bottom: Breeding Celestial Pearl Danios will start breeding from as young as 3 months old if fed well and have clean water throughout their short childhood. However, I find they are usually all mature by 4 months old. You will need at least one pair for breeding, however I have better experience breeding a trio as this gives females times to recover between breeding sessions as these fish are “constant” (usually daily) spawners. Spawning is induced by males, where they will hover over a specific area they like (moss, spawning mop, etc) and when a female is nearby they will begin to shake their bodies and flare their fins in hopes of attracting the female. They will do their dance and display, but the spawning comes when the male has his head pointed down and shakes, following the female behind closely. These fish will often spawn in a display tank and you will get fry popping up now and then in a well planted and mature tank. However, celestial pearl danios will readily eat their eggs and fry in my experience so this method will result in minimal fry numbers. There is another option which can work well if you have spare tanks, or enough room to rotate breeders. This method is basically using a bare tank with some java moss and keeping a trio in here for a 5 to 7 days, then moving them to another tank while the eggs hatch in the first tank. Then you keep repeating this process until you have enough fry or forever if you have the space… I have not tried this method myself, but have heard of others using this method with success. I personally don’t have the tank space for this method. The final method which has worked the best for me has been a dedicated breeding tank. In this tank all I have is a sponge filter and an acrylic yarn spawning mop (make sure it is 100% acrylic otherwise it will eventually rot in the tank). I keep a trio of my best fish in here, one male and two females. The male I use is the “older” pair from the photos above for his colour and body shape, as well as two nicely coloured and sized females. I call this the “permanent breeding factory”, because I am able to get on average 20 eggs per day with this method. To collect the eggs in the factory, I use a turkey baster purchased on eBay. I stop the sponge filter and after about 5 minutes or so when everything has settled down I slowly lift the spawning mop up and shake the mop, to make this easy I tied a long piece of yarn which comes out of the tank onto the lid for easy lifting without having to drop my arm into the tank. I then use a light on the front half of the tank, placing the light from the side helps in seeing the eggs easier as does a dark base (my tanks have black bottom panels). Using the turkey baster I suck the eggs up and collect them in a plastic cup for later use. With the eggs in the cup I then fill the cup most of the way and use an air stone on a very low bubble rate to keep circulation over the eggs to prevent fungus. Another option is to put the eggs in a fine meshed breeder box or poke some tiny holes into the cup and float it in the tank to keep fresh water circulating over the eggs. Eggs take about 3-4 days to hatch on average, and the fry will now be wrigglers which cannot really swim yet and are not ready to be fed. This wriggler stage will take about 3-5 days before they are free swimming. They will often be holding onto the side of the cup, or laying on the base. This is nothing to worry about. Once fry are free swimming they will be quite small and very thin in body thickness. You will need very small foods to have the best success, such as paramecium, spirulina powder, fry powder foods like sera micron and so on. I find that I get a MUCH better survival and growth rate when the fry are fed live foods so I only use paramecium for feeding them. The fry will need about 10-15 days before they can readily eat baby brine shrimp, I don’t bother with foods larger than paramecium until this stage mainly because micro worms and similar are a pain to keep going and requite too much maintenance. Once the fry are on baby brine shrimp, they will grow much quicker. Around the 5-6 week mark, I start introducing sera vipagran baby or similar small sized foods. I however prefer to give them live foods more than dry foods as I find the fry grow much quicker and are healthier and develop colour earlier. Fry will grow fairly quickly and at the 6 week mark will be around the 15mm mark and should be showing some slight purple/blue to the body and their golden spots should be readily visible. From this point on the fry will slow down their growth as they reach their adult size but colour will come in much quicker. By the 12 week mark the fish should be very close to looking like full grown adults, with the deep orange colour developing quickly after this point. Fish should also be reasonably easy to sex from this point on as the body shape has already developed and the colours are coming through quickly. Now I hope you enjoy the photos of the fry below, which should help you gauge age and so on of your fry! As a comparison, the first two photos are of fish the same age but the first shot is of a fry fed solely dry foods like spirulina powder and similar from hatch while the second photo is a fry fed on live foods from hatching. Young fry (most likely female) at 12 weeks old – Fed solely on dry foods from hatching. Young Female Fry at 12 weeks old – Fed on live foods, with dry food at the later stage in life Most likely a nice young female, but could be a male. Young pair of CPD, approximately 7-8 weeks old. Young female, approximately 7-8 weeks old Thank you for reading along and I hope you find the information useful, or at least enjoyed the article!3 points
 -
Last day to get your entries in folks. With only 2 entries so far and such a great prize, odds of winning are pretty good. To help motivate people, there will be a 2nd and 3rd prize from what's remaining on the Christmas tree.2 points
-
 2 pointsSo I've been meaning to post for the last week about my experience with macropore, but life kept getting in the way! For anyone who comes across this thread in future, better late than never I figure. Step 1: checked my test kit by testing RO water at the same time. As you can see, the test kit was reading fine but my tank nitrates were through the roof. I added 375ml of macropore to my 440L tank last Sunday. I didn't have time to dismantle the filter (plus something always goes wrong and I end up dumping water all over the carpet), so I just hung it in my tank in front of the power head: After 24 hours, I did the first test. Nitrates were way down to 10-20 already. After 48 hours there wasn't a huge amount of difference, but it was closer to 10 than 20. After 48 hours I got bored of testing my nitrates every 24 hours. Jeez, do I hate that test kit. </rant> Ahem. So after 1 week, I managed to get the macropore into the filter (without too many accidents) and the results are great - looks like 10 to me :) Can't say that the shrimp look that much different yet - I don't know how they survived so long with such high nitrates (and don't get me started on the Ph), but for now it appears to be stable. Thanks everyone for the input!2 points
 -
2 points
-
1 point
-
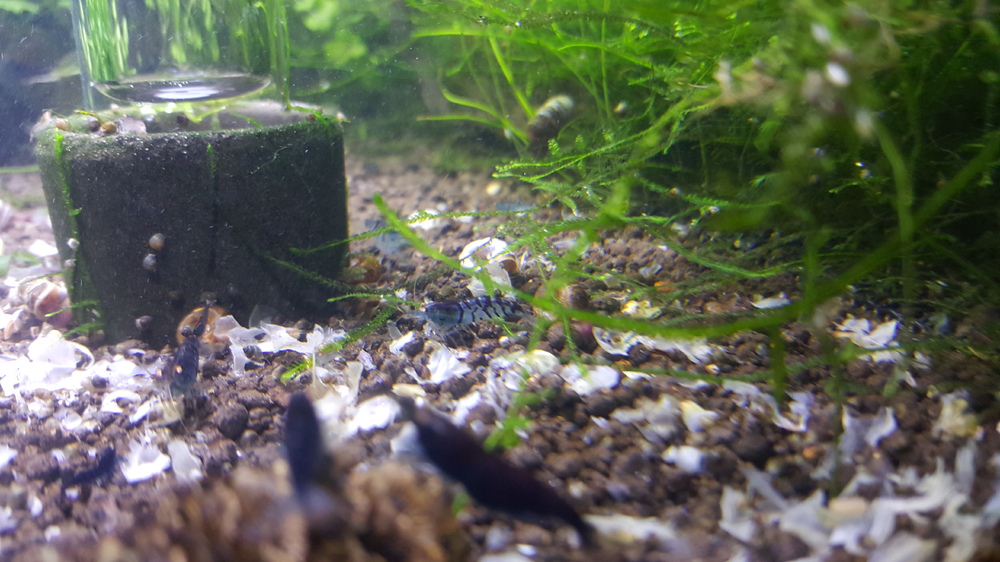
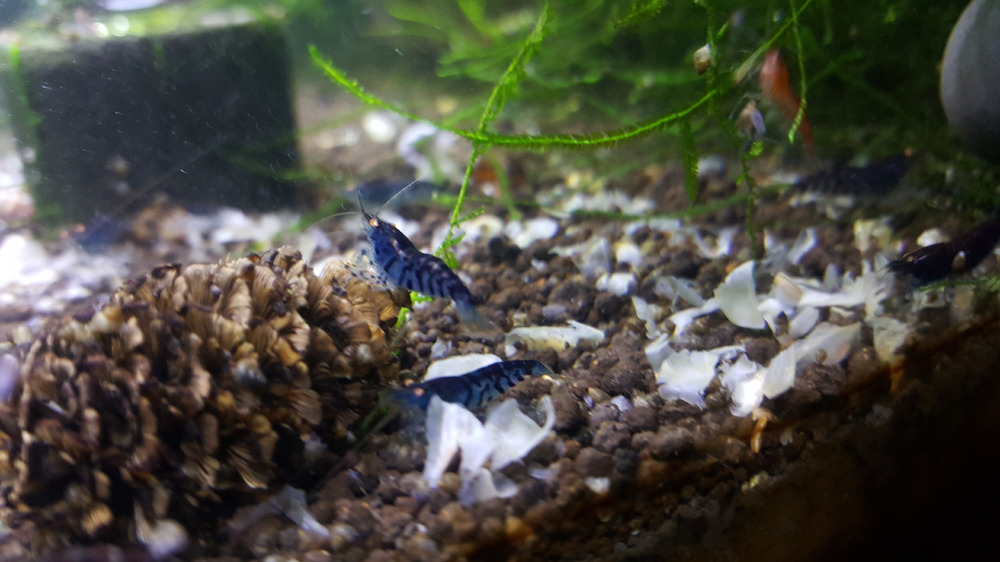
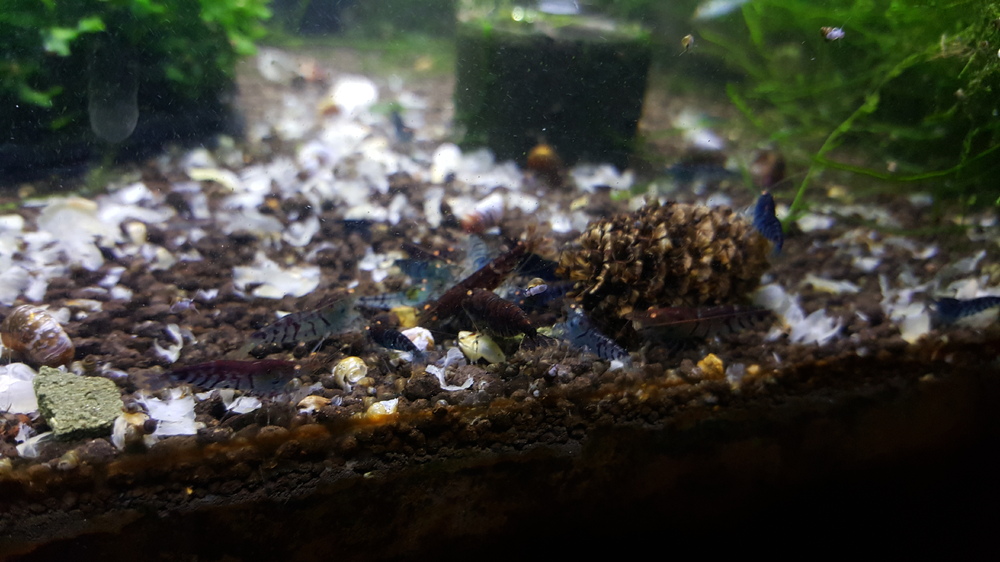
 1 pointI haven't updated this tank in a few weeks. I did a bit of a trim and pulled out a lot of hair grass. Makes it a lot easier to see the shrimp. Starting to see a lot of shrimplets and juvies. Some are looking really good. Enjoy.


 1 point
 -
1 pointI'll keep an eye on the tank (as per usual). The nitrates have been too high for months now, but I never really noticed many deaths. I'd see 1 or 2 every so often, but I figured in a colony of hundreds of shrimp that only live 18 months to 2 years that a couple of deaths every so often was normal. With such high nitrates the mosses are looking super-awesome, now I'm overdue a trim! ;)1 point
-
A simple 3 step guide on how to select a chiller for the general hobbyists. http://shrimpkeepersforum.com/forum/topic/10480-how-to-select-a-chiller-a-simple-3-step-guide/1 point
-
1 pointThat's exactly what this thread needed ... colourful pictures.1 point
-
Great article with awesome photographs to boot!1 point
-
1 point
-
Here is my entry for this competition :) Breeding Celestial Pearl Danios Good luck to everyone entering!1 point
-
 1 pointThanks guys. Nogi has got my first lot of culls but I'm sure I'll have some more soon.1 point