Leaderboard
-

buck
Members8Points758Posts -
FMuscle
Members4Points134Posts -
jc12
Members3Points385Posts -

DemonCat
Members2Points203Posts
Popular Content
Showing content with the highest reputation on 12/06/15 in all areas
-
 2 pointsHey guys i thought i would show you exactly how the tank is now running and the equipment used so from the top I've got the long 16/22 mm overflow strainers Which of course leads us to the plumbing Now we are at the sump which starts with coarse filter foam Then a fine filter foam Then comes the media which consists of 5 large bakki rods (about 400-450 long) and 6 smaller pieces of bakki rod (ranging from 100-180mm), approx 3L matrix,approx 2L of ceramic bio rings and 2 other bags of an unknown media that looks like river stones almost (if anyone can id it from that description that would be great). Then we get to the divider which has more of the coarse filter wool then its into my dodgy bros inc boss bio media tumbler sectionhttps://vimeo.com/147999136which seems to be working really well as i threw a handfull of new stuff in and there is definitely a brown tinge to the original lot From there iv got a 1500lph pump pushing the water through the uv filter ( no pic as i need to clean it up back there haha) then into the beast my hailea 300 Actually that reminds me i need to do an appreciation post for John and Chelsea at tech den coz John recieved email after email with me stressing on getting this thing over to the west side safely and im pretty sure i scared the hell out of Chelsea about the delivery being signed for in bunnury which is 140 odd kms from me haha but anyhow back on topic now. Then its off to the spray bar that runs the length of the tank so thats the main system then on top of that i have added a biospon and 2 other large double sponges ( i need to get 1 more) and last but not least is the cheapest out of everything the black background, but the difference between having a light coloured wall as a background and the black is huge I will add some more photos soon and in the next few weeks I will show yous how the different sections are going. If you can see something that could be tweeked to make this a better setup let me know Cheers guys thanks for reading2 points
 -
 2 points
 -
I have been a long time lurker on this forum and have learnt a lot from past and present members who have contributed to this forum. Thank you. This is my first 'real' post and I hope this would help anyone who might be considering building a rack themselves. As requested by @Disciple, hope this helps you too. Just a bit of background on my experience. My only previous build attempt was for a stand and sump for a 4x2x2. It was my first build dabbling with staining wood and using silicon for sump baffles, etc. As you can see from the photos below, they are pretty amateurish but I am happy for how it turned out as a first attempt. Next step is to fit some doors to it. The stand was built following this video by King of DIY. https://www.youtube.com/watch?v=jN4Y9AYuwcQ Anyway, this gives you an idea of the level of experience I have before I embark on my ambitious attempt to build a rack. Below are some photos of my 4x2x2, sump and stand build, and some of its inhabitants. Sorry they are not shrimp related and not of great quality taken using my phone. Stand and sump Filled up and planted. Display tank front view. Display tank side view. With background in place and tank inhabitants added consisting of altum flora discus, german blue rams, panda corydoras, cardinal tetras, otocinclus, red cherry shrimps, darwin algae shrimps and darwin red nose shrimps. Altum flora discus. Panda corydoras. German blue rams with their fry. I have browsed many build threads including some from here and have built on my ideas collectively from different sources. The specific post from @BlueBolts here: http://shrimpkeepersforum.com/forum/topic/1415-breeding-rack-no2/ has inspired me greatly and I would like to acknowledge that. I followed the DIY rack build as outlined here: http://shrimpkeepersforum.com/forum/topic/7063-diy-rack-for-under-50-in-under-2hrs/ The plan, materials, and costs This rack will be located in the lounge room so it has to be 'display-ish' quality and light from it must not interfere with the TV or be too blinding to people sitting around the lounge room. Also, no unsightly hoses/pipes are to be seen. I managed to convince the Minister for Home Affairs that a canister filter and chiller by definition, is not categorised as hoses or pipes, and would be in no way unsightly. The LED display from the chiller would provide subtle mood lighting, and the gentle humming of the filter and soft soothe whirling of the chiller fan would be therapeutic for lounge surfers, and would also greatly enhance movie watching experience with enriched sound depth and effects. Hence I received approval to have a canister filter and chiller located next to the rack. I used 5 x 5.4m long 90x45mm MGP10 untreated structural pine bought and cut to size from Masters for $83.75. I find Masters generally sells timber cheaper than Bunnings. Since I have both of them close to where I live, I selectively buy what I need from where it is cheaper. The frame is held together by 10-8 x 75mm zinc plated countersunk screws. I bought a box of 250 screws from Bunnings for $27.50. The rack measures 1390 x 420 x 2200 mm (L x W x H). The plan is to hold 2 x 2'x15"x15" tanks on the top and middle tier each, and a 4'x15"x15" hospital/quarantine/grow out/sump tank on the bottom tier. Each tank would be insulated by 20mm foam around the sides, back and base as I plan to run both tropical (28-30 degrees C) and chilled (22-24 degrees C) tanks on this rack. Plumbing for air and sump would be hidden within the frame. Please disregard the mess in the background. Still sorting out stuff in the garage after the move. From this: To this:1 point
-
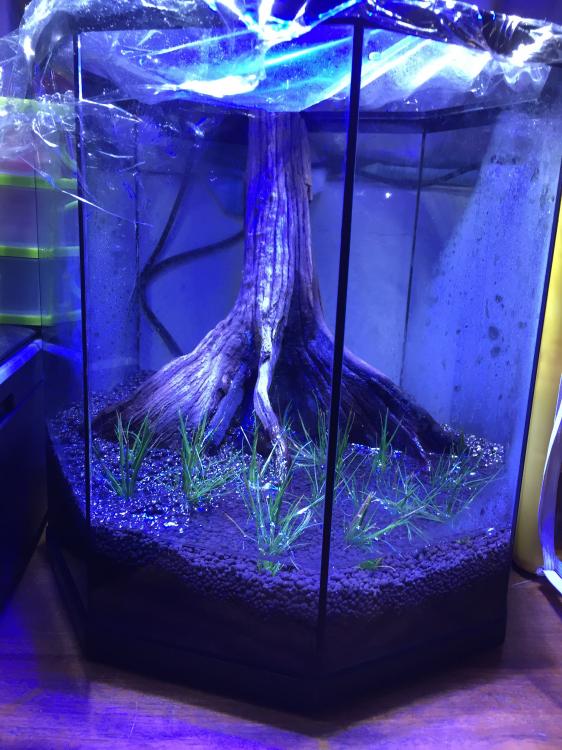
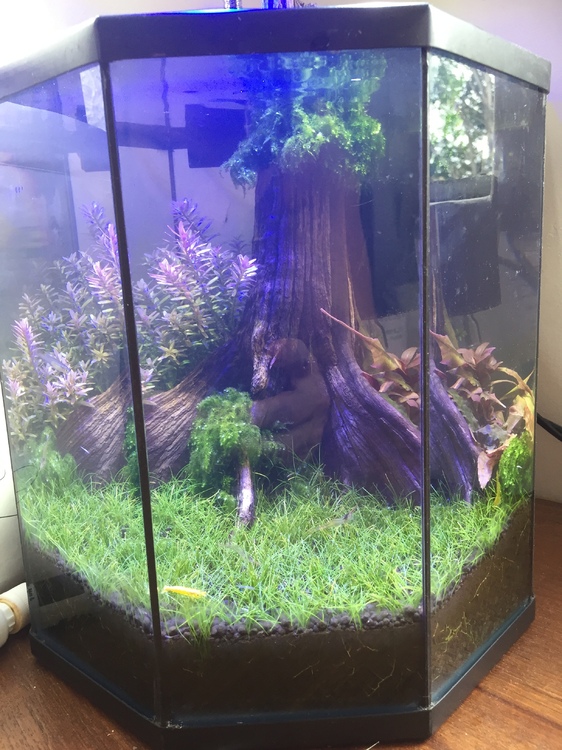
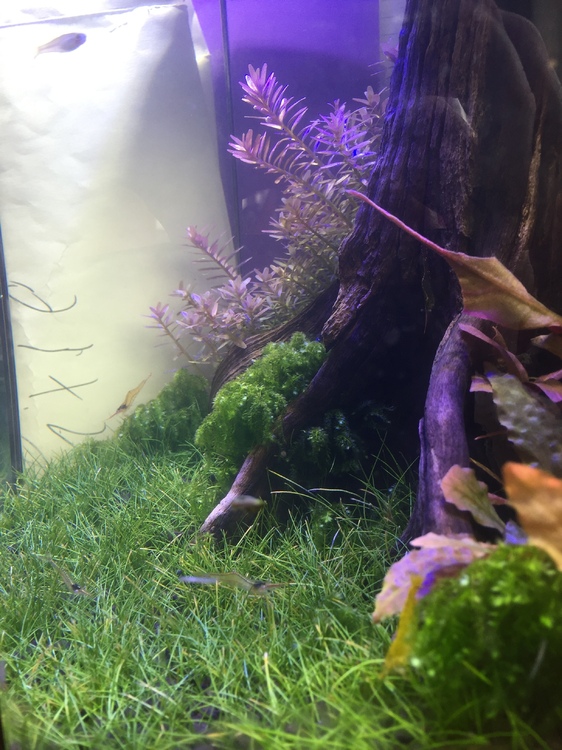
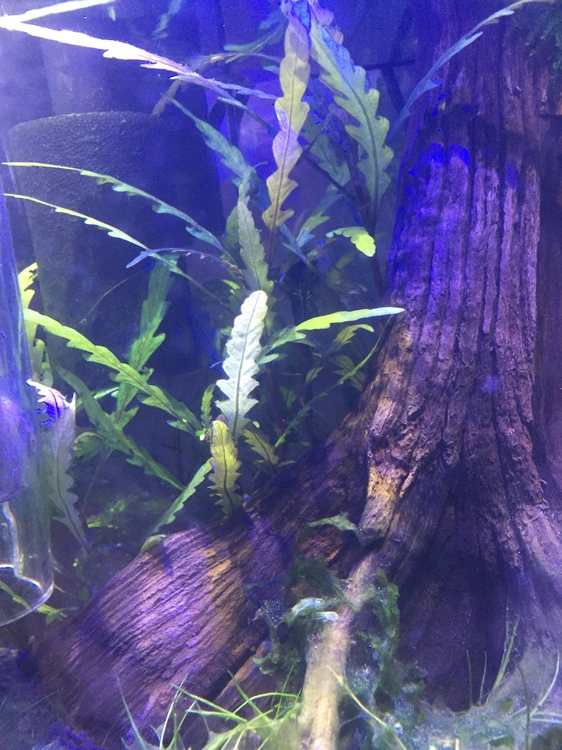
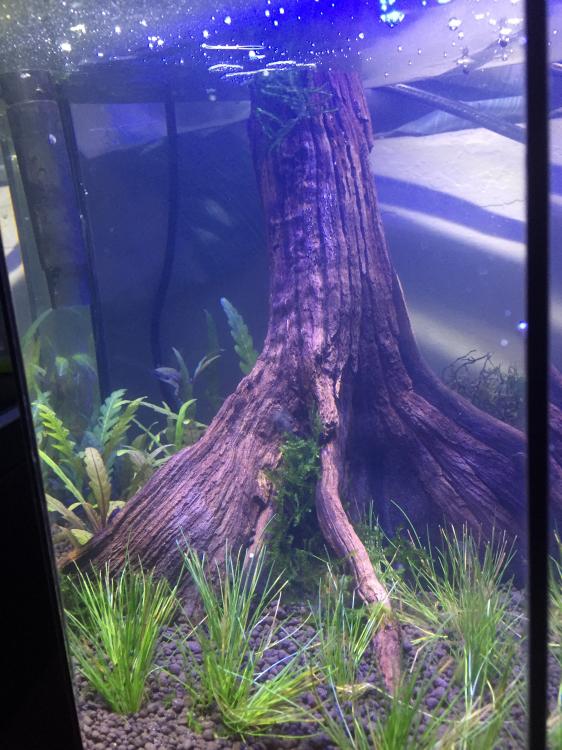
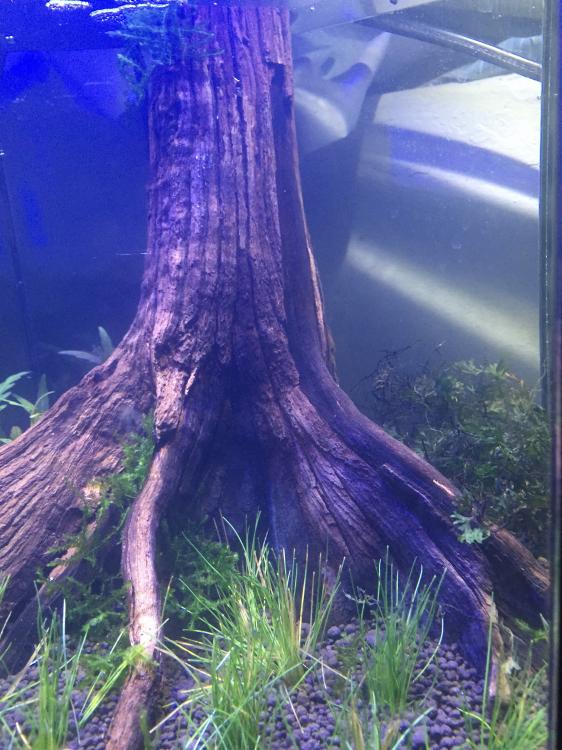
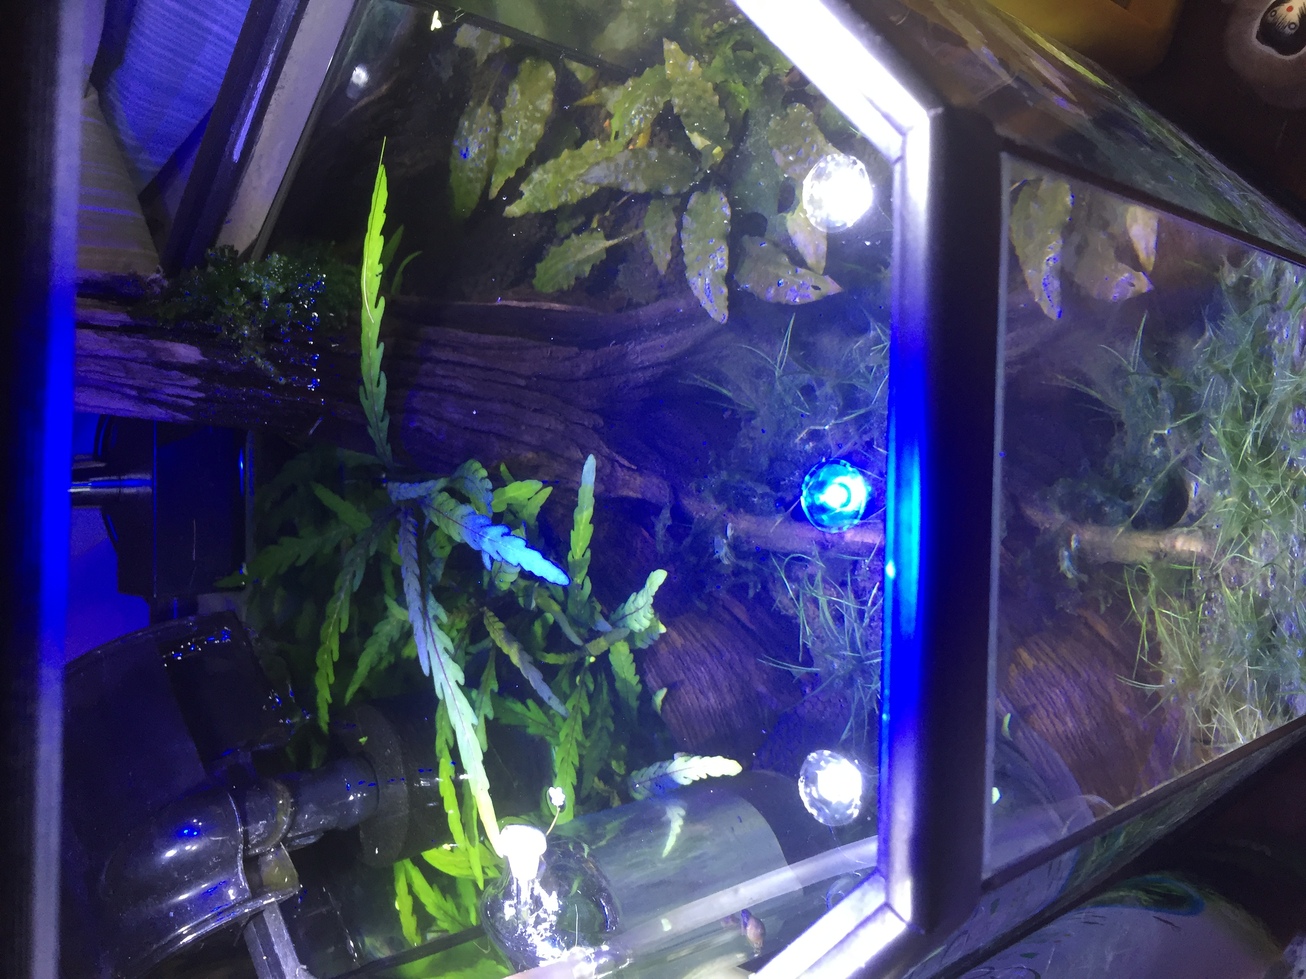
1 pointI was at age of aquariums the other day I picked up a little green elements light and decided to do a scape in a little hex tank. I grabbed some mangrove wood for the centre piece and it fit like a glove! I already had an idea of what I wanted to do with the scape, Belem hair grass front and blyxa japonica at the back. I'm not sure if I'm still keen on the blyxa I might change it to a stem or my old fav hygrophila pinnatifida... But I'll see how I feel after the dry start has progressed more. The details Tank: 25cm high and 25cm across octagon Soil: Ada Amazonia Filter: Aqua Eden 511 Light: green elements Flora: Eleocharis Belem, I'll update the others when I decide. Forna: atm I'm torn, being an octagon a betta would make for a sweet ufc thread title pun but I would also like a little school of rasbora brigittaeor similar micro fish(except celestial pearls been there done that haha). Then there is the colour of cherry to put in there, do I just put some yellows in or do I get some bloody marries... I have a while to work it out since after the dry start I have the Ada to cycle haha
 1 point
 -
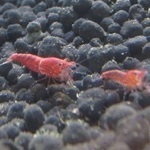
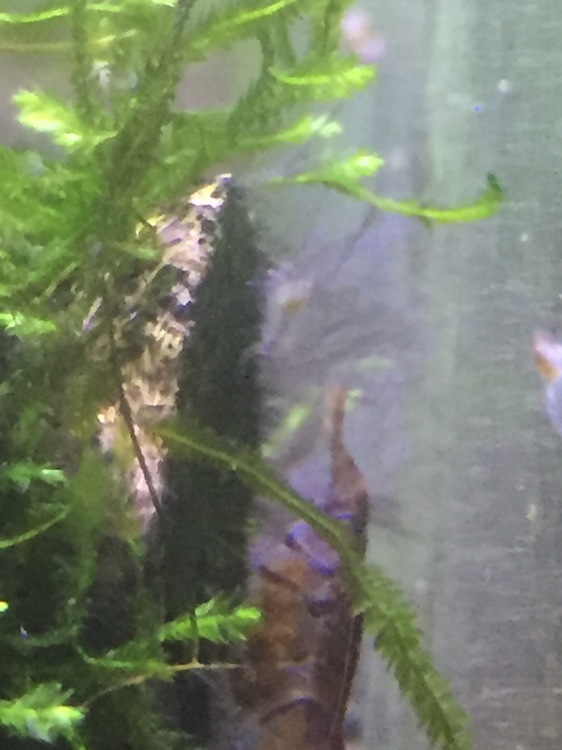
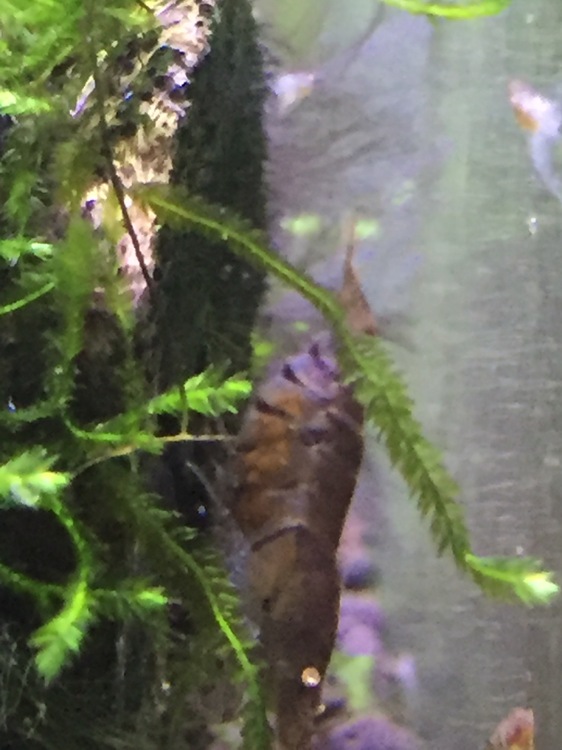
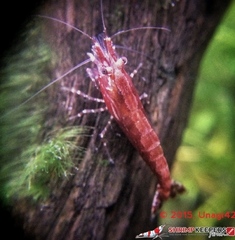
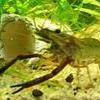
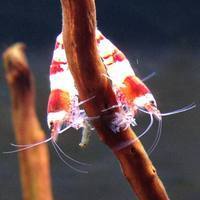
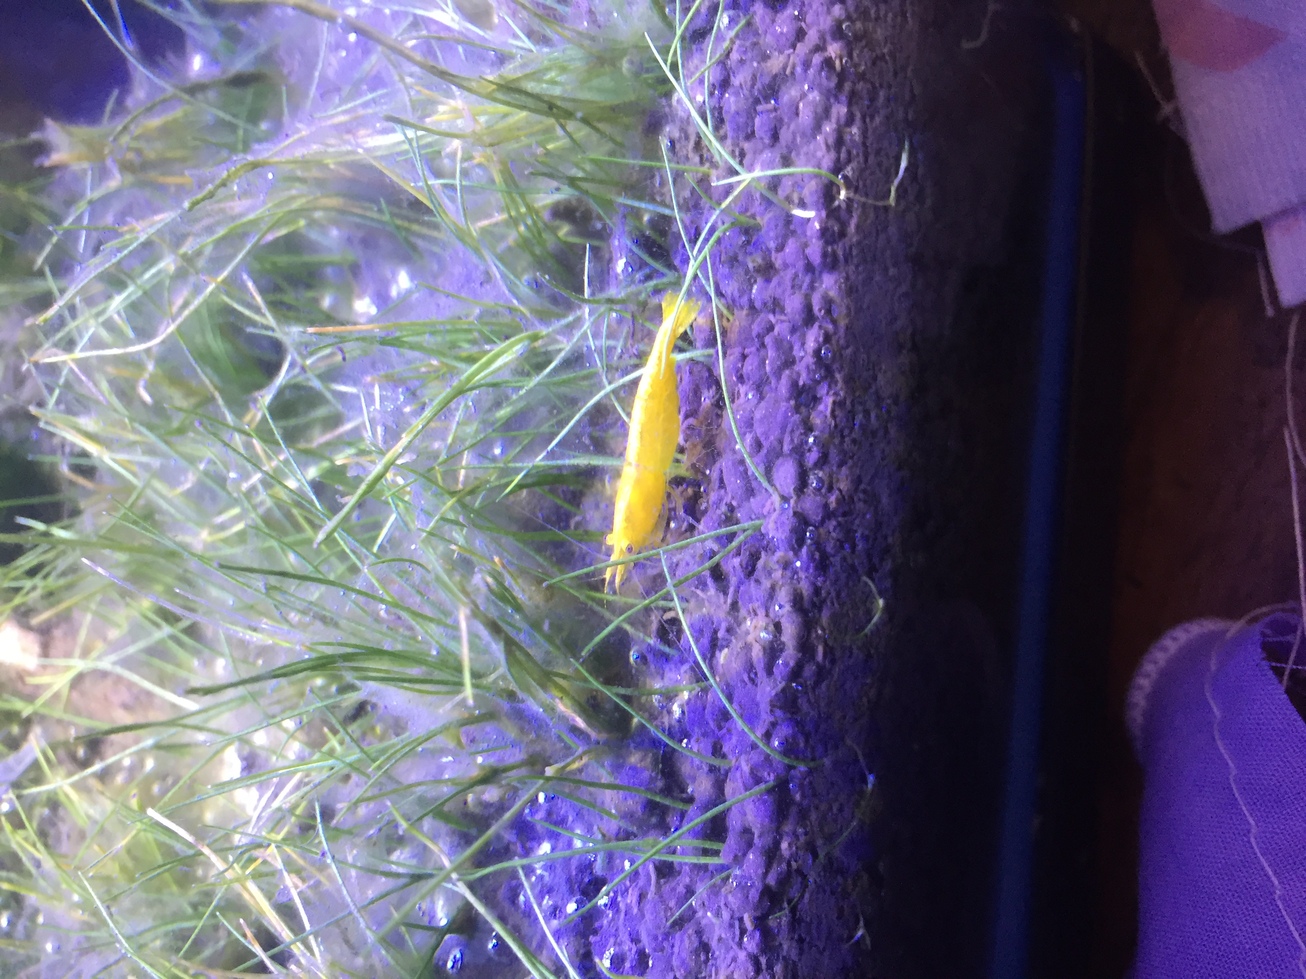
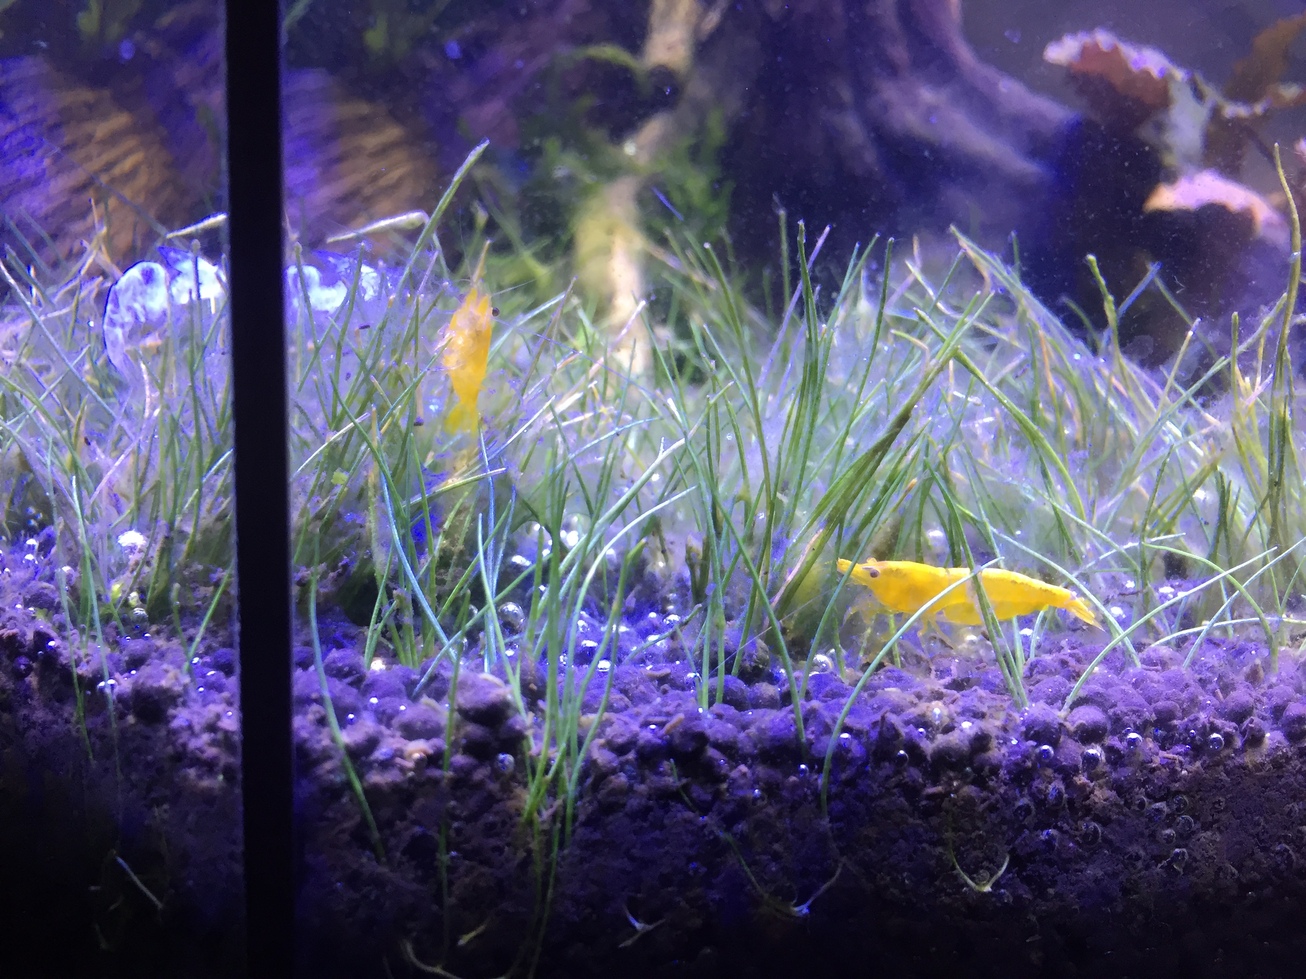
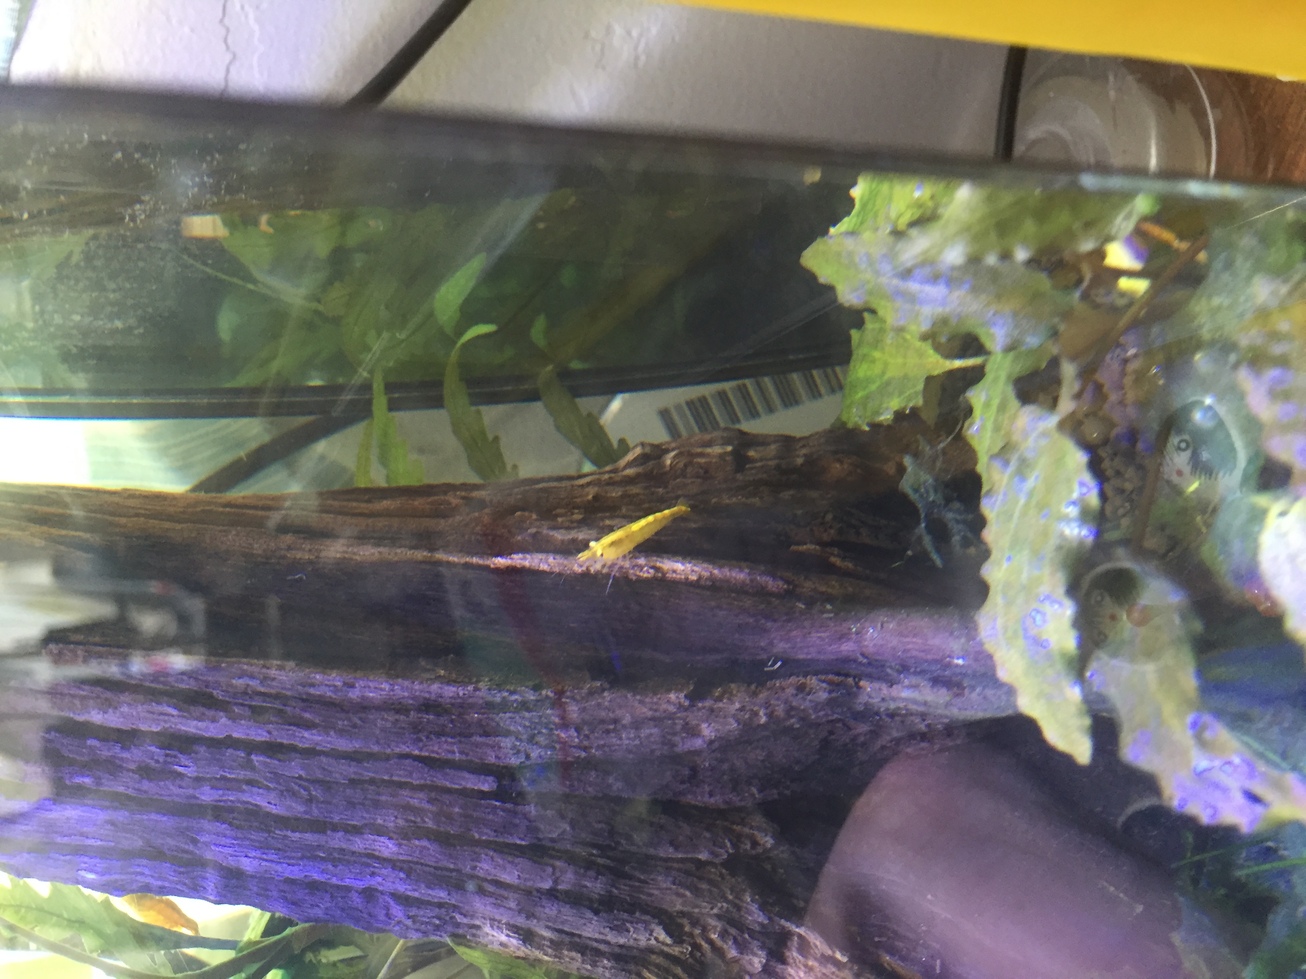
1 pointRachet as pics but i finally found some baby togers in the oebt tank and 2 of the big gals are heavily berried again!
 1 point
 -
 1 pointthey are liquid plant fertilizers :) You can read about them here http://aquagreen.com.au/aqualog/?p=125 it states the following - Dinosaur Pee Dinosaur Pee General information: It is a liquid inorganic fertiliser made up with chelated trace elements, nitrogen and potassium. It has no phosphates and therefore relies on fish excreta and fish food for phosphates. Dinosaur Spit Dinosaur Spit General information: It is a liquid organic form of carbon made up from a 10% solution of gluteraldehyde. Plants are 43 to 47% carbon by weight, one of the main limiting factors to plant growth in submerged plants is their carbon supply. This will assist plants obtain carbon and assist plants out compete algae, particularly blue-green algae. This is a weak solution of Gluteraldehyde but should be used as directed only. There are hazard considerations with strong solutions of gluteraldehyde, read http://www.npi.gov.au/database/substance-info/profiles/46.html for health and environment considerations. Keep out of the reach of children and if ingested seek medical advice. It is safe for the aquatic creatures in your aquarium up to double the recommended dose. Higher doses may adversley affect some plant species and invertebrates.1 point
 -
1 pointNo, I mean there is no unusual movements. My sponge filter creates some water movement. but that's 24/7 so no stress possible from that. The only thing I do is stick a tube on the hook, and pull it out when done. I don't even have to get my hand wet, unless I change the amount I want to remove, i.e. the height of the hook. I also monitor and switch to the bucket just before the siphon breaks, so the siphon will simply change direction as I lift the bucket above the tank.1 point
-
 1 pointWhat is this 'Dino Spit' and 'Dino Pee' that I keep hearing people refer too?1 point
 -
 1 pointhopefully getting some Zebs next week tank is ready tds is 35 gh under1 kh 0 ph 7.1 plants and moss still going great some nice algae growth on the sides so hopefully they like it.1 point
 -
Got my timber! The build could start anytime after my drill's battery is charged. *Edit: I should probably put the battery on the charger if I want it to charge, shouldn't I?1 point
-
1 point
-
 1 pointoutcome so far, its not enough cooling, the transfer from the cooler to the tank pipes is fine, the cooler just cant keep the water cold enough, but i got good news DIY Cooler Version 2.0 is in the planning stage! This one, will use a compressor like the normal coolers, the pad just isnt enough, unless i add alot of them, the cooler will be more easy for people to find :D1 point
 -
1 pointI was overseas not too long ago, my friend had my 60L hex at his place. When I brought it back to mine, I found dead shrimps once a day. I tested the water and my nitrates were at 80ppm. I did three 25% water changes in two days, each taking a few hours. I use a suction cup hook at the level I want to stop draining, put an airline on the hook and suck out the water and let it out in my floor drain. When done, I do the same in reverse, I let the new water siphon in. Nothing moves in the tank so the stock isn't stressed by constant movement, and a 15L changeover takes around 3 hours, if not more (never timed it), so there's no shock either. I haven't lost another shrimp since (about 3 weeks).1 point
-
 What an amazing setup!! Such a great write up @jayc!! Looking forward to a few more update pics soon!! ?1 point
 -
1 point@DemonCat Sometimes we get so lost in the overall it is very easy to miss very small details. As @jayc mentioned. A small section of tubing can make a big difference, especially in this situation. Thats where it's great to be able to openly share problems/issues here, someone will have a solution!1 point
-
 1 pointI'll be on the chat from 6 pm WA time. So 9pm for people in the eastern states.1 point
 -
 1 pointWhen we drip water into tanks there are all sorts of expensive fancy things that you can buy that work really well but don't get too caught up in it. A piece of airline tubing with a knot can be used just tighten the knot to get the drip rate you want or you can use an air control tap - they work with water too. Just have your bucket or bottle of water higher than your tank and it works very easily.1 point
 -
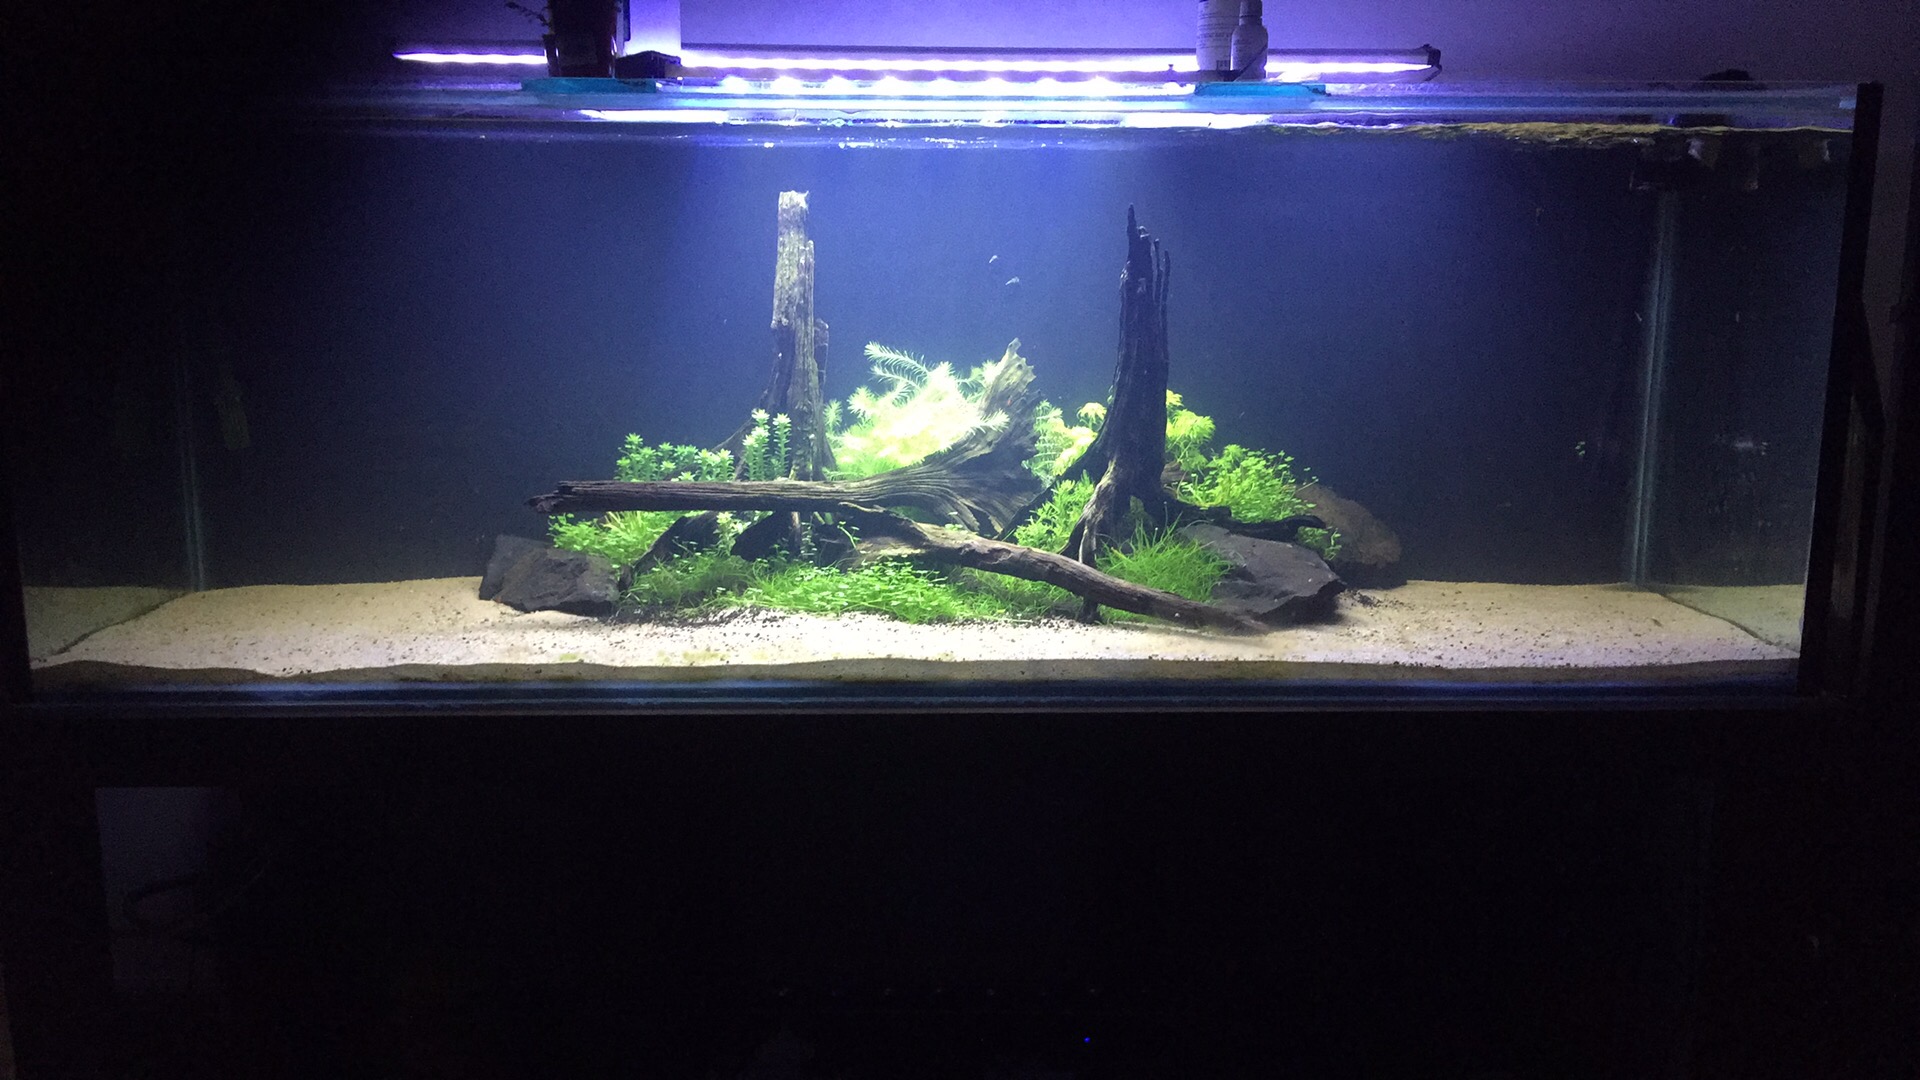
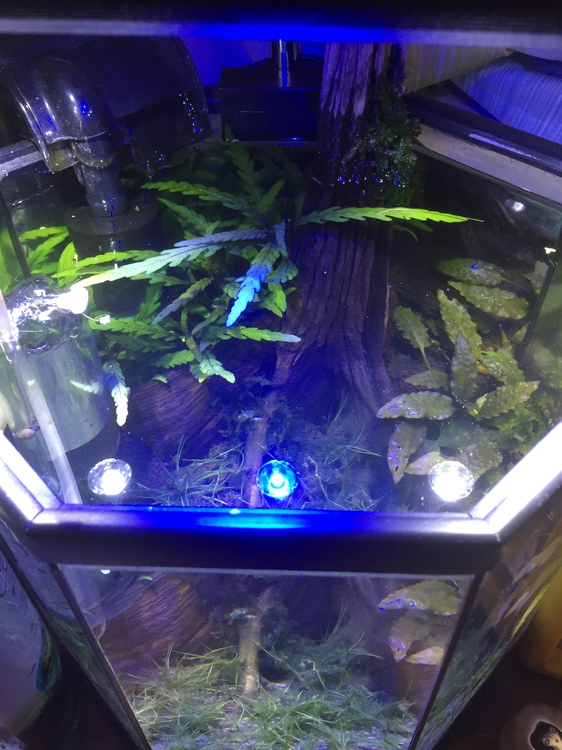
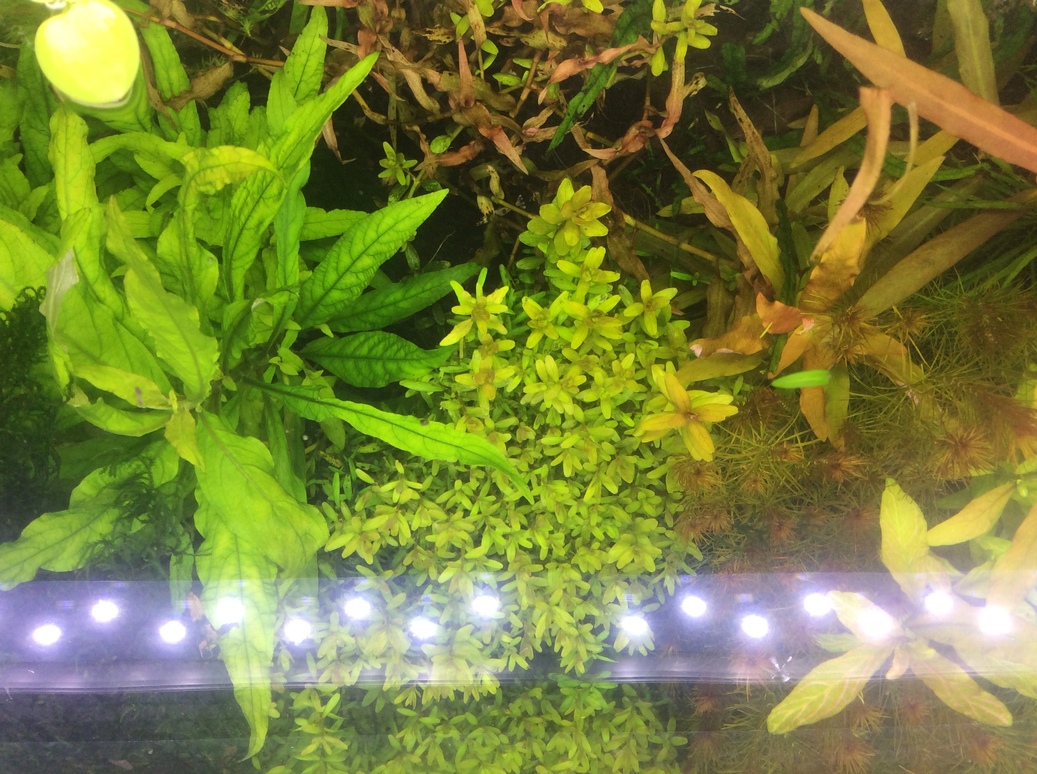
1 pointCouple of progres shots, every thing is growing well and algae is staying manageable.
 1 point
 -
1 point.... I am an adult, and have a steady job. My job is to problem solve policy issues and property development issues. I pride myself on my problem solving ability in this regard. Yet, I couldn't think of investing in a simple air hose to fix all of my problems. I am such a plonker. Thanks @jayc!!!1 point
-
 1 pointThe only reason the filter has to sit like that is because of the Venturi. The venturi let's air in to the water outlet. If you want to submerge it further, and avoid the filter being exposed during water changes you can attach an air hose to the venturi and valve to allow the venturi to sit outside the water.1 point
 -
1 pointThanks for the info @fishmosy and @newbreed Whilst on the topic of internal filters, I have the fluval U3 which has a venturi system, therefore whilst its submerged, the top part of the filter is right on the waterline so the venturi system can access the air. Thus, when I take water out, the top 10% - 20% or so of the filter and water outlet is above the water line. I always turn the filter off when I do a water change as I am unsure whether the top bit can be above the water line... and it does not exactly say in the instruction book!! Ha - I feel like such a newbie. Attached image is from the instruction bit... so from what I gather from the highlighted image and text is that i have to have it off when the waterline is below the water outlet (which it is when I have taken out water)
 1 point
 -
 1 point1 point
1 point1 point
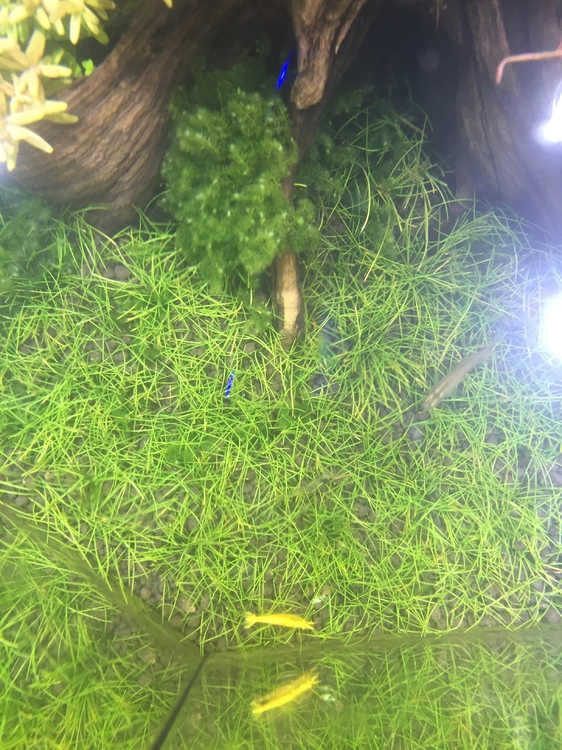
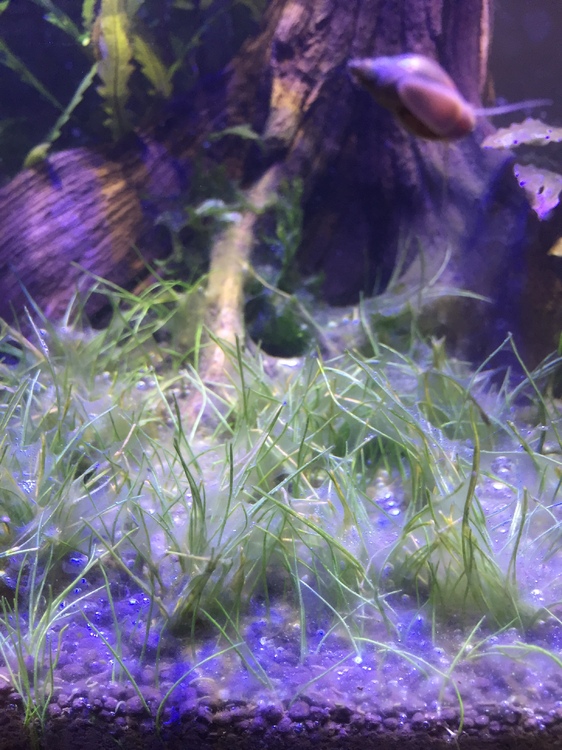
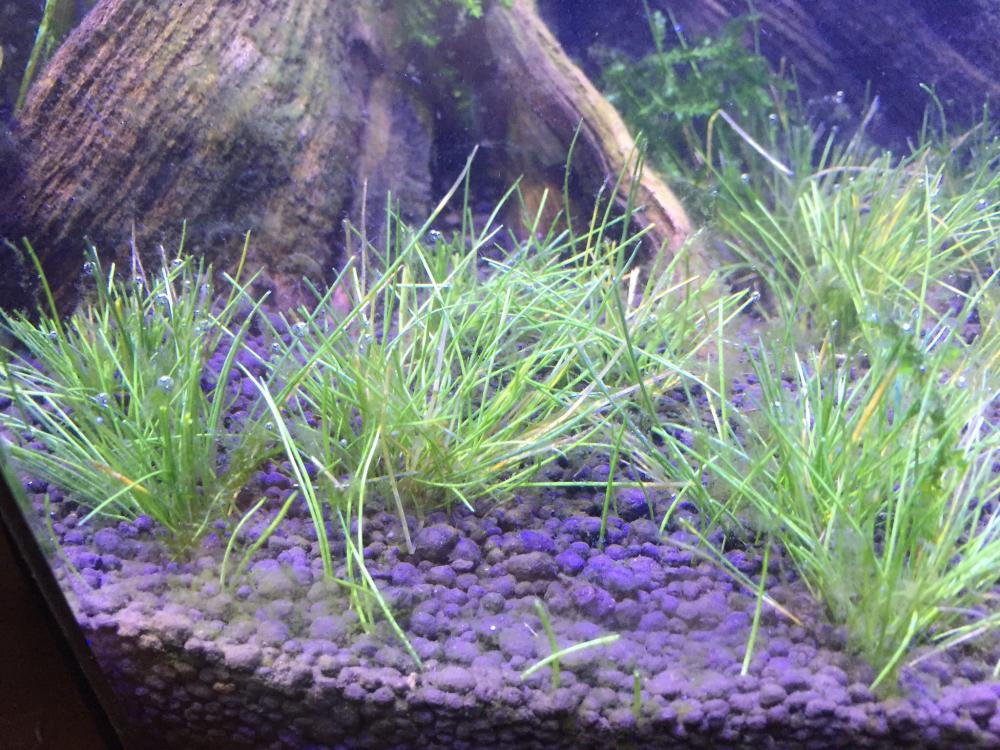
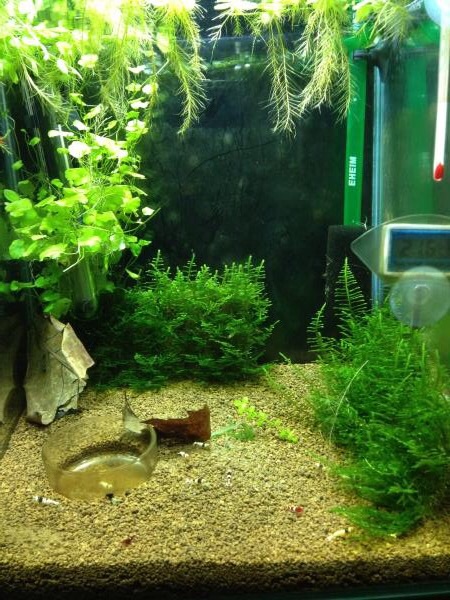
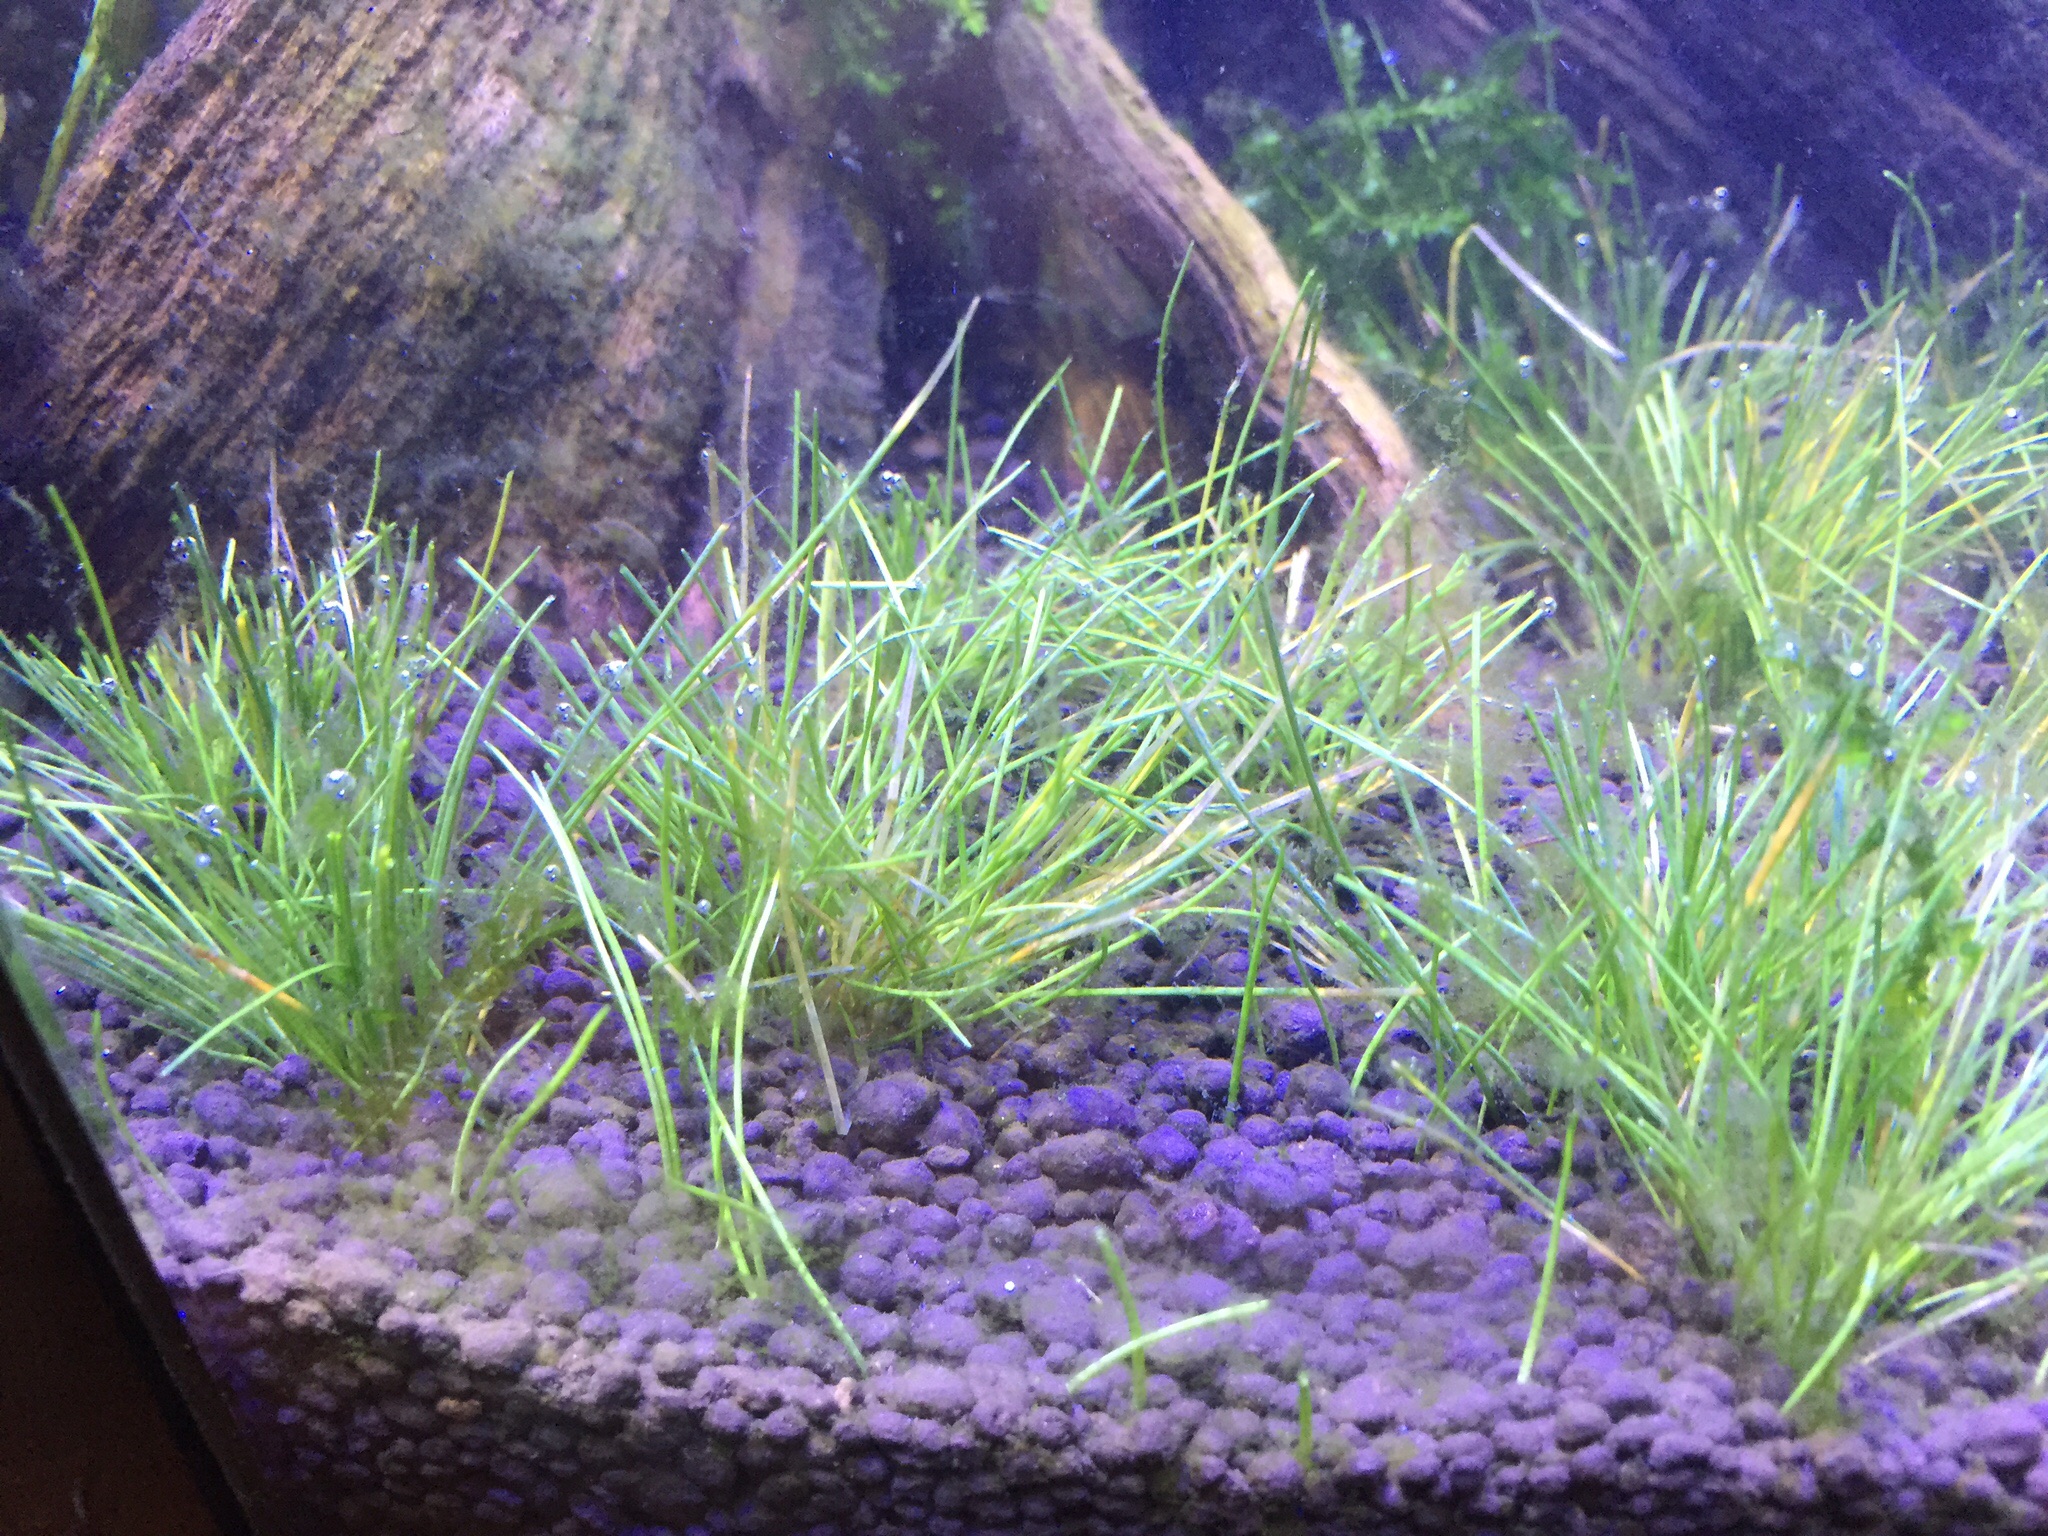
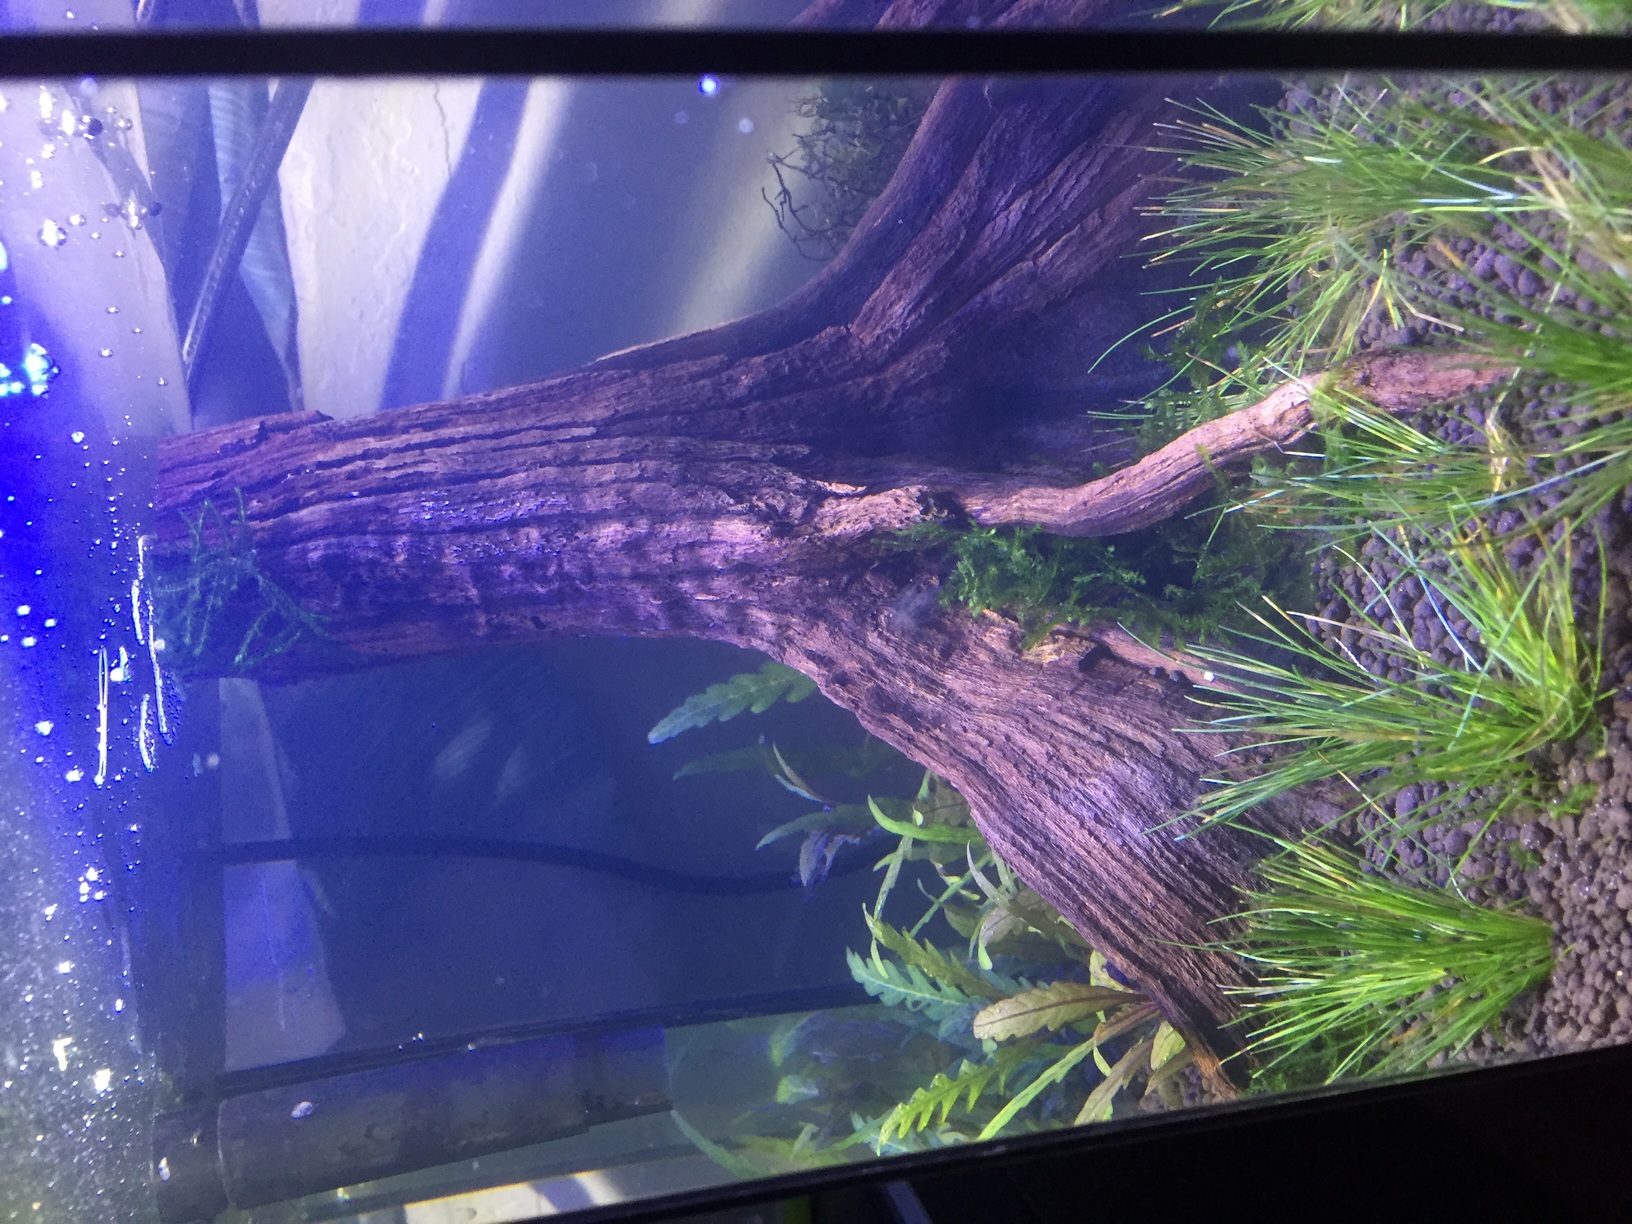
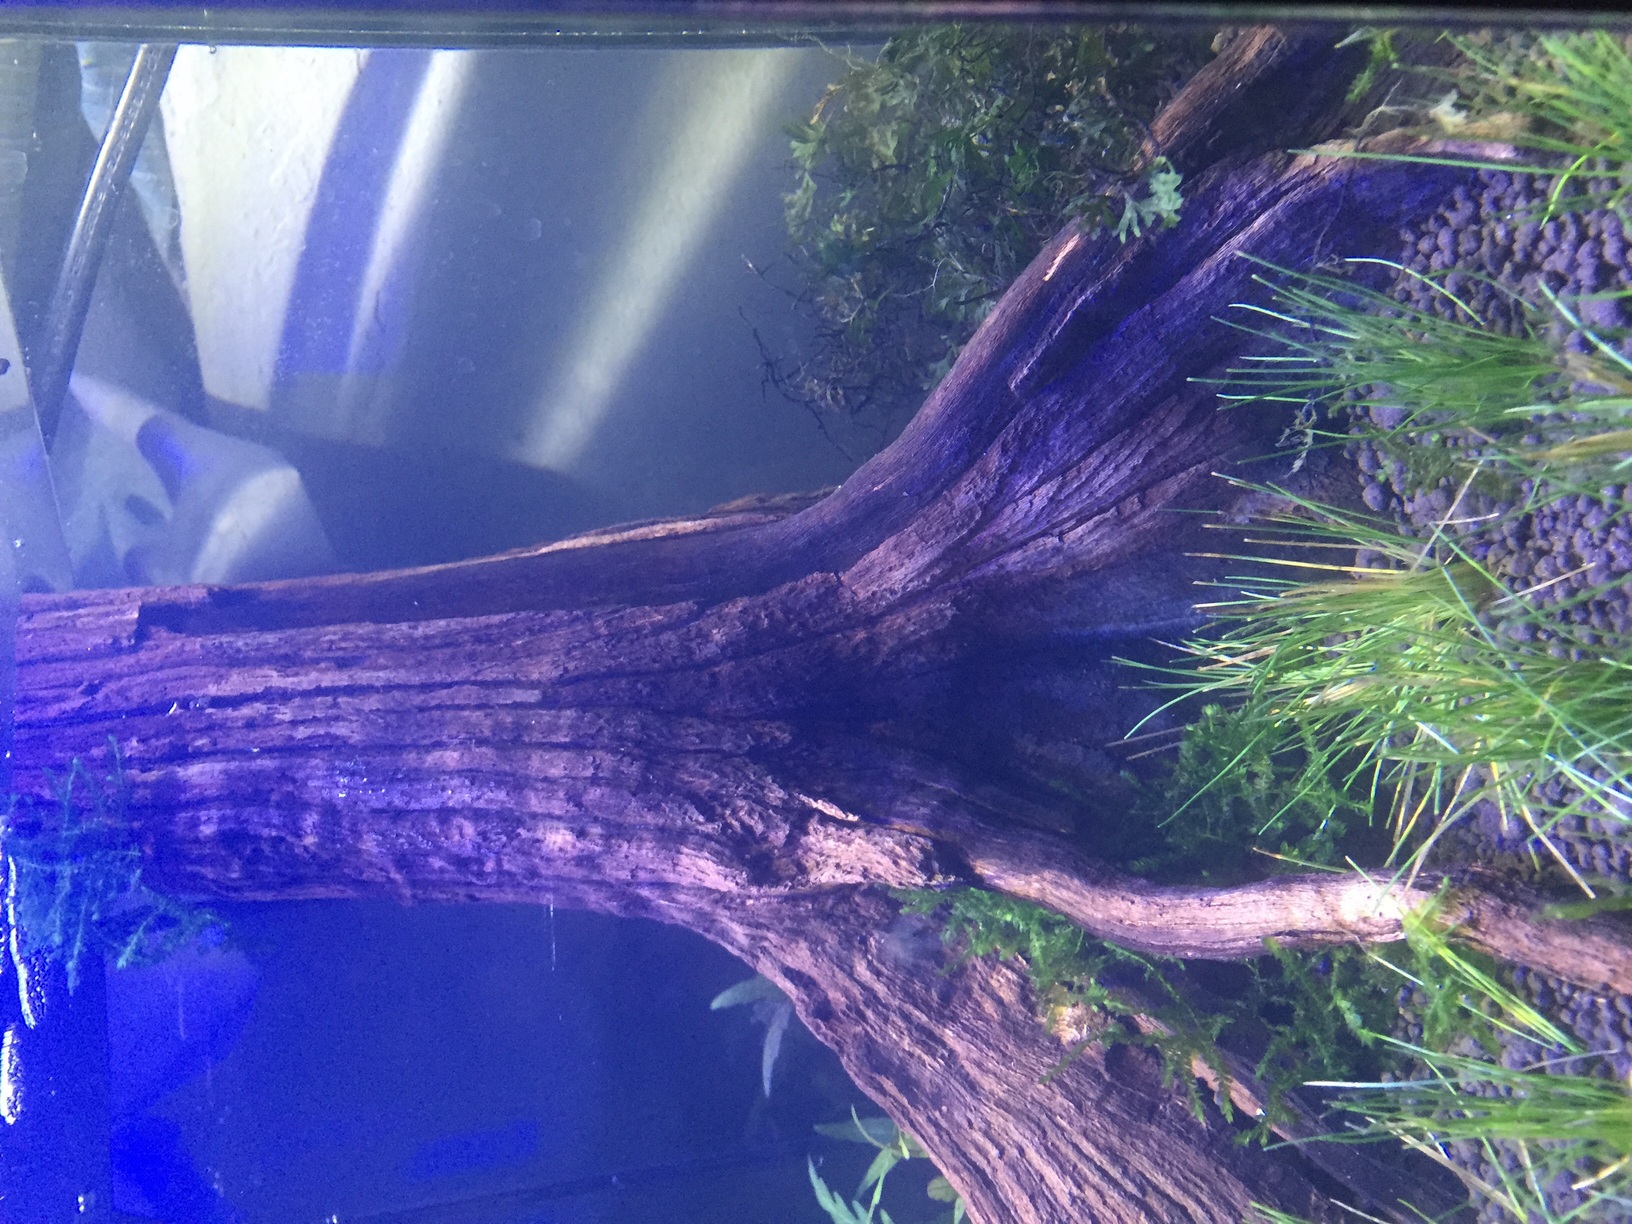
1 pointThe the tanks progressing well i seam to have a carpet of algea rather then hair grass but im sure that ill sort its self out as the tank matures.
1 point1 point
1 point1 point
1 point1 point
1 pointThe the tanks progressing well i seam to have a carpet of algea rather then hair grass but im sure that ill sort its self out as the tank matures.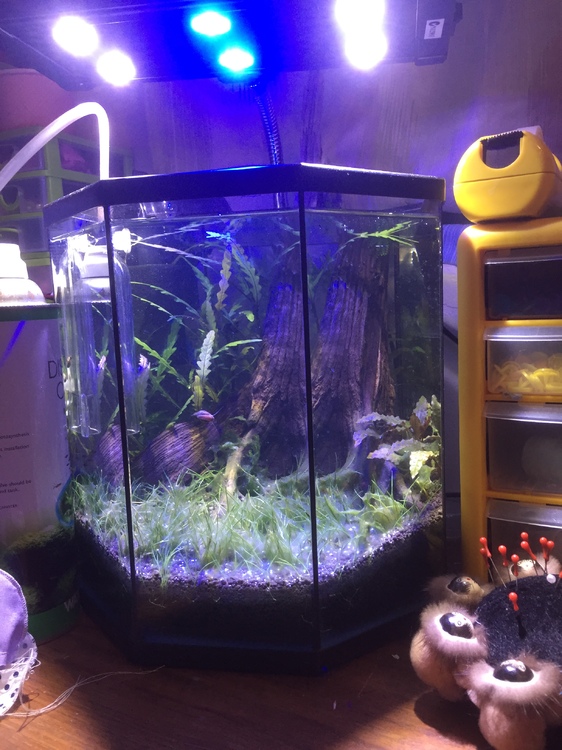
 1 point
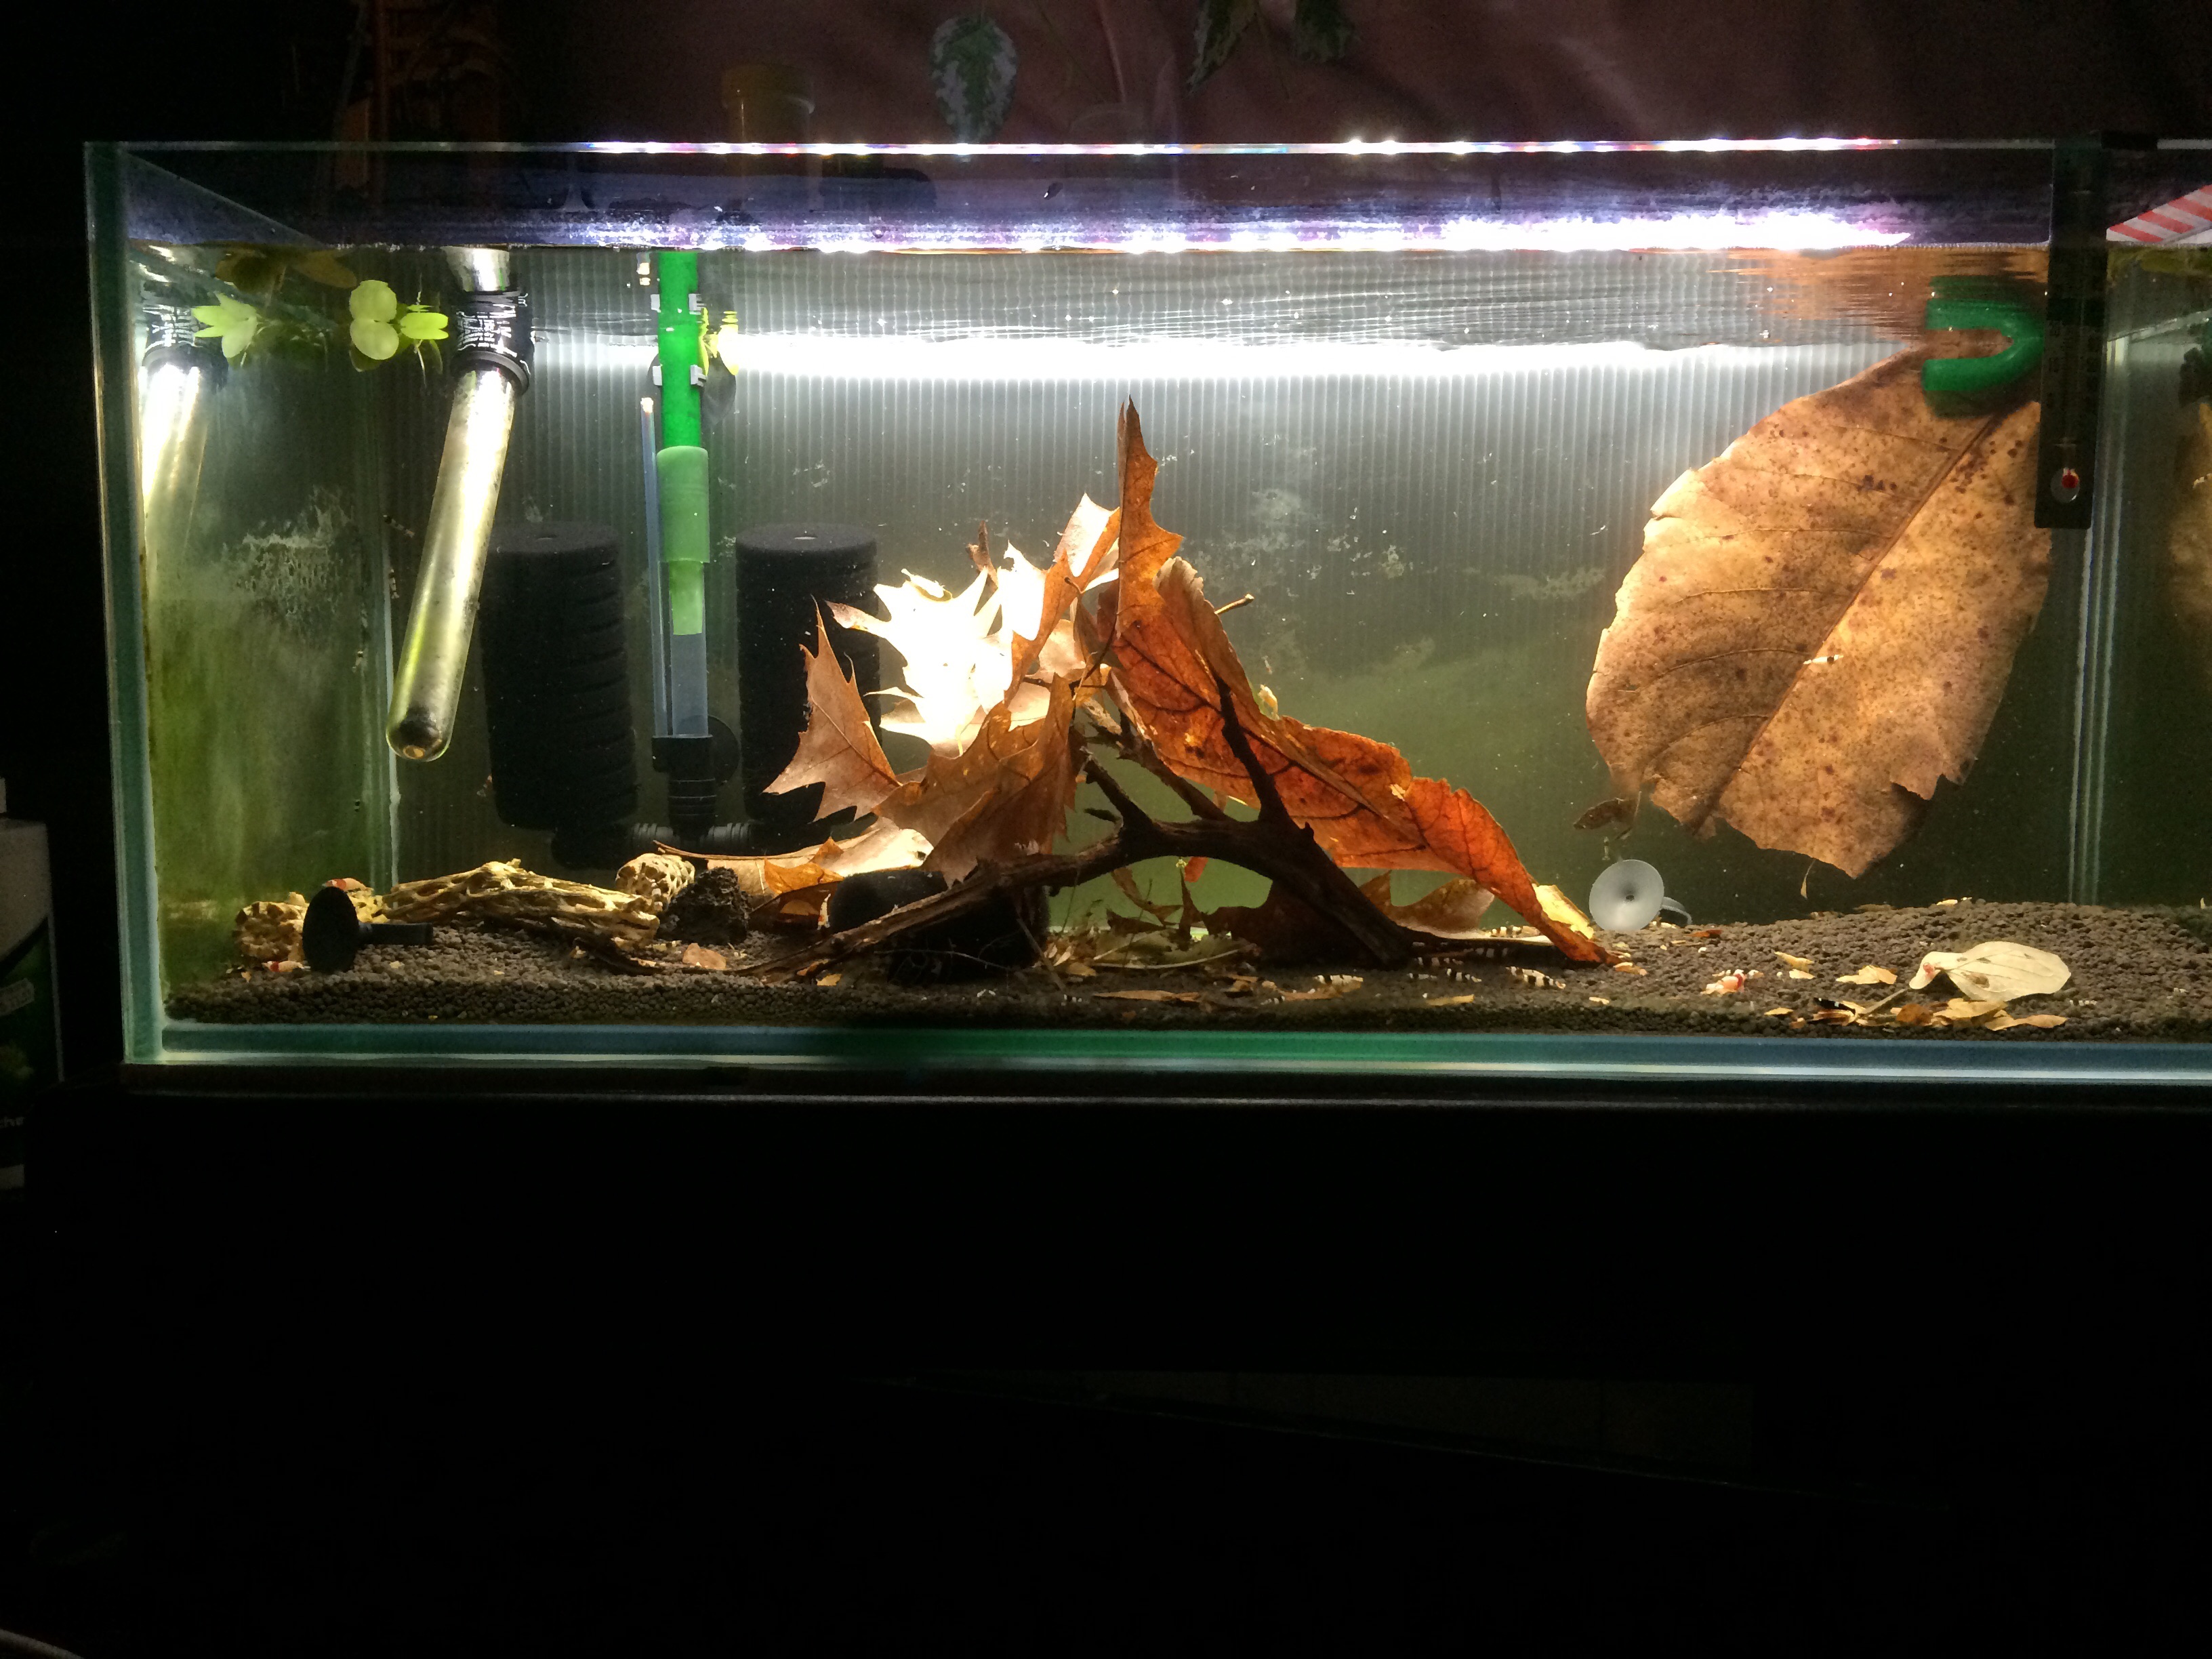
Finally found some time to install the LED lights and plumbing for the bottom tier, and moved the sump in place. Filling it up. As with all good plumbing, a few pesky leaks are bound to be found. There are 6 leaks in total. 5 x leaks are at the joints along the horizontal plumbing for the bottom level above the sump and 1 x leak at one of the joints in the vertical pipe of the sump pump return line. The most annoying thing is that these leaks are like a drop every 5-10 minutes. It wasn't a major crisis but I simply cannot ignore them. Personally I don't really like rigid PVC and glue. Even though I find irrigation pipes to be a hit and miss when it comes to leaks but I like them as they are cheap and easy to work with using a utility knife. I have tried both forcing the pipes onto the joints directly or softening it first using hot water, but still with similar results. An alternative that has worked for me is using flex hose. Similarly, easy to work with using just a simple utility knife but they are more expensive than irrigation pipes. All leaks were fixed except for the one on the vertical pipe. I'll try a new irrigation hose again but if it still leaks, then I'll have to use flex hose for that section as well. Fixed 5 leaks by replacing irrigation pipes with flex hose. That is all for now.1 point
1 point
Finally found some time to install the LED lights and plumbing for the bottom tier, and moved the sump in place. Filling it up. As with all good plumbing, a few pesky leaks are bound to be found. There are 6 leaks in total. 5 x leaks are at the joints along the horizontal plumbing for the bottom level above the sump and 1 x leak at one of the joints in the vertical pipe of the sump pump return line. The most annoying thing is that these leaks are like a drop every 5-10 minutes. It wasn't a major crisis but I simply cannot ignore them. Personally I don't really like rigid PVC and glue. Even though I find irrigation pipes to be a hit and miss when it comes to leaks but I like them as they are cheap and easy to work with using a utility knife. I have tried both forcing the pipes onto the joints directly or softening it first using hot water, but still with similar results. An alternative that has worked for me is using flex hose. Similarly, easy to work with using just a simple utility knife but they are more expensive than irrigation pipes. All leaks were fixed except for the one on the vertical pipe. I'll try a new irrigation hose again but if it still leaks, then I'll have to use flex hose for that section as well. Fixed 5 leaks by replacing irrigation pipes with flex hose. That is all for now.1 point It might be even more entertaining to see the photos of what doesnt go to plan. :p1 point
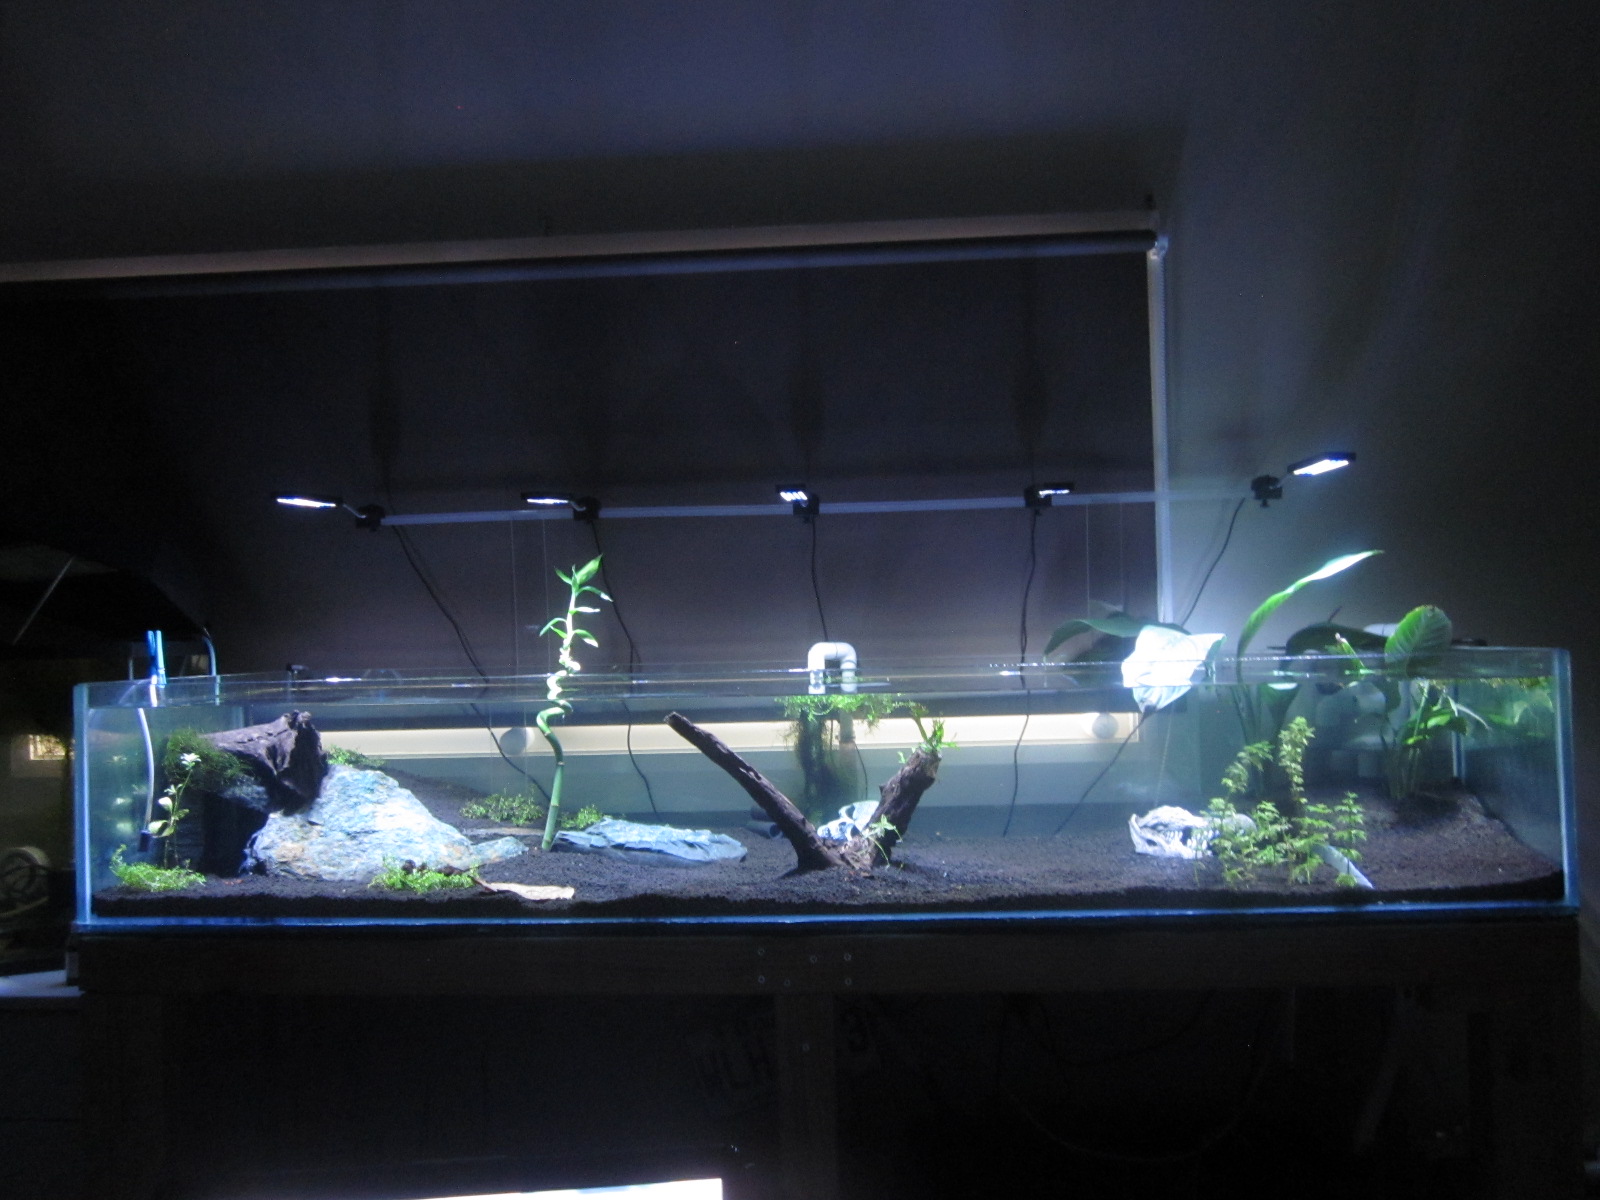
It has been a while and I have been trying to work on this rack between other commitments. Probably a tad slow but I am thoroughly enjoying the build. I have completed 90% of the wiring for the LED strip lights and moved the tanks onto the top and middle tier. Current tank inhabitants are a few German White Tail Tuxedo guppies. The tanks are filled and running on sponge filters. The sponges have been seeding in the sump of the 4x2x2 for about 4 weeks. Here are some progress photos. Tanks in place with grey foam insulation. Tape measure fish was the first tank inhabitant but alas it was dead and not moving before I even fill the tanks. Complete wiring for the top and middle tier. Just need to tidy it up with some cable trunking. I find the LED strip a bit too bluish. I'll most likely swap them out at some point, perhaps with 5630 LED strips or Cree LED chips. That'll be for another day. Now for the shrimp tank. I used Cal Aqua Labs Black Earth Premium. Base layer around 1" with BEP normal and top off another 1" with BEP fine. Water is a bit cloudy as photo was taken right after I filled it. All tanks are currently only 3/4 filled as they are not connected to the sump yet. Some German White Tail Tuxedo guppies. One of my favourite fish and the only strain of guppies I keep and breed. They are only sub-adults at around 15 weeks old. Hopefully I'll be able to get the shrimp tank up and running soonish. Thanks for reading.1 point
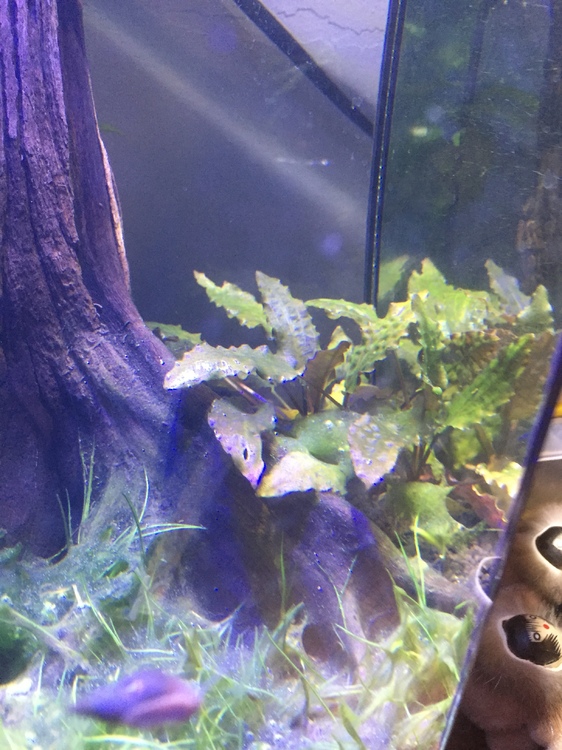
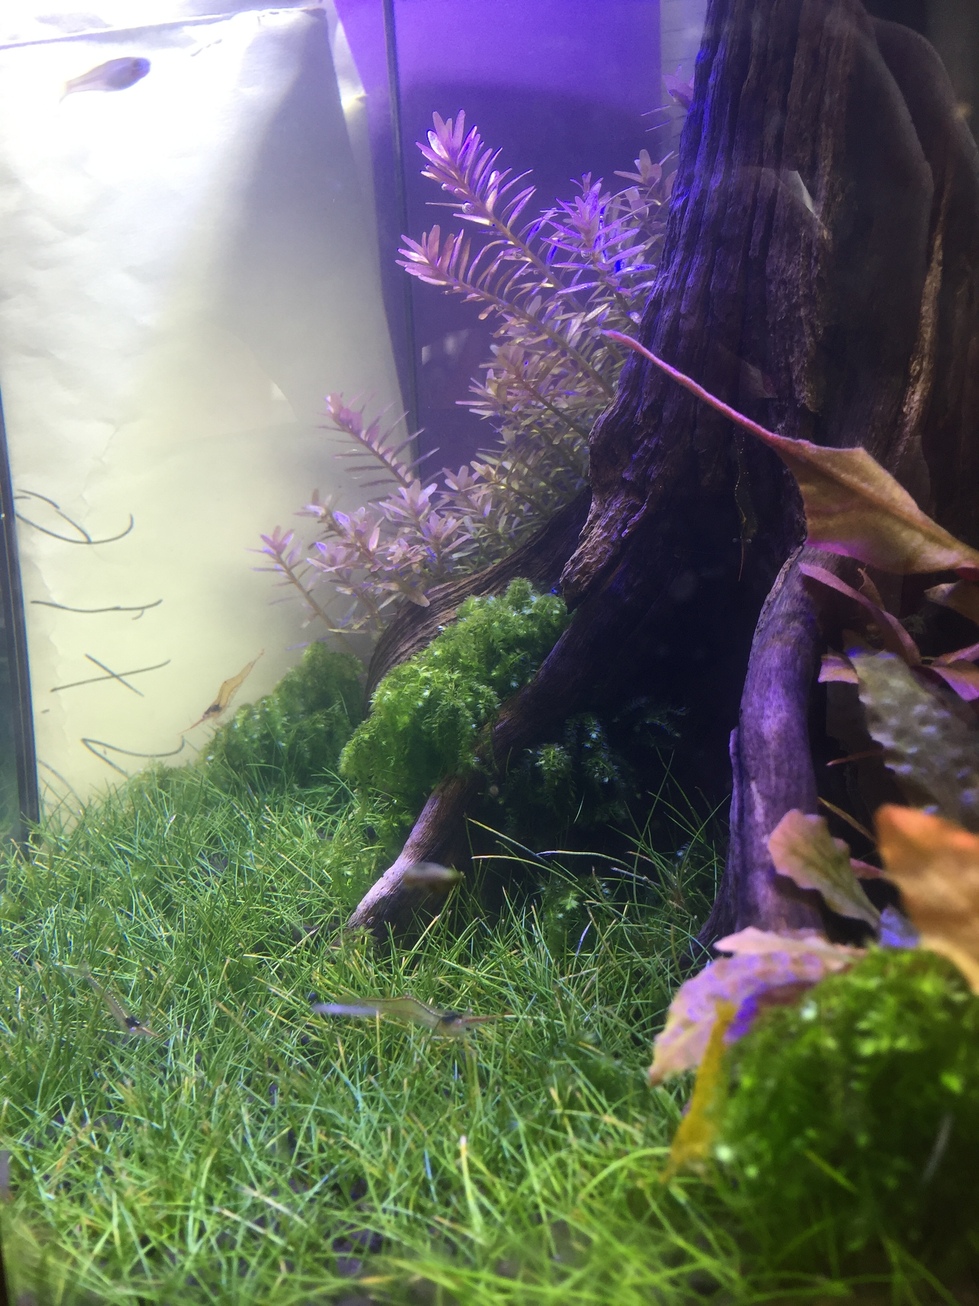
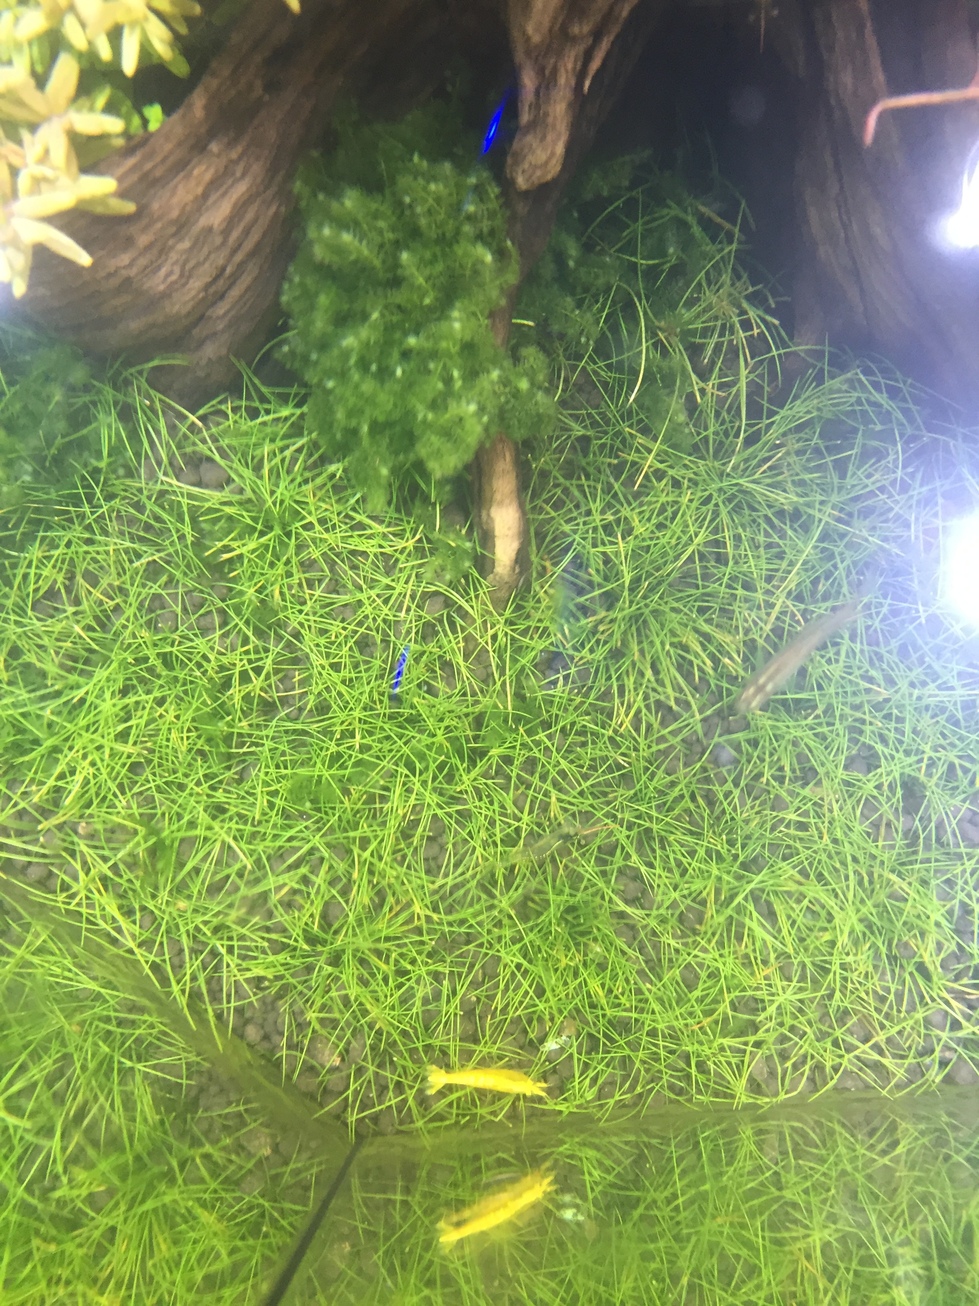
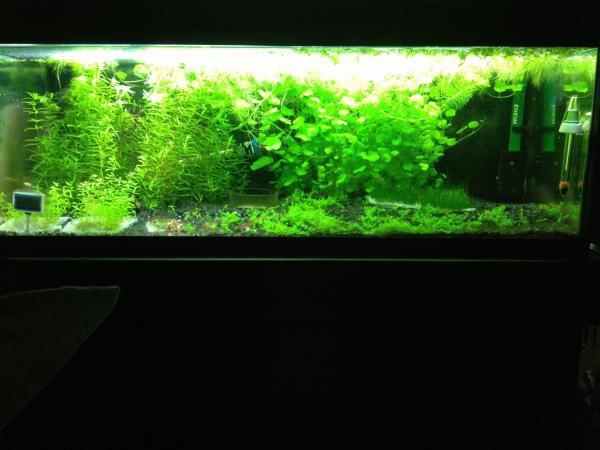
1 pointI've been neglecting this tank but it's coming along ok for the amount of effort I've put in. I gave the Belem a trim to promote growth today and did a water change. Added a few drops of Ada green gains post trim to help it along.
It might be even more entertaining to see the photos of what doesnt go to plan. :p1 point
It has been a while and I have been trying to work on this rack between other commitments. Probably a tad slow but I am thoroughly enjoying the build. I have completed 90% of the wiring for the LED strip lights and moved the tanks onto the top and middle tier. Current tank inhabitants are a few German White Tail Tuxedo guppies. The tanks are filled and running on sponge filters. The sponges have been seeding in the sump of the 4x2x2 for about 4 weeks. Here are some progress photos. Tanks in place with grey foam insulation. Tape measure fish was the first tank inhabitant but alas it was dead and not moving before I even fill the tanks. Complete wiring for the top and middle tier. Just need to tidy it up with some cable trunking. I find the LED strip a bit too bluish. I'll most likely swap them out at some point, perhaps with 5630 LED strips or Cree LED chips. That'll be for another day. Now for the shrimp tank. I used Cal Aqua Labs Black Earth Premium. Base layer around 1" with BEP normal and top off another 1" with BEP fine. Water is a bit cloudy as photo was taken right after I filled it. All tanks are currently only 3/4 filled as they are not connected to the sump yet. Some German White Tail Tuxedo guppies. One of my favourite fish and the only strain of guppies I keep and breed. They are only sub-adults at around 15 weeks old. Hopefully I'll be able to get the shrimp tank up and running soonish. Thanks for reading.1 point
1 pointI've been neglecting this tank but it's coming along ok for the amount of effort I've put in. I gave the Belem a trim to promote growth today and did a water change. Added a few drops of Ada green gains post trim to help it along.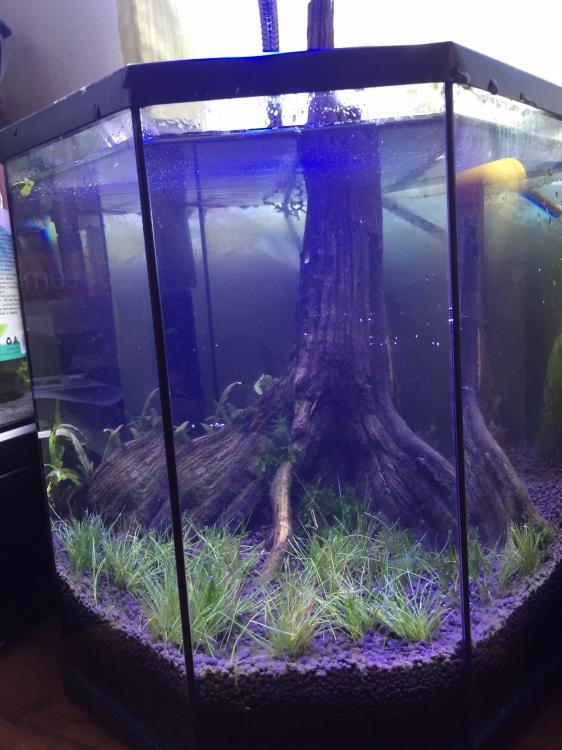
 1 point
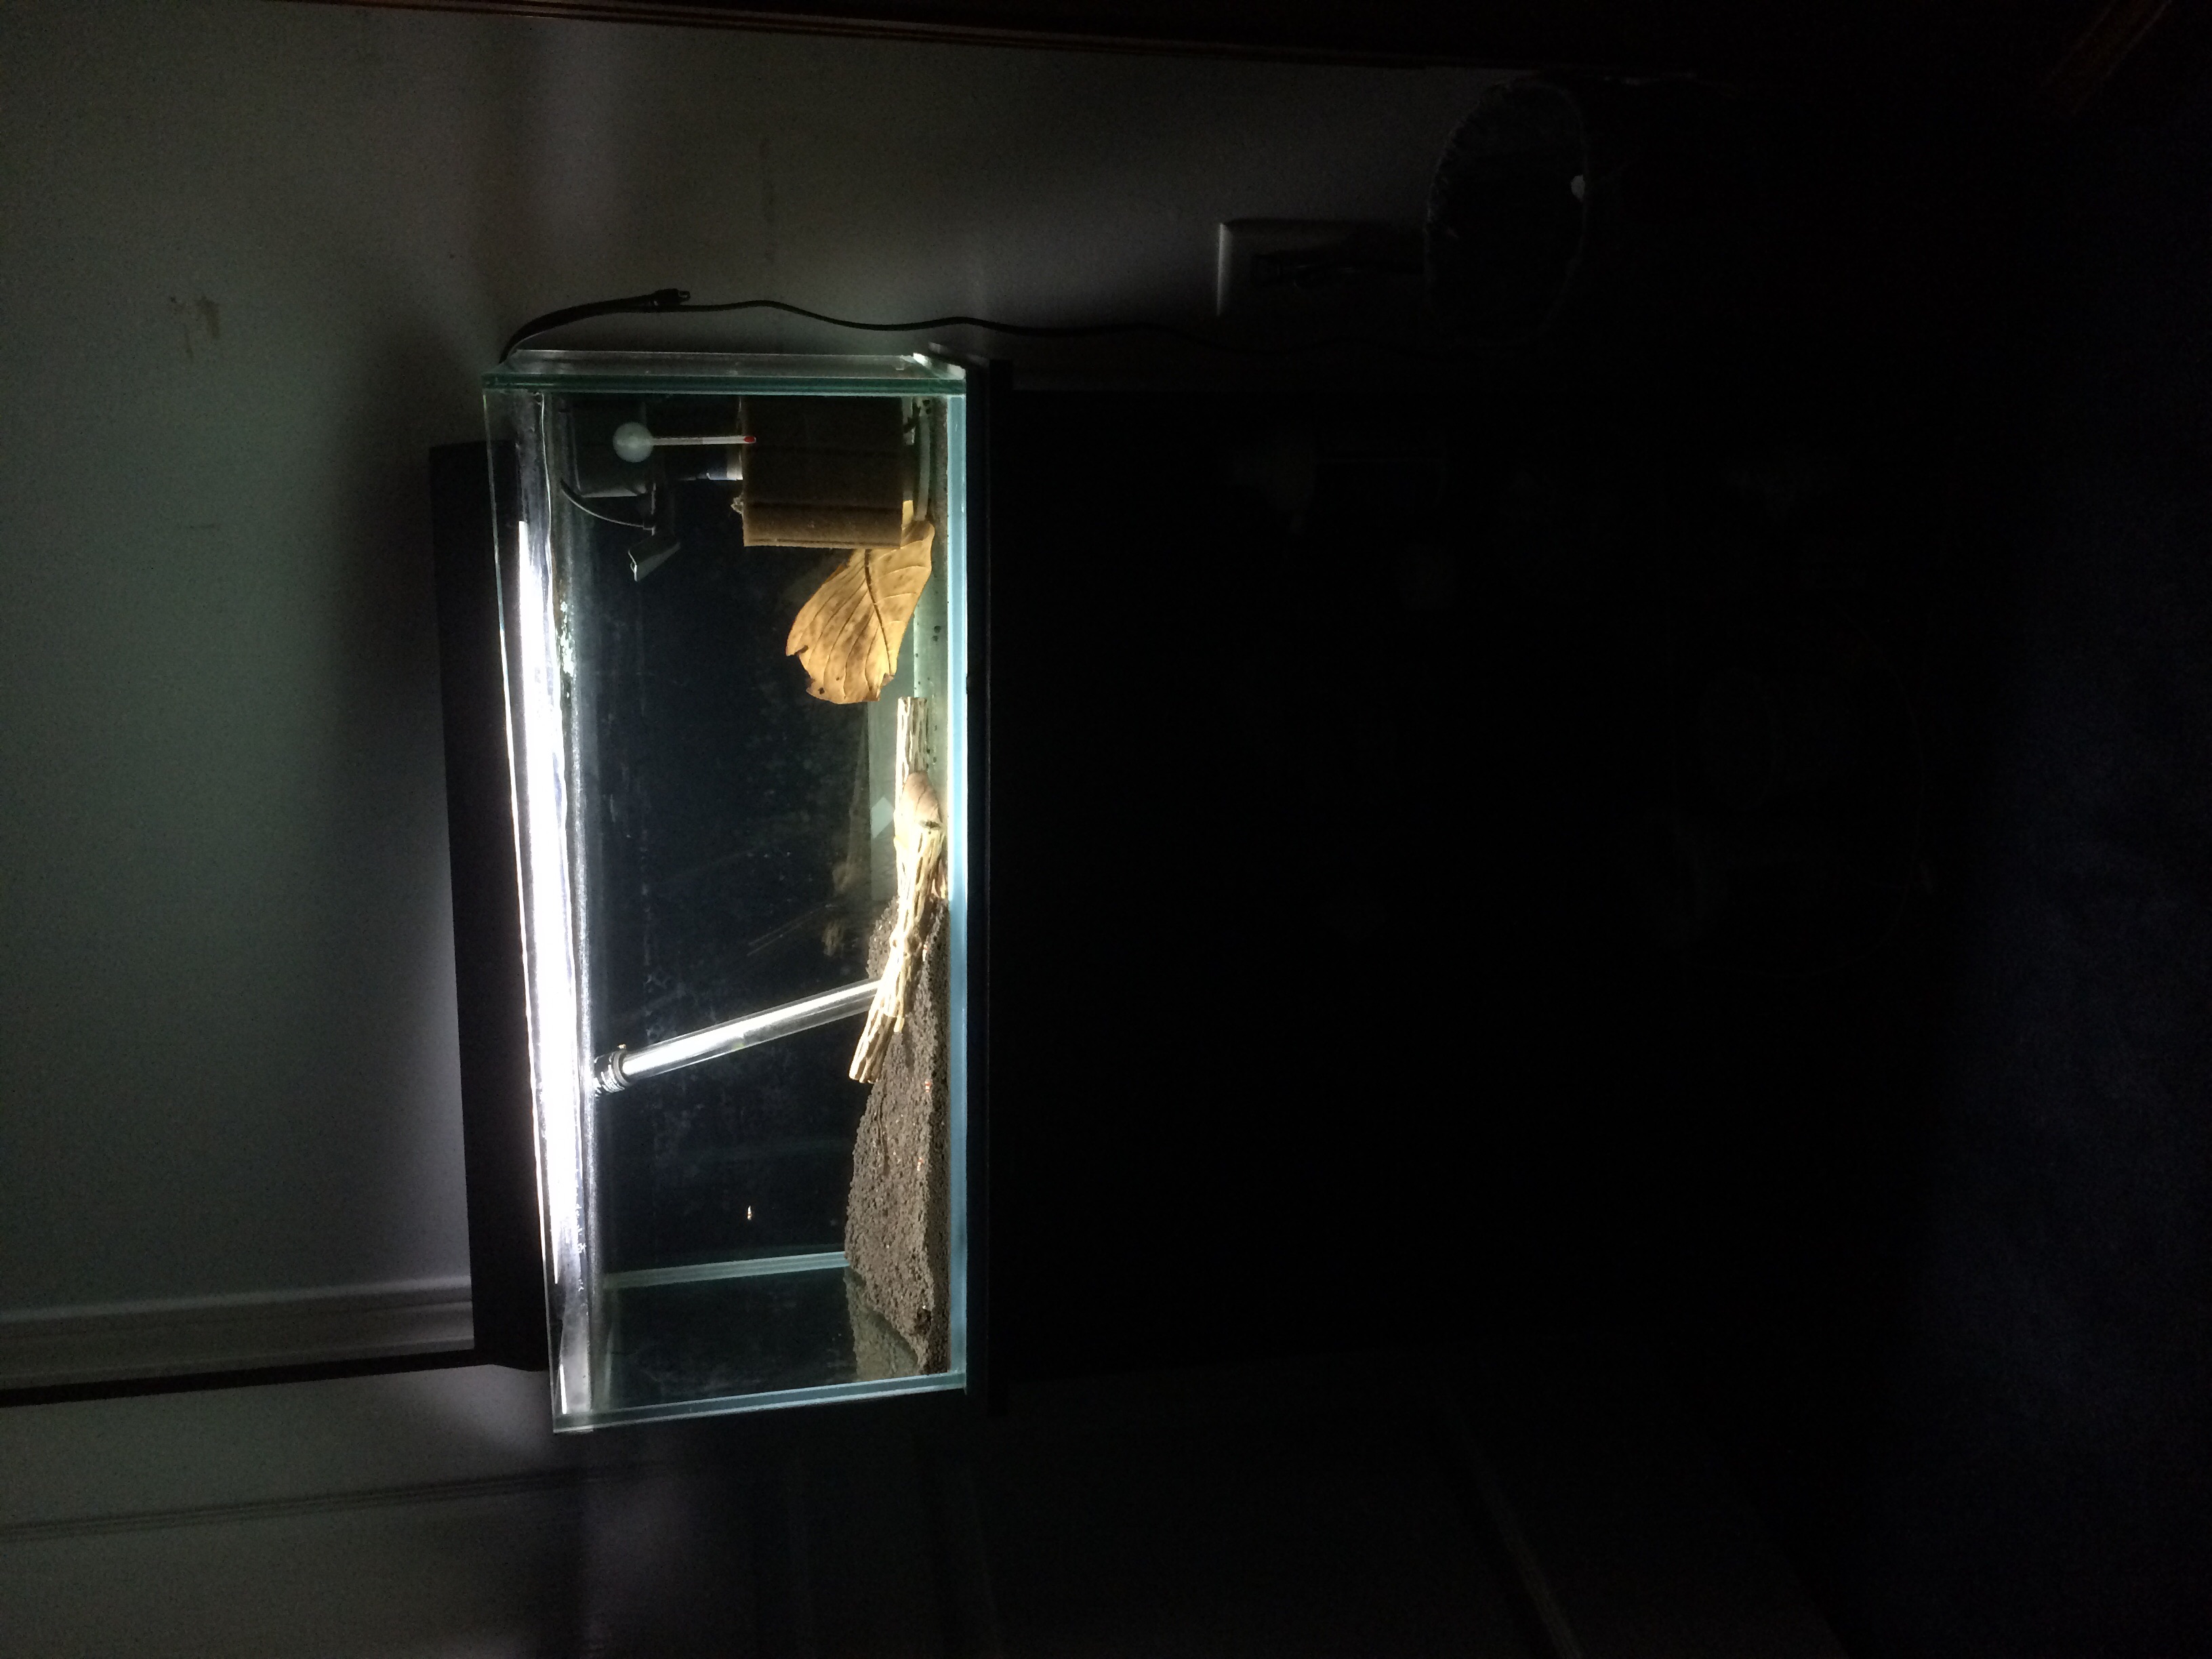
So as I said I flooded it and here are the pics! I've dicided to go with the HOB filter, it's just easier, I do need to get a slightly bigger one but this little gem will to for the time being.
1 point
1 pointSo as I said I flooded it and here are the pics! I've dicided to go with the HOB filter, it's just easier, I do need to get a slightly bigger one but this little gem will to for the time being.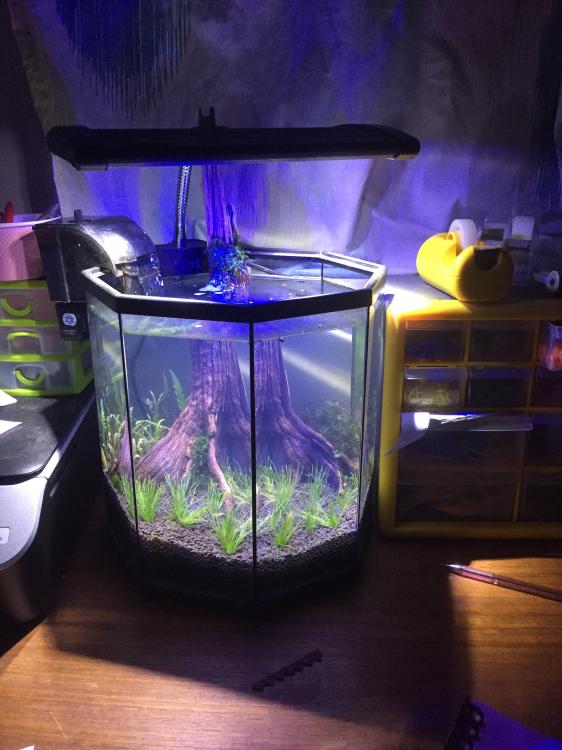
 1 point


Account
Navigation
Search
Configure browser push notifications
Chrome (Android)
- Tap the lock icon next to the address bar.
- Tap Permissions → Notifications.
- Adjust your preference.
Chrome (Desktop)
- Click the padlock icon in the address bar.
- Select Site settings.
- Find Notifications and adjust your preference.
Safari (iOS 16.4+)
- Ensure the site is installed via Add to Home Screen.
- Open Settings App → Notifications.
- Find your app name and adjust your preference.
Safari (macOS)
- Go to Safari → Preferences.
- Click the Websites tab.
- Select Notifications in the sidebar.
- Find this website and adjust your preference.
Edge (Android)
- Tap the lock icon next to the address bar.
- Tap Permissions.
- Find Notifications and adjust your preference.
Edge (Desktop)
- Click the padlock icon in the address bar.
- Click Permissions for this site.
- Find Notifications and adjust your preference.
Firefox (Android)
- Go to Settings → Site permissions.
- Tap Notifications.
- Find this site in the list and adjust your preference.
Firefox (Desktop)
- Open Firefox Settings.
- Search for Notifications.
- Find this site in the list and adjust your preference.