Leaderboard
-

newbreed
Members4Points3152Posts -

wot_fan
Members3Points194Posts -

inverted
Members2Points605Posts -

GotCrabs
Members1Points1430Posts
Popular Content
Showing content with the highest reputation on 04/10/15 in all areas
-
3 pointsI ran across this YouTube video today. I thought some of you would like to see it. https://www.youtube.com/watch?v=QxSYGrzXteE&list=PLwRGZ0xIOf16XAgKC4FaS-tKY9X5aPZt-&index=13 points
-
2 pointsI would love some of these amazingly graceful fish! But not allowed in VIC either!! [emoji22] But the following were an amazing school we saw in Phuket last year! Stunning.2 points
-
2 points
-
 1 point
 -
 1 pointThought I would find this to update. Rack is still a work on progress. 6 tanks out of 20 drilled. Plan to get some pipe work this weekend, powerheads next weekend, then the rest of the pipework following. Plan is 2 powerheads per 10 tanks. One 3000l per hour each sump, and one 500l per hour. 500l will turn over just the k1 hel x media, while the 3000l will run the 10 tanks each. Reason for that is one rack will be fish. One shrimp. so if we medicate anything no risk of killing bacteria. Anyone with thoughts or ideas, if I'm doing anything wrong let me know1 point
 -
1 pointThese images are great Ineke! Congrats on the amount of fry, looks like your planning and preparation are paying off!! Don't worry too much about having too many juveniles, just setup another few tanks in another room! Lol1 point
-
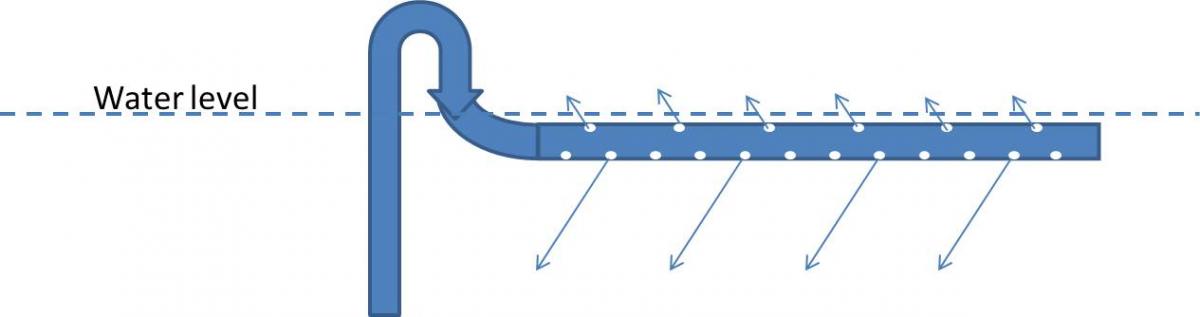
 1 pointHow you had it in the last picture is fine. Top it off with Substrat pro on top of the marine pure. You don't need another sponge above all the biological media. The basket should have a lid that will stop large media getting into the impeller. Spraybar or normal outlet is a personal choice and what you are trying to achieve. Spraybar, depending on placement, can allow you a more even flow across the whole tank. If placed under the water level, it will create a current down to your plants to avoid dead spots. If you face the bar down for more current to the plants, then surface agitation is reduced to nothing. Normal outlet gives you more surface agitation = more oxygen exchange at the surface. Possibly also less surface scum. It moves the water in a circular pattern but only near the surface, but you can get dead spots in the tank. Ideally, you'd want a bit of both. I use the spraybar, but drill extra holes in it. I drill new holes, that when installed, the original holes will point down into the tank to create water flow to the plants. And the new holes will point up, so the surface of the water is agitated and reduces surface scum while increasing oxygen exchange. The spraybar is positioned, just under the surface of the water in the tank. Hopefully you can visualise what I'd describing here. Edit - here is my super excellent drawing skills for you to visualise the additional holes on the spraybar.
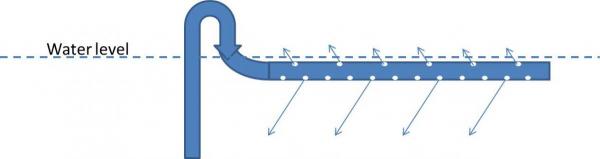 1 point
 -
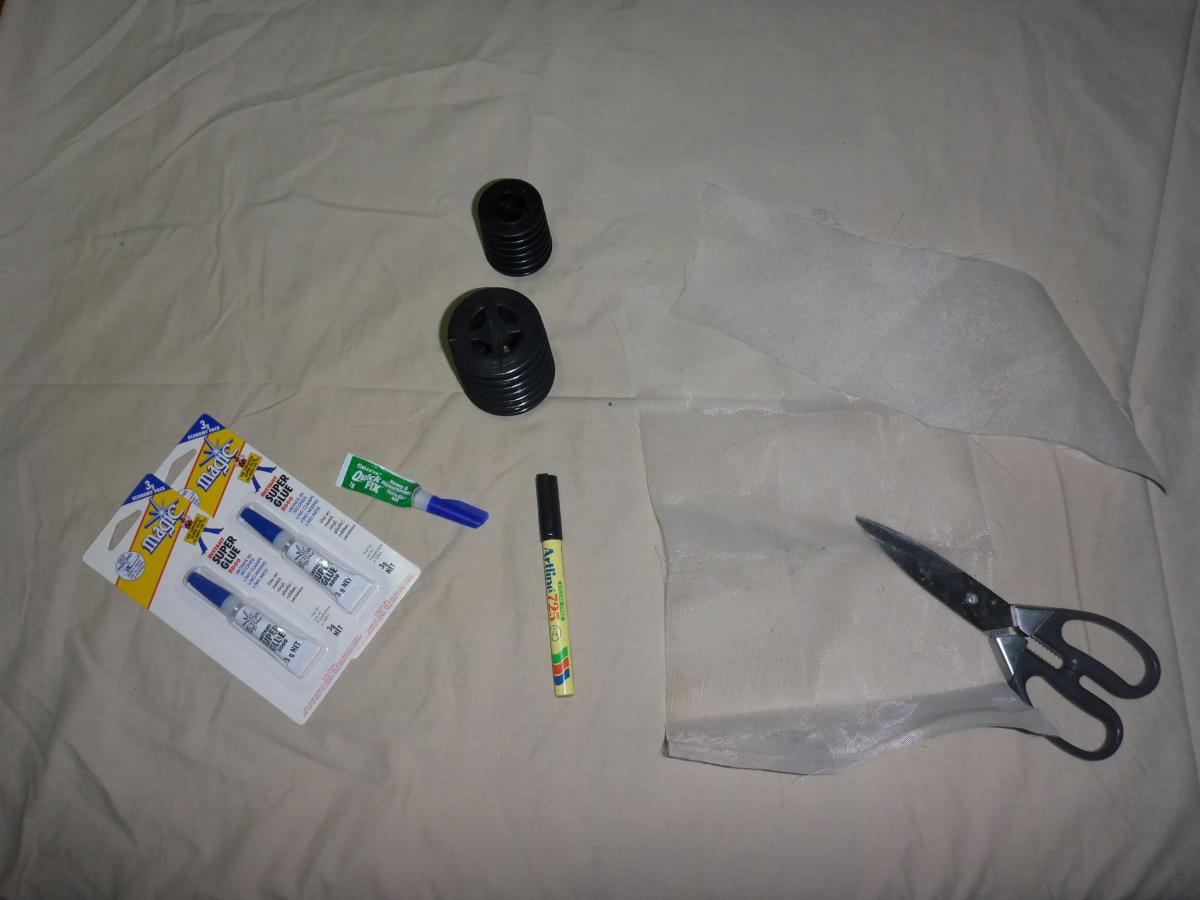
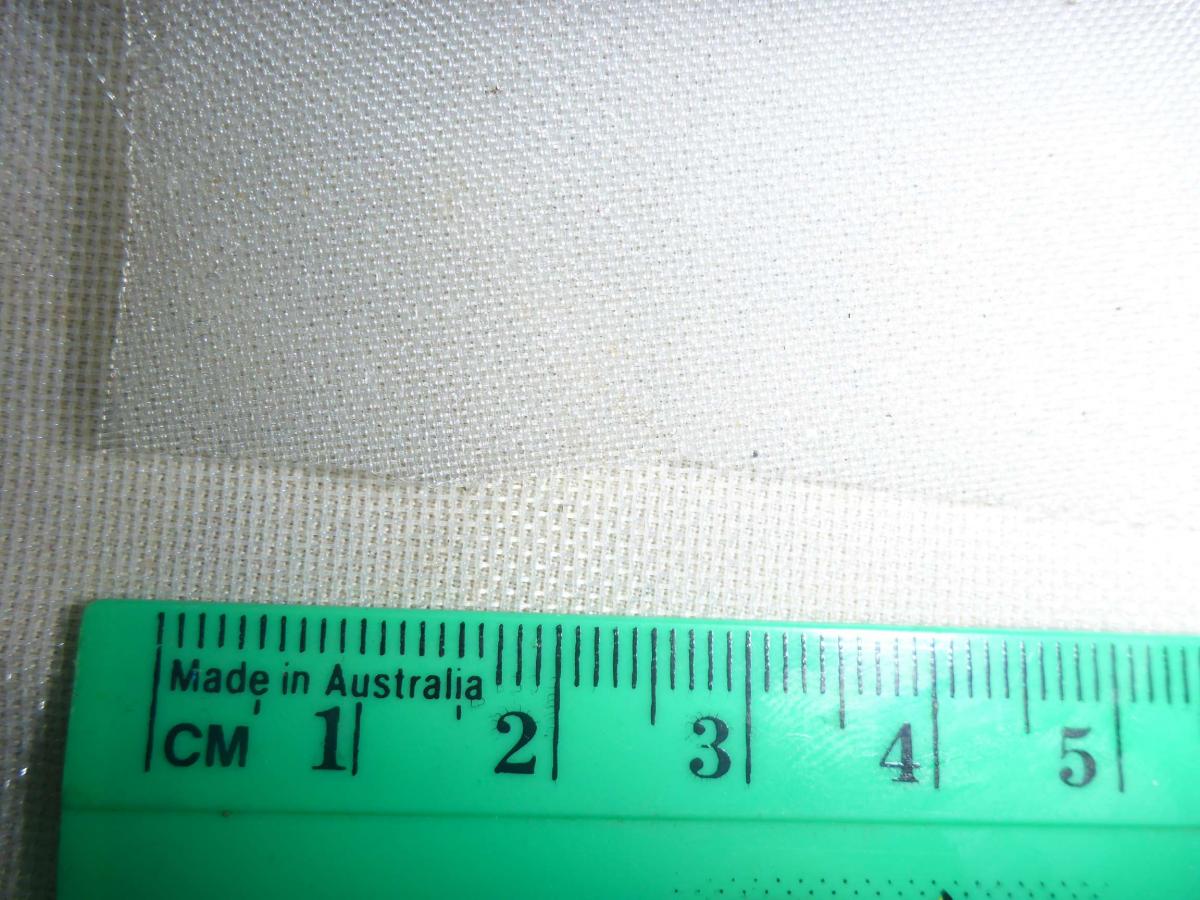
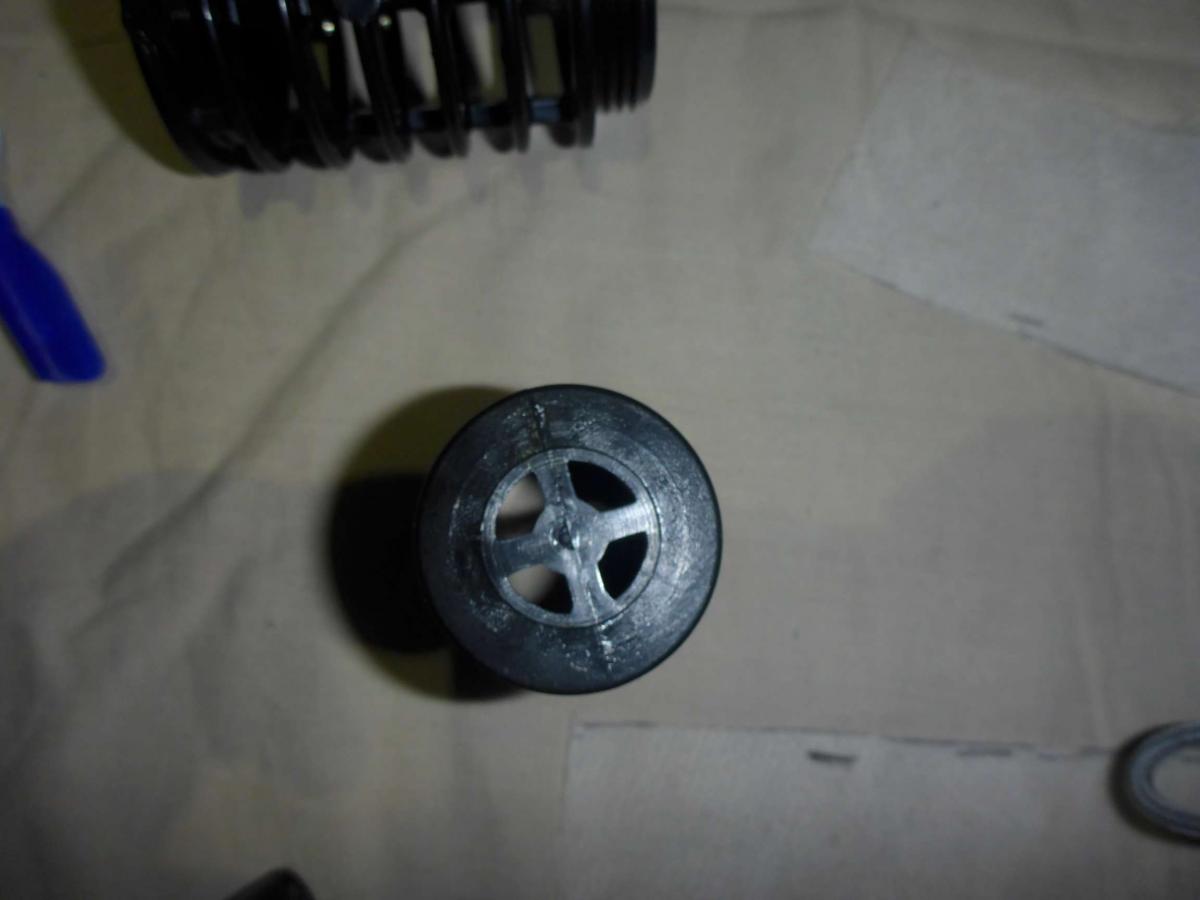
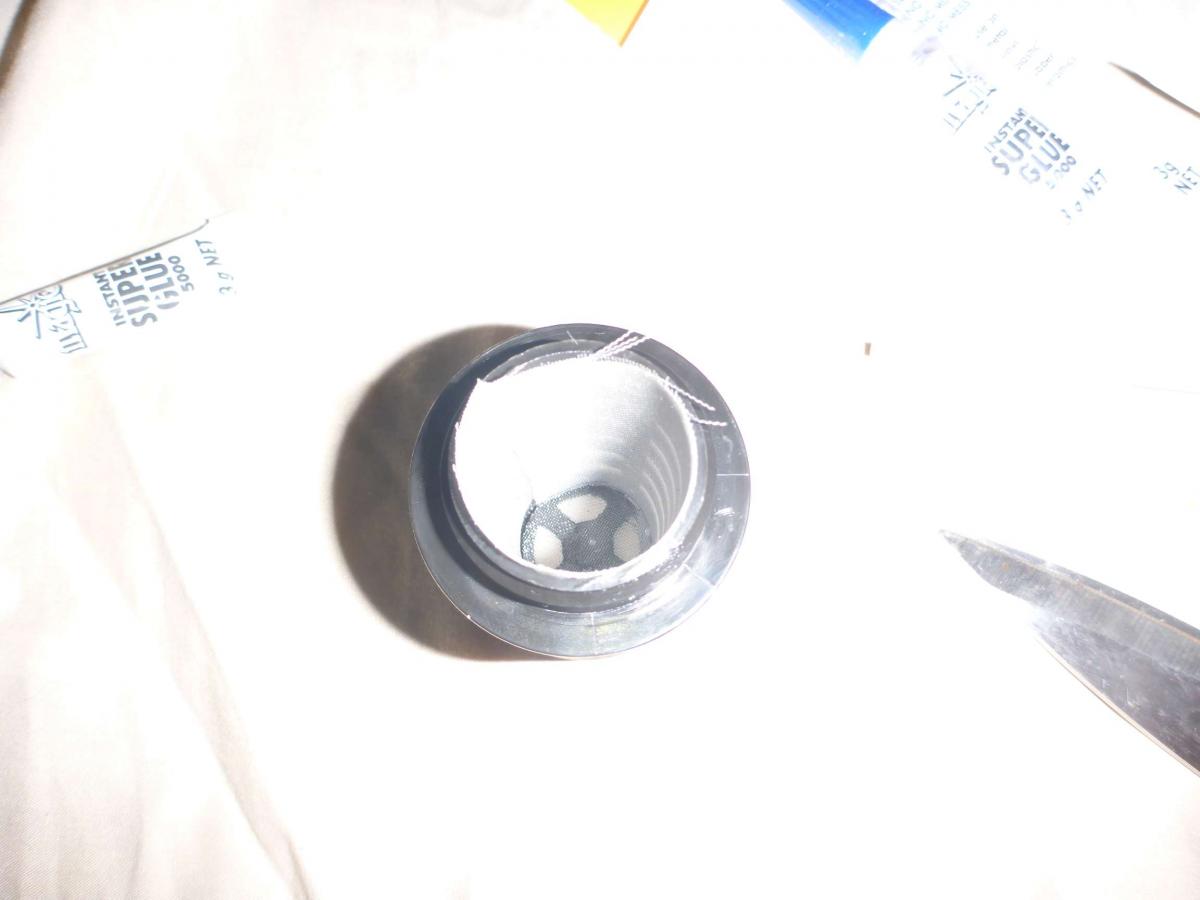
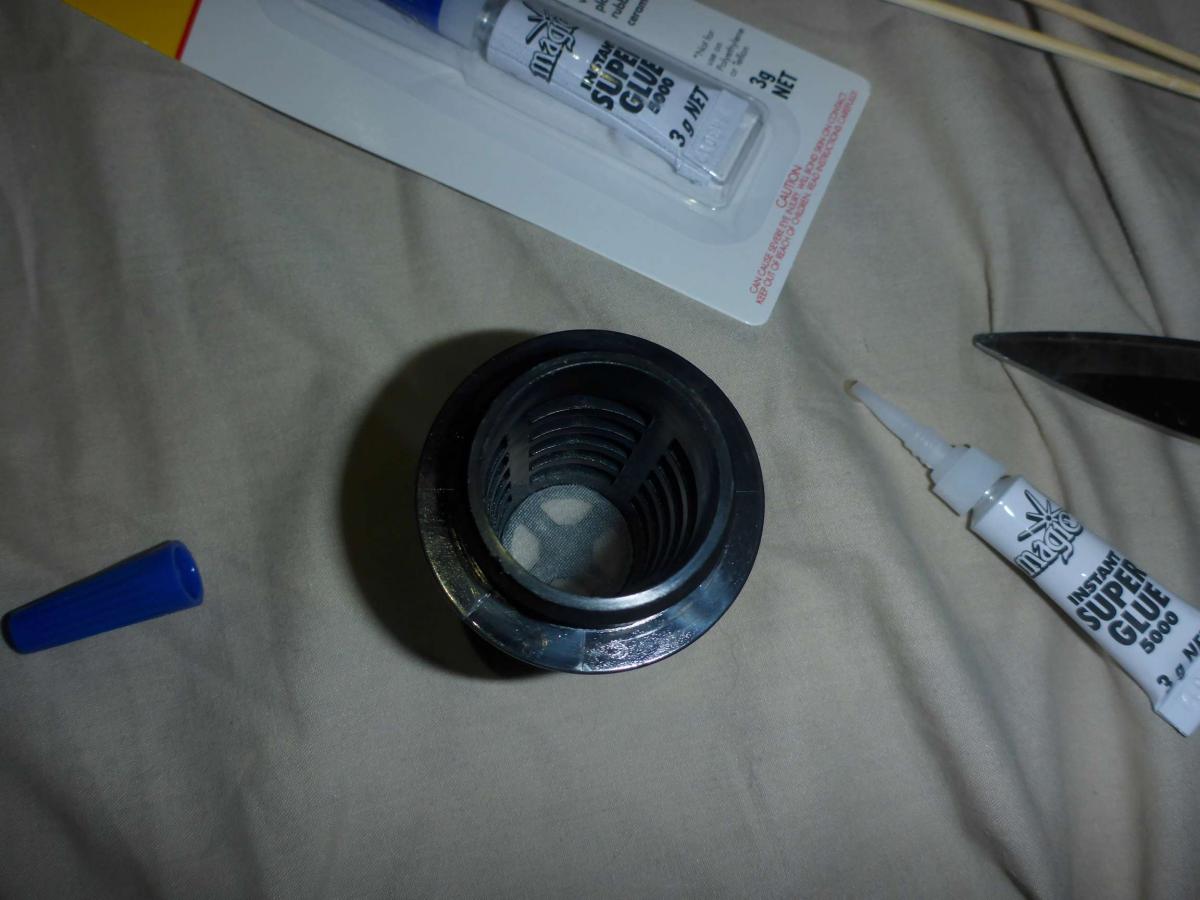
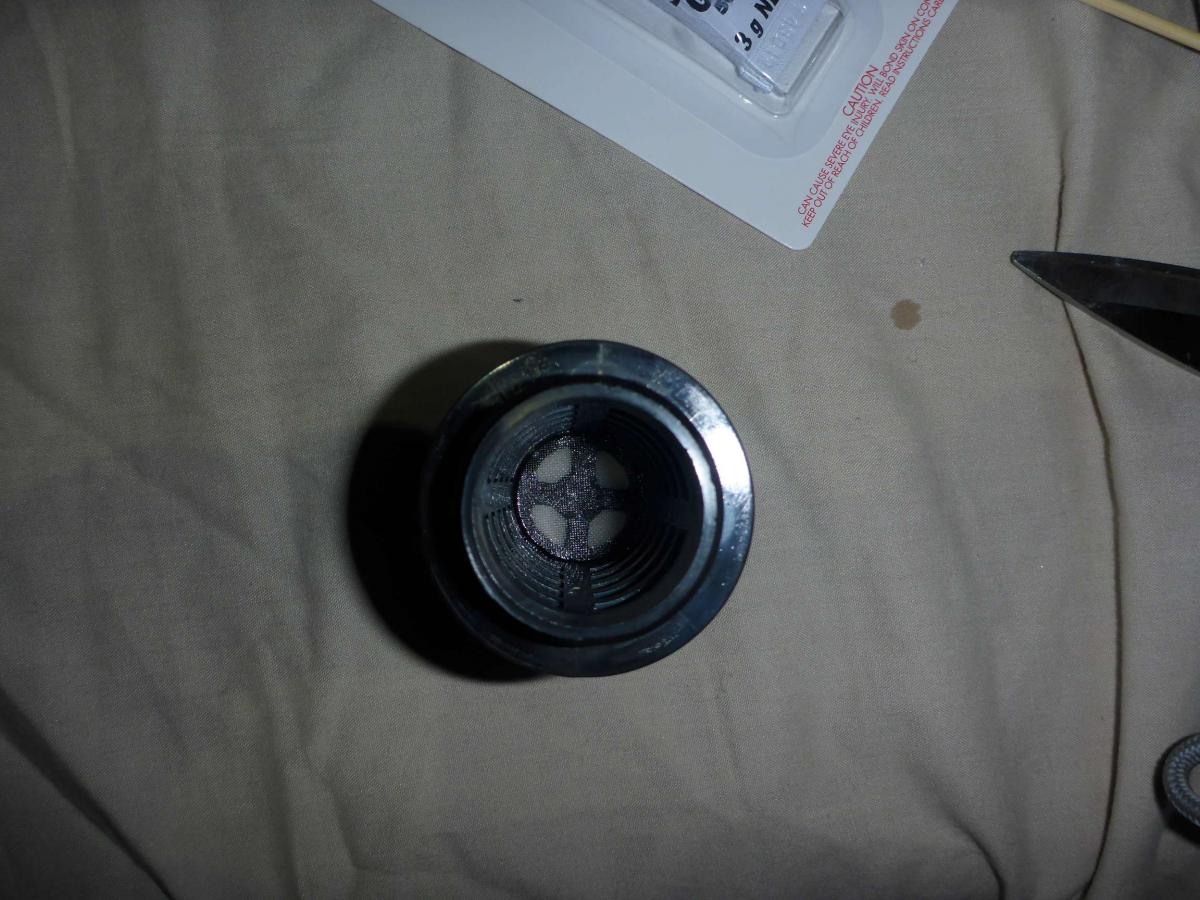
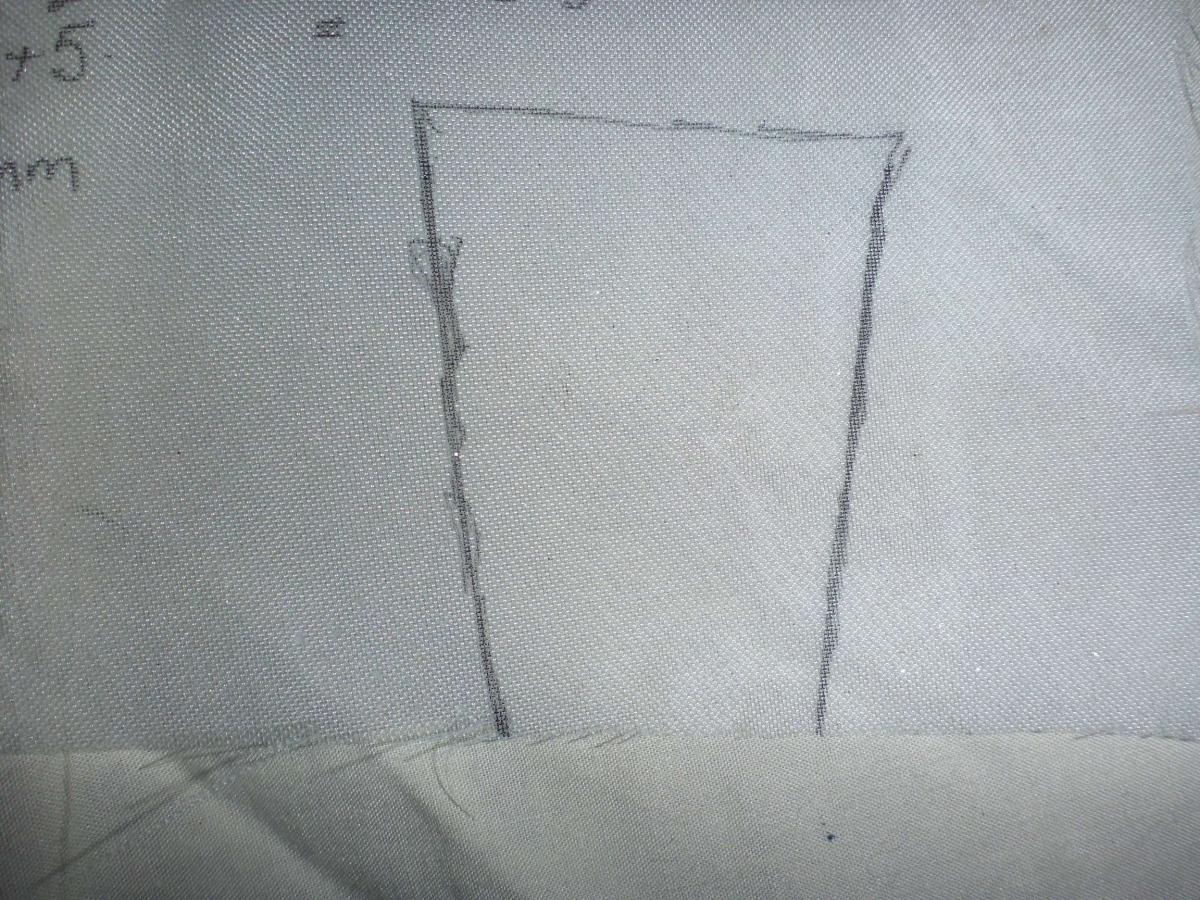
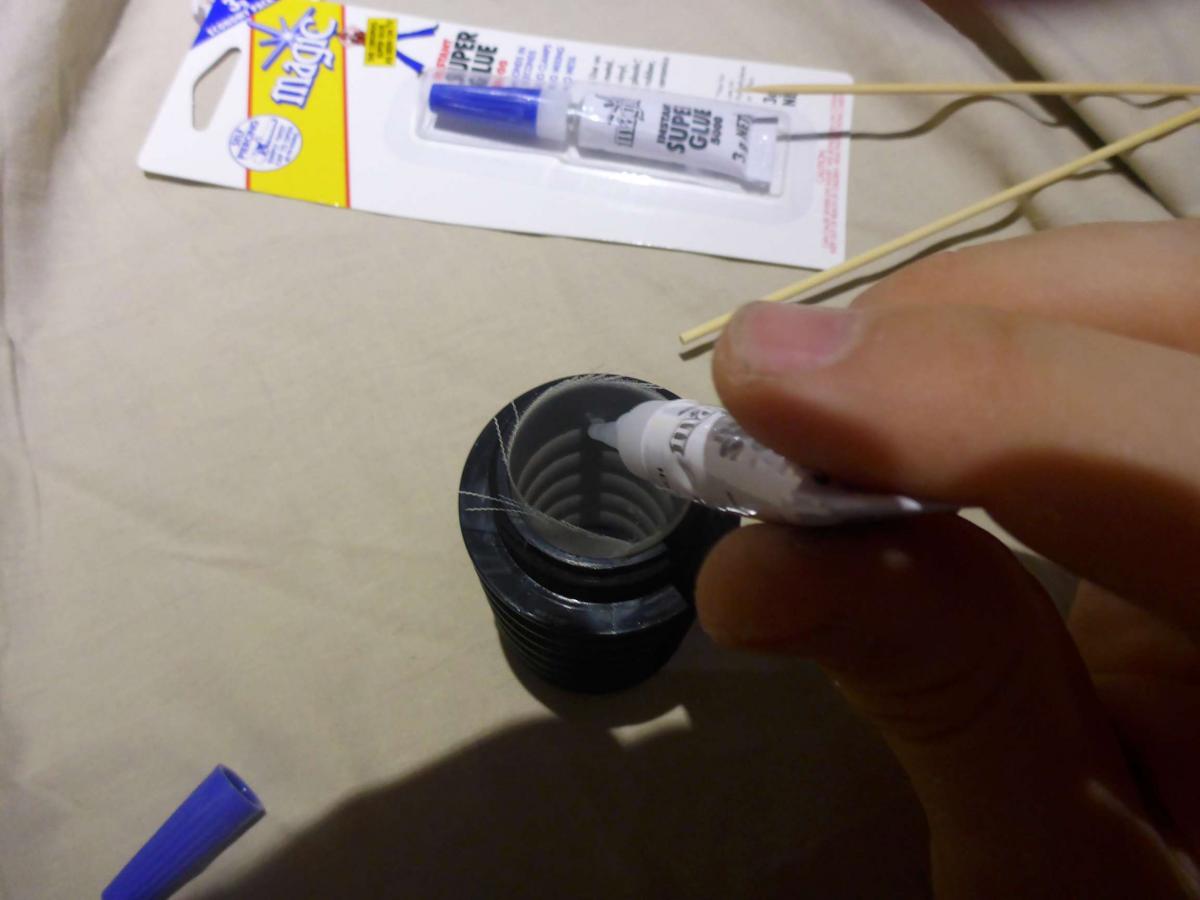
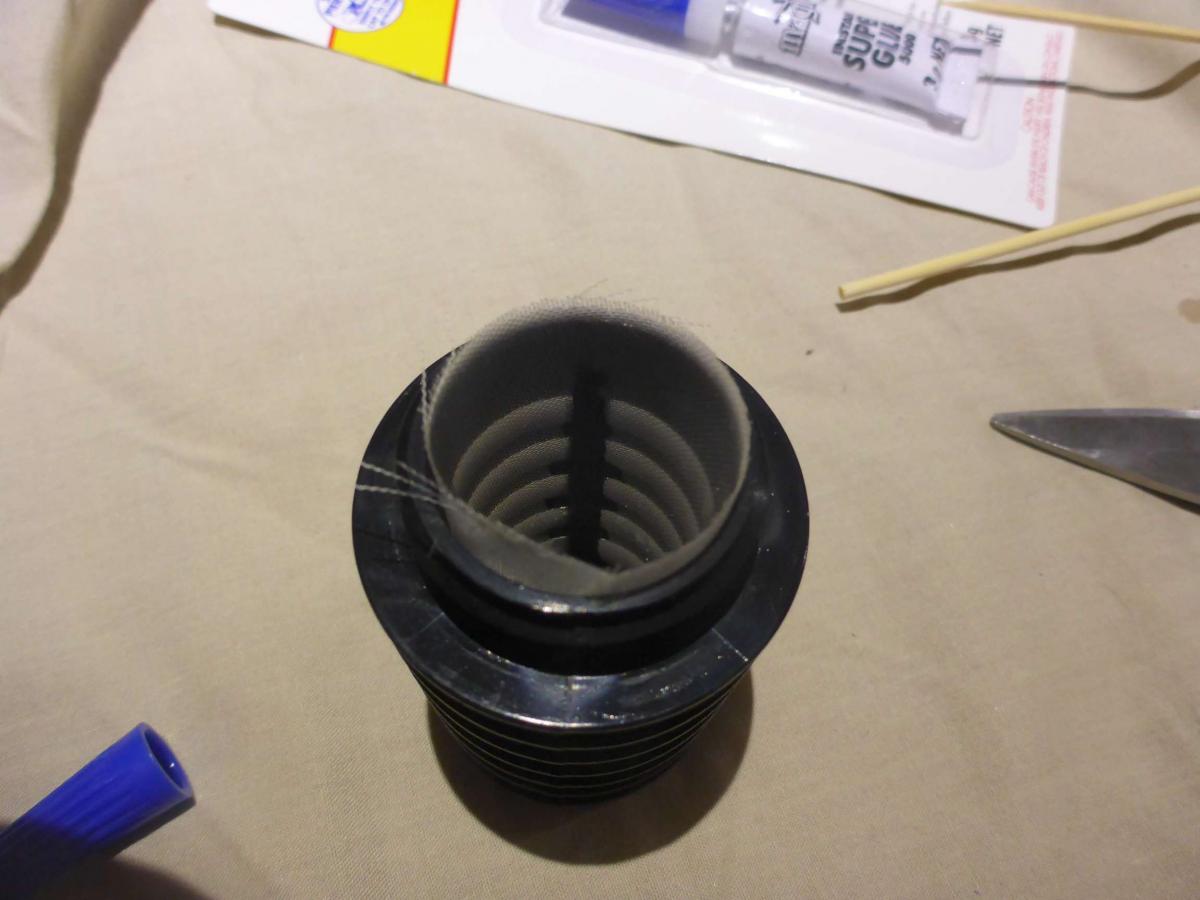
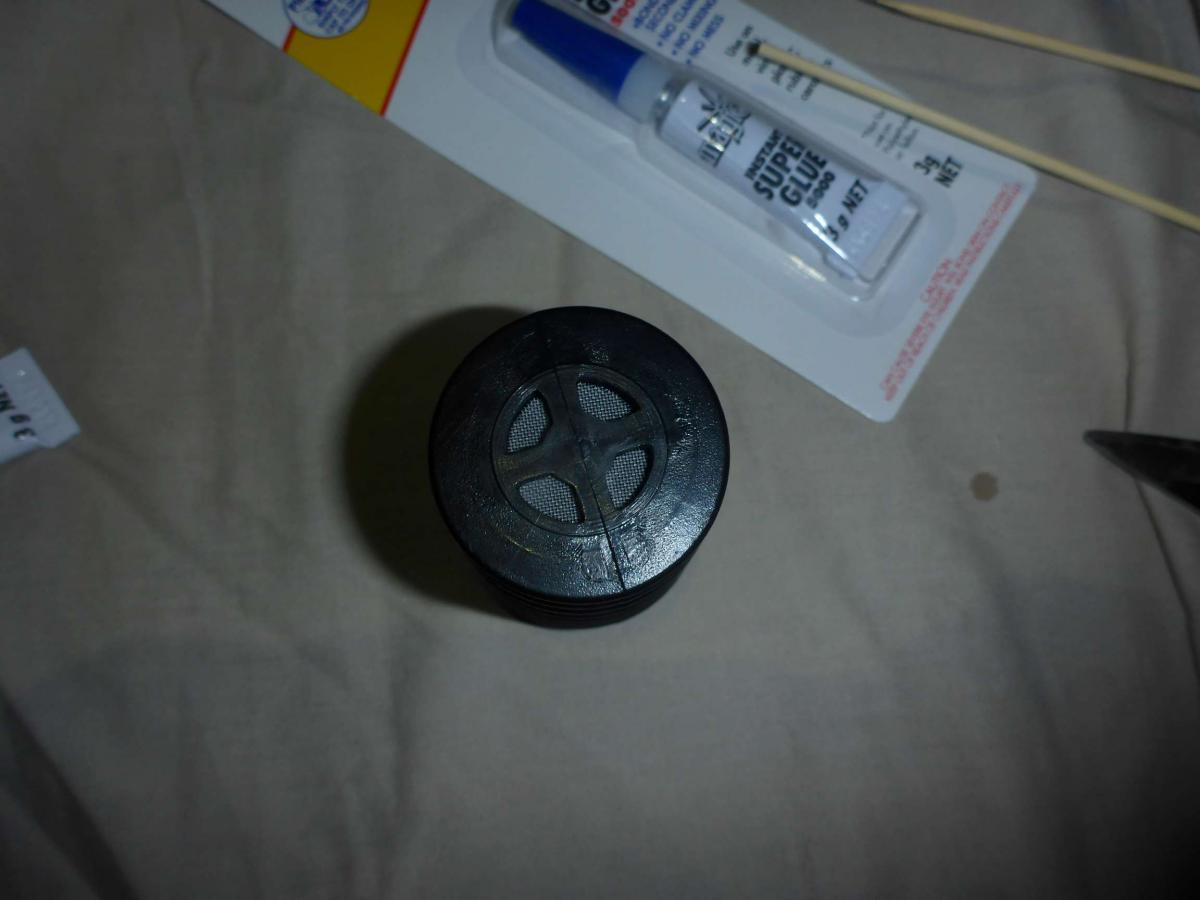
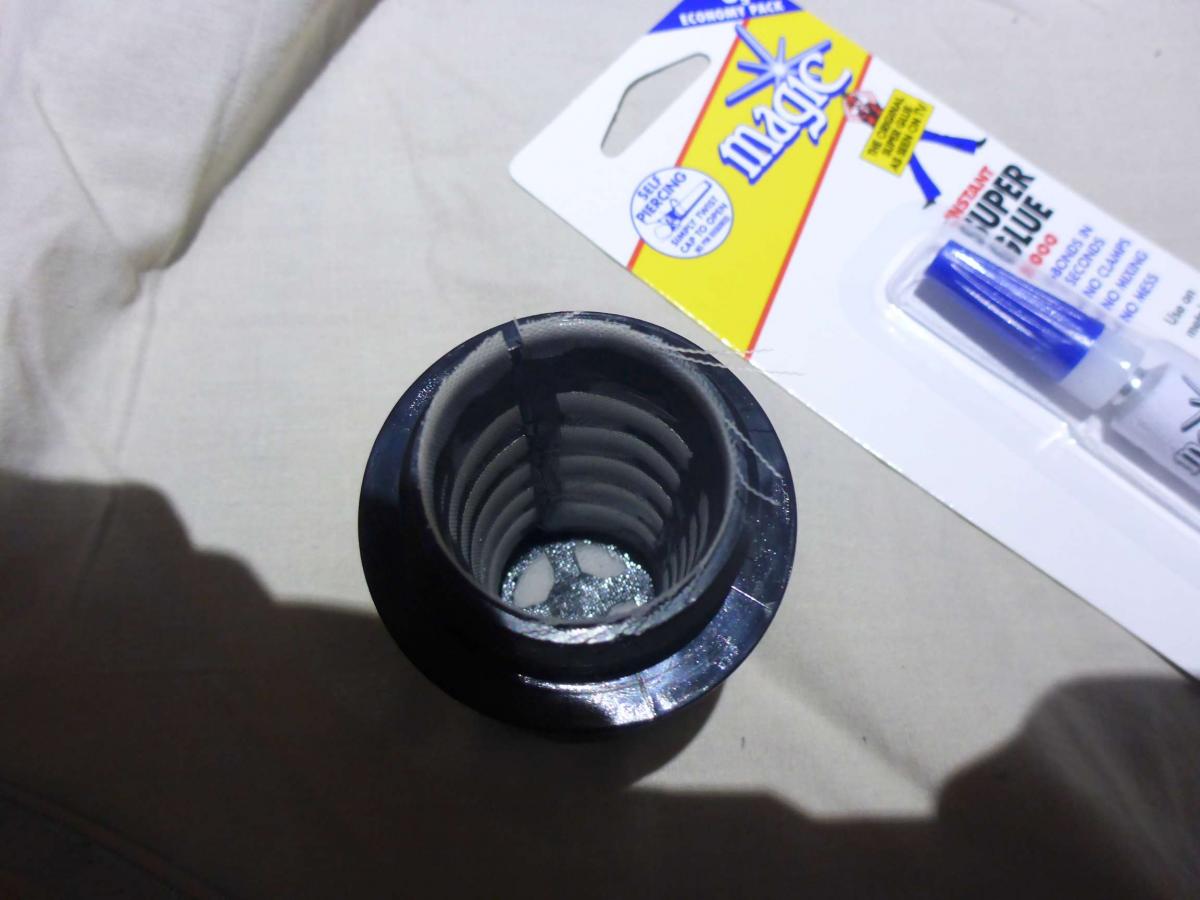
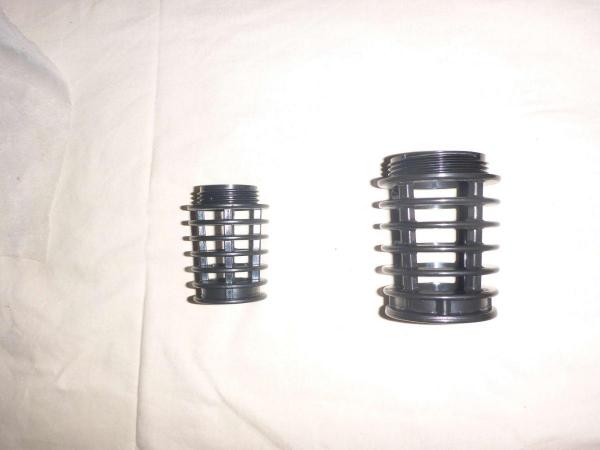
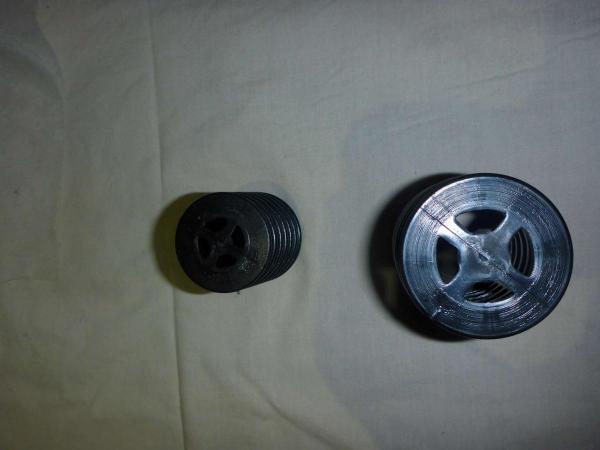
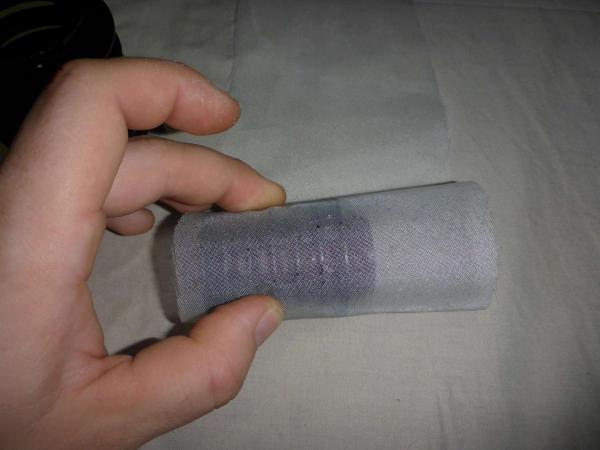
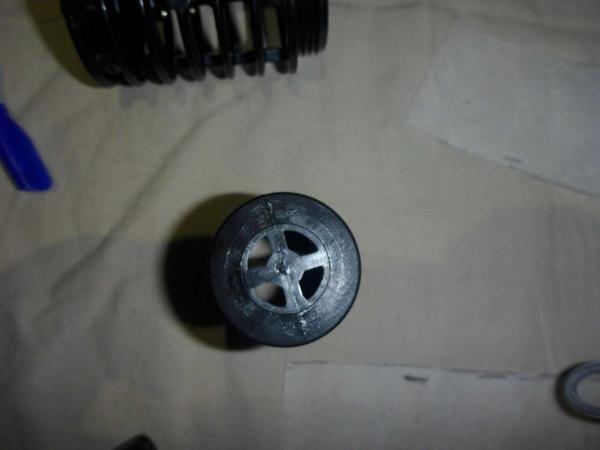
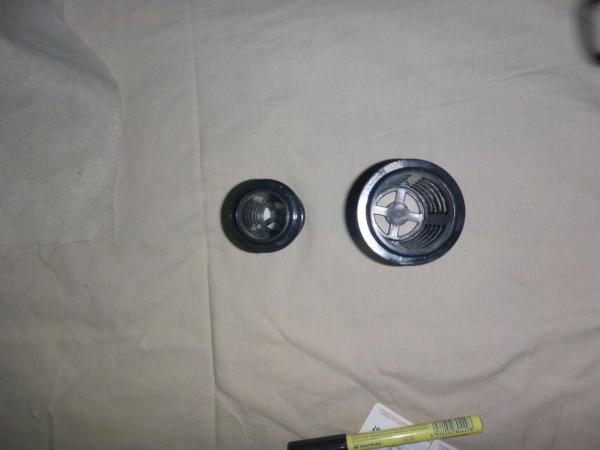
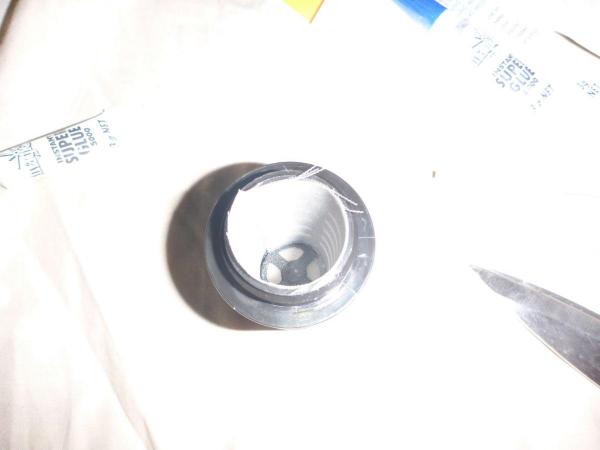
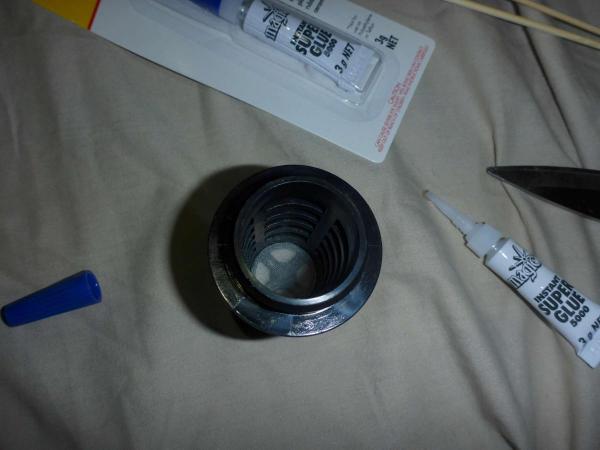
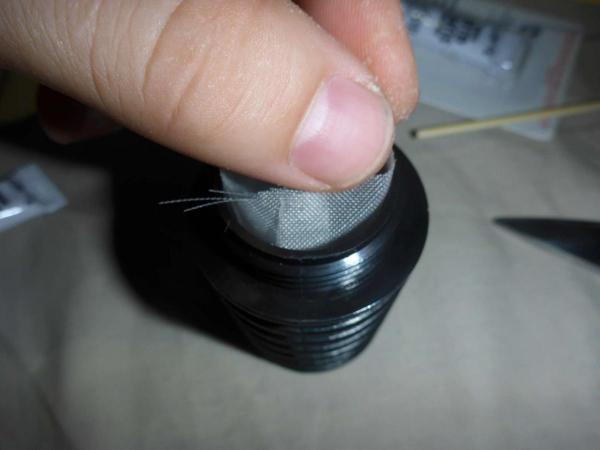
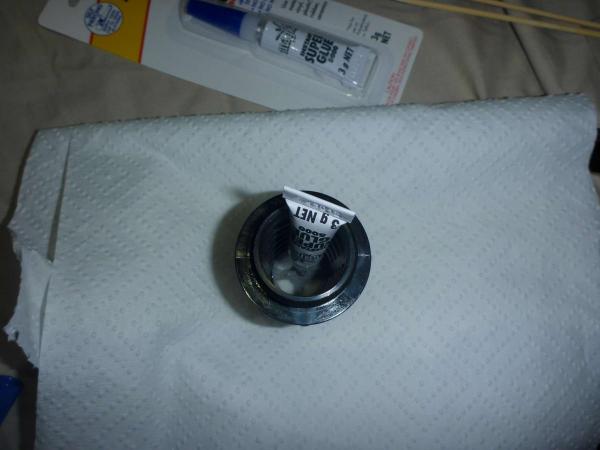
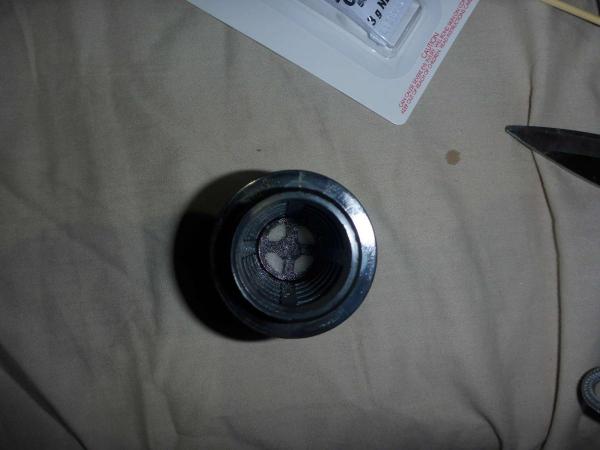
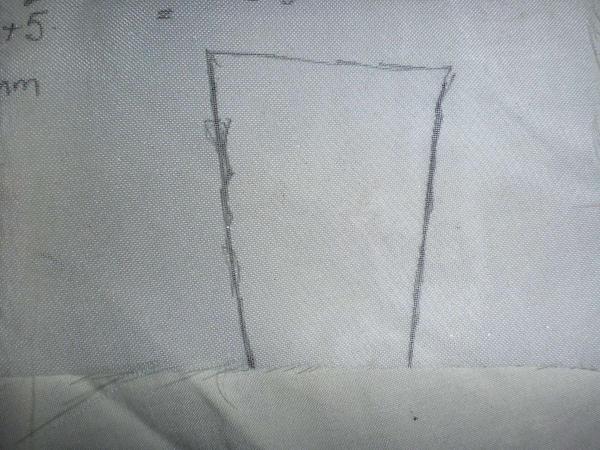
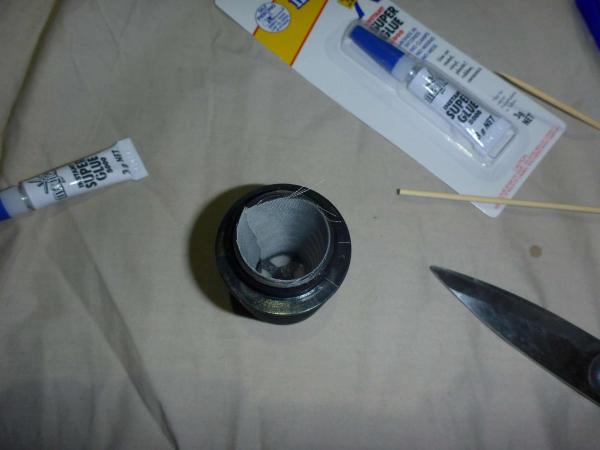
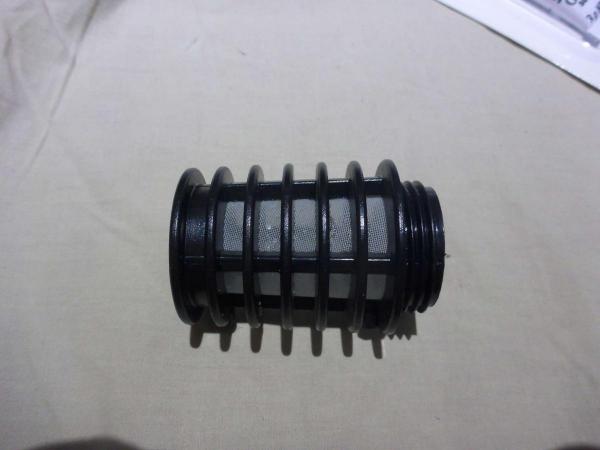
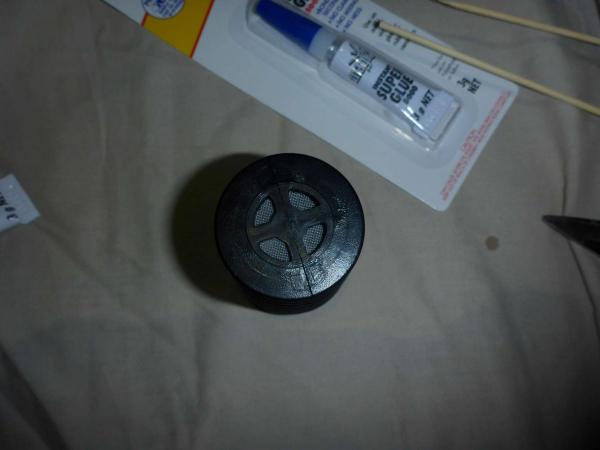
 1 pointSo here is my long awaited guide to making your own overflows. So, what you need: - Superglue - the liquid type is best in this situation, but you could use the gel type. - Marker pen - Scissors - mesh - more on that in a sec - Shroud - more on that in a sec A razor blade may also be handy for making the final incisions to tidy everything up, but forgot to include that in this shot. The mesh: There are several important things to consider when selecting your mesh (or the size of your mesh). How big are the shrimp you are keeping? There is no point in trying to use a 50 micron mesh for CRS as the babies are unlikely to fit through 250 micron. (micron refers to micrometres, or a millimetre divided by 1000. So 250 micron is one quarter of a millimetre). Remember smaller meshes will clog quicker so will need to be watched closely. Flyscreen is usually 1-2mm and nylon, so suitable for use as a screen for adult shrimps. Flyscreen is definitely not recommended if you want to stop shrimplets escaping out your overflows and (likely) into your pumps (often fatal). Above: 500 micron and 250 micron mesh respectively. For this example, I'll be using 250 micron screen. I've found 500 micron to be suitable for CRS and RCS, but 250 micron seems to be better for natives such as chameleons, which seem to have smaller shrimplets. So I have been using 250 micron screens on most of my tanks. I do find however that the screens need to be cleaned at least once a month to prevent buildup of algae, detritus, ect. If you use a nylon screen/mesh, you can use bleach/chlorine as a cleaner, 20ppm is an appropriate amount, but DO NOT LEAVE FOR MORE THAN 24 HRS as bleach seems to breakdown nylon screens if left for longer periods. If you have a buildup of salts or carbonates that can't be removed by chlorine, try a soaking in weak acid solution (after a rinse as acid and bleach react to form deadly fumes). Of course, remember to rinse your screens well before returning it to a tank filled with shrimp! The Shroud: It is just as important to consider the shroud that you use as it is to consider what mesh. The shroud must have enough open space to maximize the surface area available for the mesh. Less openings means less mesh, so the mesh clogs quicker. And clogged mesh can mean overflows, pump burnouts, angry partners, insurance claims, ect. ect. If in doubt, go bigger. The type that I most like (pictured below) are suited to screwing into bulkheads (which I prefer to use in any aquarium system) and have a good amount of open area but also plenty of area to glue the mesh to. I think you can get these at the two big hardware stores, but I get mine from a local irrigation shop for $3-8 depending on size. Here are two sizes, I believe they are 1.25 inch and 2 inches respectively. I'll be using the smaller size. The Process: The most important trick to this DIY is the use of liquid superglue. Mesh (being mesh) has holes, so liquids flow through it, including liquid glues. Here we use this obvious fact to our advantage. There are two ways of attaching the mesh to the shrouds. The first is to simply wrap the shroud in the mesh, add the superglue and trim when dry. The advantage of this method is that it maximizes the amount of surface area for the mesh to let water through = slower clogging. However I don't think it looks anywhere near as nice. So method two adds the mesh to the interior of the shroud. Step one: Cut a circle of mesh to cover the holes in the end of the shroud. On the end of the shroud is some casting marks. The inner circle is a good approximation for the internal diameter. Drop the mesh in. Then add the superglue only to areas where the mesh and shroud meet. If you don't add too much glue at one time, it will tend to flow only where the shroud and mesh meet i.e. where you want it. Step two: Cut the mesh for the side holes. Because the shroud is larger at the outflow end, the shape of the mesh needs to look like this: There are online tools that can help you find out the dimensions of your mesh by knowing the diameter or radius of the circles at the top and bottom of the overflow, which will give circumference (which are the top and bottom lengths of the trapezoid shape above respectively), as well as the height. However always leave extra as its easy to cut more mesh away, but very hard to join little bits on. I avoid the maths by wrapping the shroud in the mesh, trimming to get an oversize rectangle, and then carefully trimming down from there. However, this method does result in a bit more of the mesh ending up as offcuts. Add the mesh to the shroud and ensure it fits without too much of an overlap. Remember a double thickness of mesh (the overlap) will clog quicker. A 5mm overlap is plenty strong enough. So here I had to trim the mesh again as the overlap was much greater at the bottom than at the top. You'll have to look closely to see it. Once it fits in nicely, add the superglue only to the sections where the mesh and shroud touch. Here gravity is your friend as glue added to the top will flow vertically down the spine of the shroud without moving sideways into the mesh further than where the two touch. Step Three: Once all the areas where the shroud and mesh touch are done, leave it to dry (overnight), and then a final trim to remove the excess mesh. Step Four: Enjoy your DIY overflow that will never corrode.


 1 point