Leaderboard
-
FMuscle
Members3Points134Posts -

s1l3nt
Members1Points116Posts
Popular Content
Showing content with the highest reputation on 12/20/15 in Articles
-
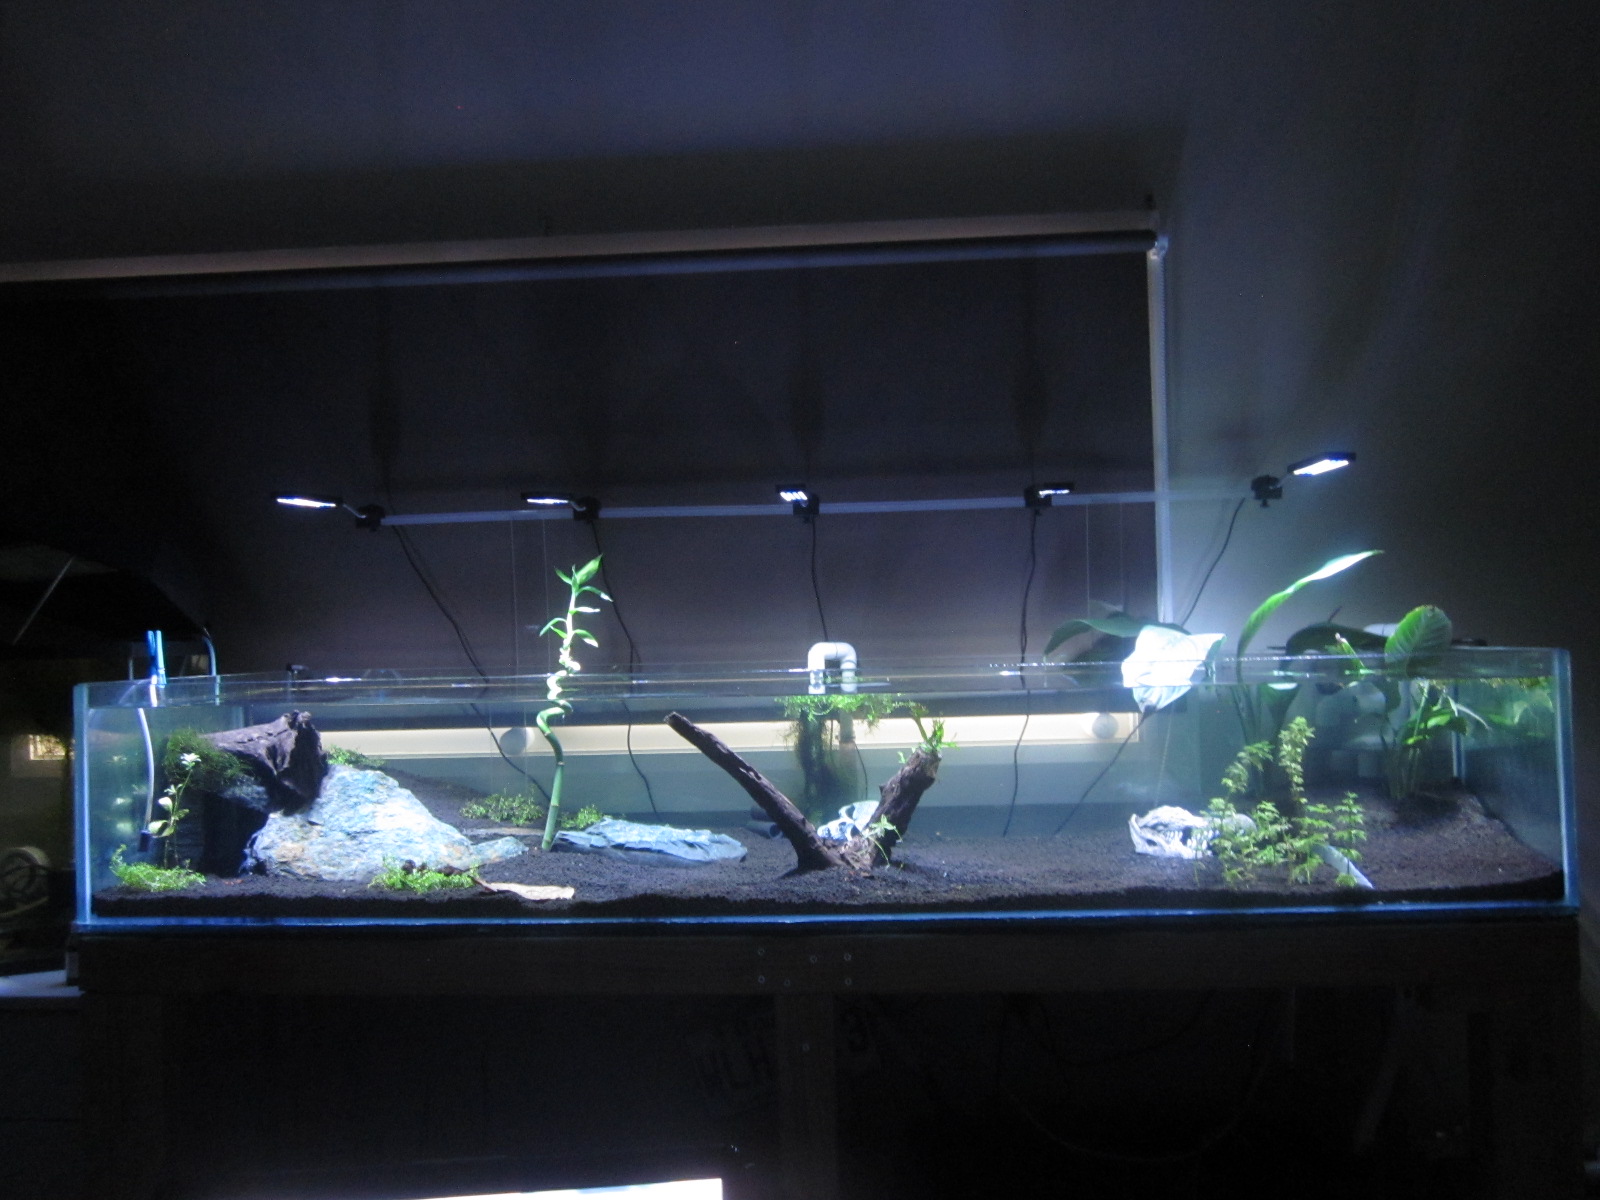
3 pointsSome of you have probably noticed. But for confirmation, I am a big fan of not paying if I don’t need to. This means I’m a big fan of DIY. I made PVC overflow and return pipes tailored to my 3ft, I made a $10 sump for it as well, I built an air powered substrate vacuum. I made my life cheap and easy for this hobby. This article came at the expense of a disaster. I bought a 6x2x2 tank. It cracked. Not to throw the towel, I took it apart, had panels cut in half, new panels made, and here is my tutorial on how to build your own fish/shrimp/planted tank. First, build a stand for the tank. Get your glass panels ready. To figure out what sizes you need, remember that the bottom supports the sides. Your bottom panel has to be the exact width and length as you planned tank. A 100x50x40 tank with 10mm thick glass needs a 100x50cm bottom panel. The front and back are the same width as the bottom, but the glass’ thickness shorter than the projected height. For the example, front and rear panels would be 100x39cm. The sides sit on the bottom, and between the front and rear panels. Subtract the thickness from the height once, and for the width twice, here the sides would be 48x39cm. If you are reusing old aquarium panels, scrape them clean with a razor blade, then wipe off any silicone residue with acetone. Let dry. Tools needed: A good razor blade or sharp utility knife, tape, either electrical, masking or both, a caulking gun, twice the silicone tubes you think you’ll need, optional are suction cup handles to move the glass around, I did this build alone, it helped for the big panels. Get your work area ready, cover the floor, table, bench you’re working on. Have moist rags and/or gloves at your disposal. Make sure your work surface is flat, clean of debris and level. Put your panels within easy reach. You have limited time to work with silicone, it starts to skin, to dry its surface fairly quickly, so you have to be organised. The longer the seam, the faster you need to work. Apply the first bead of silicone on the bottom panel where the rear panel will sit. How thick depends on how experienced you are, and how thick your panels are. In my case, I did a bead of around 10mm, because my glass is 10mm thick. Do not worry about putting too much. Too much is better than not enough. Put the rear panel in place, making sure it sits right on the edge of the bottom panel, flush on both sides. Have someone or something hold the panel up for a moment. Apply a bead of silicone on one side of both the bottom and the rear panel, and while keeping the rear panel slightly tilted back, put one of the side panels in place on the bottom panel. Then bring up the rear panel and push it against the side panel, making sure they’re square and flush with each other. They will now hold each other with the silicone. Put a piece of tape or two across the corner as extra support. Repeat the operation on the other side, this time lay the side panel a few mm off to the front and slide it in place against the rear panel. Make sure they’re square and flush, and tape them. Apply silicone on the front top edge of the bottom panel and the edges of both side panels. Bring your front panel at an angle, sit the bottom first, make it flush to bottom panel, then press it against the sides. Square, flush, tape. Let the tank cure for about 24 hours. Watch your berried shrimp in the meantime. Once the silicone is dry, remove the excess with a sharp blade. Trim the inside carefully, just to remove the excess and not to dig and cut between the panels. There is no real need to use acetone there, it is mainly used because new silicone doesn’t stick well to old silicone. So unless you went crazy on the amount of silicone you put on the first part and it went everywhere, you can leave the little bits around the corners. Tape the edges of the tank leaving the corners exposed. About 5-10mm is good, some prefer to leave a wider gap around the bottom. Apply silicone to the corners, starting around the bottom, then go up in the corners. You don’t need much there, a good bead size would be around 80% of the gap you left with the tape. Smooth out the silicone with your finger to give it a nice concave shape. Remove the tape while the silicone is still wet. Take care of not putting silicone everywhere and not to destroy your awesome corners as you remove it. Let the tank cure once more, for three to seven days this time. Why not watch your fish play in the bubbles? After the curing is done, do a test fill. If possible do it outside. If not, I suggest doing it slowly, adding a few cm at a time and constantly monitoring the seams for any signs of leakage. The test fill is also a good moment to see if you need to brace your tank. As you fill your tank, measure the distance between the front and back on both sides and compare the results with the measure in the center. If your panels are bowing by the same or more than their thickness, I’d recommend a brace. In this case, the bowing is only 1-1.5mm while the tank is ¾ filled. I do not need bracing. If everything is in order, scape, plant, fill, cycle, stock and enjoy your new DIY tank. Side note: if you are building a small tank, the cure period between the assembly and the reseal may be skipped by working fast enough to smooth the silicone as you go. On bigger tanks, like my 6ft, by the time I fit the panel, the silicone is already drying where I started to lay the bead, making it impossible to create a clean seam. My tank's specs: 6X2X1 (1830x610x310mm) 10mm thick glass. Filtration: Sponge + double overflow to sump (to be built). Stand: DIY 70x35 timber, 1830x610x800.3 points
-
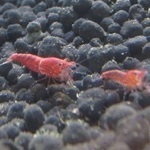
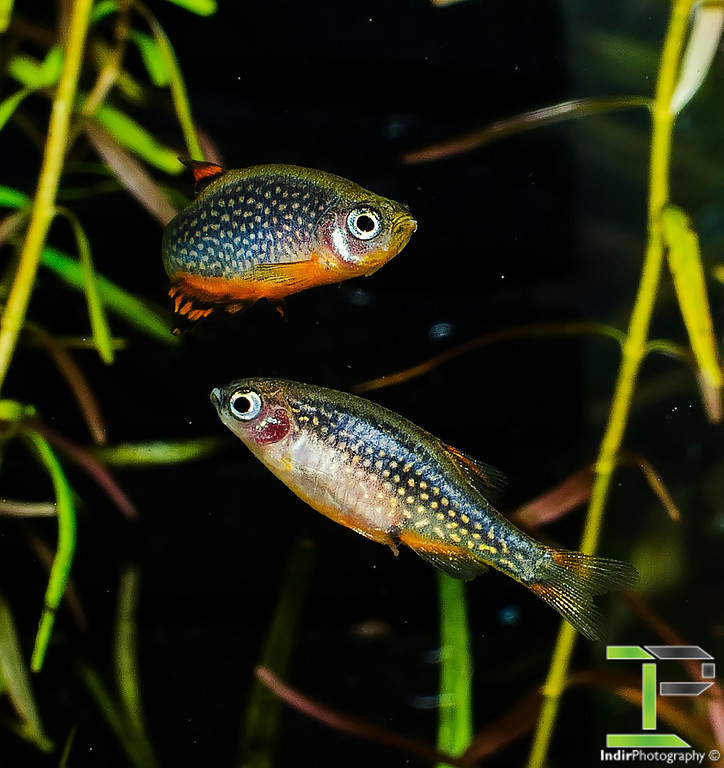 Breeding Celestial Pearl Danios (Also known as Galaxy Rasboras) Firstly I will start by saying that these are a fantastic little fish that show no aggression to any other species nor within their own species. Males will spar with each other sometimes and often display to females, no damage is ever done. They are shrimp friendly, but will take down shrimplets if they get hungry. So they can be added to a mature and established shrimp community tank to ensure maximum shrimp numbers surviving also. These fish prefer a nice planted tank with a dark substrate, this helps reduce skittishness and bring out their colour even better, it also gives refuge for fry that will pop up in the display tank! Feeding Celestial Pearl Danios will need to be fed small foods, due to their small mouth size. Though they are always excited to see live black worms (2-3 of these will make them VERY fat). Mine love grindal worms so they get this often, as well as baby brine shrimp and cyclops regularly. They will readily take dry foods of small size, I have had great success with Sera Vipagran Baby. To keep them in shape for breeding on a regular basis, I feed them twice a day with baby brine shrimp and a higher protein food like grindal worms, black worms, and so on. I find live high protein foods keep them in better shape and increase egg numbers. Sexing CPD Celestial Pearl Danios are fairly easy to sex, especially when they are of mature/breeding age. Females will have a much rounder body shape, when they are younger they will also have a taller body (older/more mature males develop this also, usually 6+ months old). Females also have a prominent black spot in front of the anal fin, the difference becomes more obvious as they mature more. Males are more slender in the body but will have much better colour in the body and fins, they develop a nice blue to purple colour to the body with nice orange fins and often the under belly too (the under belly colour can also be the case in females though, so isn’t a guarantee). In the below photos you will see the younger male has a slender body and orange under belly, as well as better colour than the female. However, as you can see in the older pair, the male has developed the deep body also and the female has a light orange hue to her under belly. The male in the second photo is a prime candidate for breeding as he is quite nicely coloured and has developed good body/fin shape and colour. Young Pair – Male on the bottom right and female on top left: Older/More Mature Pair – Male on top and female on bottom: Breeding Celestial Pearl Danios will start breeding from as young as 3 months old if fed well and have clean water throughout their short childhood. However, I find they are usually all mature by 4 months old. You will need at least one pair for breeding, however I have better experience breeding a trio as this gives females times to recover between breeding sessions as these fish are “constant” (usually daily) spawners. Spawning is induced by males, where they will hover over a specific area they like (moss, spawning mop, etc) and when a female is nearby they will begin to shake their bodies and flare their fins in hopes of attracting the female. They will do their dance and display, but the spawning comes when the male has his head pointed down and shakes, following the female behind closely. These fish will often spawn in a display tank and you will get fry popping up now and then in a well planted and mature tank. However, celestial pearl danios will readily eat their eggs and fry in my experience so this method will result in minimal fry numbers. There is another option which can work well if you have spare tanks, or enough room to rotate breeders. This method is basically using a bare tank with some java moss and keeping a trio in here for a 5 to 7 days, then moving them to another tank while the eggs hatch in the first tank. Then you keep repeating this process until you have enough fry or forever if you have the space… I have not tried this method myself, but have heard of others using this method with success. I personally don’t have the tank space for this method. The final method which has worked the best for me has been a dedicated breeding tank. In this tank all I have is a sponge filter and an acrylic yarn spawning mop (make sure it is 100% acrylic otherwise it will eventually rot in the tank). I keep a trio of my best fish in here, one male and two females. The male I use is the “older” pair from the photos above for his colour and body shape, as well as two nicely coloured and sized females. I call this the “permanent breeding factory”, because I am able to get on average 20 eggs per day with this method. To collect the eggs in the factory, I use a turkey baster purchased on eBay. I stop the sponge filter and after about 5 minutes or so when everything has settled down I slowly lift the spawning mop up and shake the mop, to make this easy I tied a long piece of yarn which comes out of the tank onto the lid for easy lifting without having to drop my arm into the tank. I then use a light on the front half of the tank, placing the light from the side helps in seeing the eggs easier as does a dark base (my tanks have black bottom panels). Using the turkey baster I suck the eggs up and collect them in a plastic cup for later use. With the eggs in the cup I then fill the cup most of the way and use an air stone on a very low bubble rate to keep circulation over the eggs to prevent fungus. Another option is to put the eggs in a fine meshed breeder box or poke some tiny holes into the cup and float it in the tank to keep fresh water circulating over the eggs. Eggs take about 3-4 days to hatch on average, and the fry will now be wrigglers which cannot really swim yet and are not ready to be fed. This wriggler stage will take about 3-5 days before they are free swimming. They will often be holding onto the side of the cup, or laying on the base. This is nothing to worry about. Once fry are free swimming they will be quite small and very thin in body thickness. You will need very small foods to have the best success, such as paramecium, spirulina powder, fry powder foods like sera micron and so on. I find that I get a MUCH better survival and growth rate when the fry are fed live foods so I only use paramecium for feeding them. The fry will need about 10-15 days before they can readily eat baby brine shrimp, I don’t bother with foods larger than paramecium until this stage mainly because micro worms and similar are a pain to keep going and requite too much maintenance. Once the fry are on baby brine shrimp, they will grow much quicker. Around the 5-6 week mark, I start introducing sera vipagran baby or similar small sized foods. I however prefer to give them live foods more than dry foods as I find the fry grow much quicker and are healthier and develop colour earlier. Fry will grow fairly quickly and at the 6 week mark will be around the 15mm mark and should be showing some slight purple/blue to the body and their golden spots should be readily visible. From this point on the fry will slow down their growth as they reach their adult size but colour will come in much quicker. By the 12 week mark the fish should be very close to looking like full grown adults, with the deep orange colour developing quickly after this point. Fish should also be reasonably easy to sex from this point on as the body shape has already developed and the colours are coming through quickly. Now I hope you enjoy the photos of the fry below, which should help you gauge age and so on of your fry! As a comparison, the first two photos are of fish the same age but the first shot is of a fry fed solely dry foods like spirulina powder and similar from hatch while the second photo is a fry fed on live foods from hatching. Young fry (most likely female) at 12 weeks old – Fed solely on dry foods from hatching. Young Female Fry at 12 weeks old – Fed on live foods, with dry food at the later stage in life Most likely a nice young female, but could be a male. Young pair of CPD, approximately 7-8 weeks old. Young female, approximately 7-8 weeks old Thank you for reading along and I hope you find the information useful, or at least enjoyed the article!1 point